Create Crop Marks
Sometimes a production manager or a printer will require you to crop your illustration. Crop marks must be defined by a non- rotated rectangle.
Follow these steps to create crop marks:
-
Draw a rectangle around the area that you wish to define with crop marks.
-
With the designated rectangle selected, assign no fill and no stroke to the rectangle.
-
Select Object Crop Area Make.
Figure 22-6 shows crop marks in the document window.
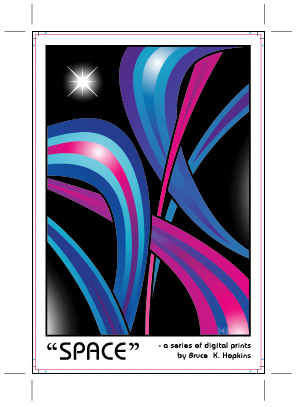
Figure 22-6: These crop marks do print but are trimmed off by your print shop as part of the publication process.
You can convert the crop marks back to a regular rectangle by selecting Object Crop Area Release. Because you use only one set of crop marks in a document, you can replace the assigned crop marks by creating and selecting a new rectangle and assigning crop-mark properties to that shape. The old crop marks will revert to a regular shape. When you print color separations for spot or process printing, the crop marks you set on the artboard define the printed area for separations.
EAN: 2147483647
Pages: 175