17.16 WINDOWS WITH MENUS IN AWTSWING
|
17.16 WINDOWS WITH MENUS IN AWT<SWING
User interfaces frequently require pull-down menus. To explain how these can be programmed, let's try to construct a window that can be used for editing a small text file. To keep this interface simple, we will provide this window with a bare minimum functionality. Basically, we want a menu bar at the top of the window. The menu bar should contain one menu object labeled "File" and this object should consist of the following menu items:
File: New Open Save
Clicking on "New" should result in our being able to enter text into the window, clicking on "Open" should enable us to download a designated file into the window, and clicking on "Save" should enable us to write the contents of the window into a designated file.
In order for the menu items to possess the functionality stated above, we'd need to associate an ActionListener object with each menu item; this object will trap the mouse clicks on that item and take appropriate action. As was the case with JButton objects, when a menu item is clicked on, it delivers an ActionEvent object.
The editing of text in the window can be done with the help of a TextArea object. For example, we can create a new TextArea object by
TextArea ta = new TextArea( 45, 40 ); //(A)
which will create an editable subwindow, 45 lines high and 40 columns wide, inside our window. The TextArea constructed with this constructor call comes with both horizontal and vertical scroll bars.[26] Simple editing in this area can be done by moving the cursor to the desired location by using the cursor control keys of the keyboard and then by adding or deleting characters as needed.
With the overview of what needs to be done as presented above, let's see how one would write up the code. The menu bar itself can be created by the invocation
MenuBar menuBar = new MenuBar();
and added to the window by
setMenuBar( menuBar );
But before we can invoke the setMenuBar() function to set the menu bar in place at the top of the window, we must insert menu objects into the menu bar. The following steps have to be gone through in order to add a menu object to the menu bar:
-
Construct an object of type Menu. Supply the name of the menu object as an argument to the constructor. In our case, that would be
Menu menuObject = new Menu( "File" );
-
Create menu items for the menu object. For our example, for the first menu item "New," we would say
MenuItem menuItem = new MenuItem( "New" );
Associate an ActionListener object with each menu item. This could be done in the same manner as for button objects in our earlier programs. For example, for the menuItem we just created, we could associate an ActionListener object with it via an anonymous class that provides an implementation for the actionPerformed method:
menuItem.addActionListener(new ActionListener() { public void actionPerformed(ActionEvent evt) { String arg = evt.getActionCommand(); if (arg.equals("New")) ta.setEditable(true); } });The action performed here is that we want the TextArea window to become editable. This we accomplished by
ta.setEditable(true);
Recall from line (A) above, ta is the TextArea object in our example. But this is not the approach we will use in the program that is shown below. Instead, we will have the class WindowWithMenu implement the ActionListener interface and then we will write a single actionPerformed method for all three menu items (see line (G) of the program). Now amenu item's ActionListener object can be declared by
menuItem.addActionListener(this);
which says that the WindowWithMenu object itself will be the menu item's ActionListener. These "add" statements are in lines (D), (E), and (F) of the program.
-
Now all that remains to be done is to add the menu item to the menu object by
menuObject.add(menuItem);
Of the three menu items, "New" is simplest to deal with. For the other two menu items, "Open" and "Save," we need to be able specify the files that for the former case would be loaded into the TextArea object and in the latter case would be used for storing the text in the TextArea object. This is best done by using a FileDialog object. For example, for designating a file for loading into the TextArea, we could say
FileDialog loadDialog = new FileDialog(this, "Load File Dialog:", FileDialog.LOAD);
as we do in line (B) of the program. Interaction with this FileDialog object is initiated with the following statement in line (H) of the program:
String filename = loadDialog.getFile();
This statement causes a file dialog to pop up on the terminal screen. The user can either click on one of the files in the list shown or enter the name of the file in the space provided. In the FileDialog constructor call, the first argument is the parent Frame object through which the FileDialog object will be constructed. The second argument, the string "Load File Dialog:," is used as a title for the file dialog window. The third argument is the constant LOAD from for the FileDialog class. This argument becomes SAVE for a file dialog window in which we wish to name a file for writing into. See line (C) of the program.
In the program shown below, the part of the implementation of actionPerformed which deals with the menu item "Open" includes the code needed for setting up an input stream and for reading the characters from this stream. In line (I), we use read to read one character at a time. The entire content of the file is used to construct a single large string, called superString. This string object is then inserted into the TextArea sub-window by
String superString; ... superString += (char) ch; ta.append(superString)
where ch is the character returned by the read function and where, as the reader will recall, ta is the TextArea subwindow in our example. See lines (I) through (K).
For the "Save" menu item, the actionPerformed() method needs to write the contents of the TextArea subwindow into the designated file. As shown in line (L), the entire content of the subwindow can be extracted as a single String object by
String str = ta.getText();
and, as we have done in line (M), this object can then be deposited into the designated file by
FileOutputStream fout = new FileOutputStream(filename); for (int i=0; i<superString.length(); i++) fout.write(superString.charAt(i));
The source code follows:
//WindowWithMenu.java import javax.swing.*; import java.awt.*; import java.awt.event.*; import java.io.*; class WindowWithMenu extends JFrame implements ActionListener { TextArea ta = new TextArea(45, 40); //(A) String filename; FileDialog loadDialog = new FileDialog( this, //(B) "Load File Dialog:", FileDialog.LOAD); FileDialog saveDialog = new FileDialog( this, //(C) "Save File Dialog:", FileDialog.SAVE); public WindowWithMenu() { super("Window with Menu"); addWindowListener(new WindowAdapter() { public void windowClosing(WindowEvent e){ System.exit(0); } }); MenuBar menuBar = new MenuBar(); ta.setEditable(false); getContentPane().add(ta, "North"); Menu menu = new Menu("File"); MenuItem menuItem = new MenuItem("New"); menuItem.addActionListener(this); //(D) menu.add(menuItem); menuItem = new MenuItem("Open"); menuItem.addActionListener(this); //(E) menu.add(menuItem); menuItem = new MenuItem("Save"); menuItem.addActionListener(this); //(F) menu.add(menuItem); menuBar.add (menu); setMenuBar(menuBar); } public void actionPerformed(ActionEvent evt) { //(G) String arg = evt.getActionCommand(); if (arg.equals("New")) ta.setEditable(true); if (arg.equals("Open")) { loadDialog.setDirectory("".); loadDialog.show(); filename = loadDialog.getFile(); //(H) String superString = " "; if (filename != null) { try { FileInputStream fin = new FileInputStream(filename); while (true) { int ch = fin.read(); //(I) if (ch == −1) break; superString += (char) ch; //(J) } fin.close(); } catch(IOException e) { System.out.println("IO error"); } } ta.append(superString); //(K) ta.setEditable(true); } if (arg.equals("Save")) { saveDialog.setDirectory("".); saveDialog.show(); filename = saveDialog.getFile(); String superString = ta.getText(); //(L) if (filename != null) { try { FileOutputStream fout = new FileOutputStream(filename); for (int i=0; i<superString.length(); i++) fout.write(superString.charAt(i)); //(M) fout.close(); } catch(IOException e) { System.out.println("IO error"); } } } } public static void main(String[] args){ Toolkit tk = Toolkit.getDefaultToolkit(); Dimension d = tk.getScreenSize(); int screenHeight = d.height; int screenWidth = d.width; Frame wb = new WindowWithMenu(); wb.setSize(2*screenWidth/3, 3*screenHeight/4); wb.setLocation(screenWidth / 5, screenHeight / 5); wb.show(); } }
Figure 17.31 shows the GUI produced by this program. The screen shot for the figure was taken with the "File" pull-down menu visible.
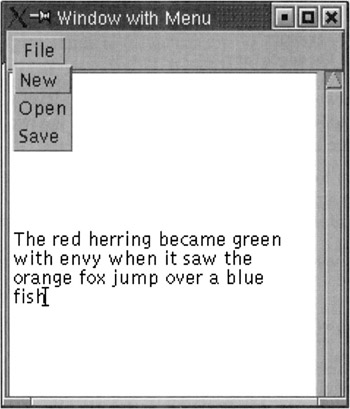
Figure 17.31
[26]Scrolling is handled internally by a TextArea object. No scroll events are generated.
|
EAN: 2147483647
Pages: 273