Adding Dissolves
| [ LiB ] |
Adding Dissolves
The first effect covered here is the dissolve. Truth is, the dissolve isn't as much an effect as it is a basic transition such as a cut or a fade to black. But, because Avid Xpress considers it an effect, I decided to include it in this chapter.
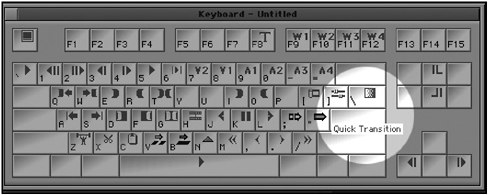
Because dissolves are used so much in the editing process, Avid Xpress Pro has designated a key on the default keyboard, and several other places, called the Quick Transition button (see Figure 8.3).
Figure 8.3. The Quick Transition button looks like a small box with a gradient inside.
To add a dissolve to the Timeline, take these steps:
-
Place your Position Indicator near the transition/cut point that you want to change to a dissolve.
-
Turn on the track(s) you want to add a transition to.
-
Either press the Quick Dissolve key on the keyboard or select the Quick Transition button from the Tool Fast Menu or the Timeline's toolbar (see Figure 8.4).
Figure 8.4. To add a quick dissolve, select this icon from the Tool Fast Menu.

-
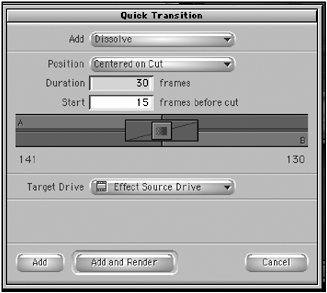
The Quick Transition dialog box will appear (see Figure 8.5).
Figure 8.5. The Quick Transition dialog box.
-
You have several options here. If you do not want the transition to be a dissolve, which is the default, click on the top pull-down menu and select the type of transition you want. Your options include Film Dissolves, Fades, and Dip to Color .
-
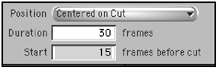
For now, leave the Position set at Centered on Cut. You'll read about the transition position options in the next section.
-
Set the duration of the effect. This can be set to any frame rate, considering you have enough media.
-
Because dissolves can play back in real-time, click the Add button. A dissolve is now added into the Timeline (see Figure 8.6).
Figure 8.6. A new icon appears in the Timeline when a dissolve is created.
Dissolve Positions
When the Quick Transition window appears, you have a choice of how the transition will be positioned in the Timeline. The options are Centered, Starting, or Ending on cut. After this is determined, you can also customize how many frames are used on each side of the transition. Let's explore the difference between the positions.
Centered on Cut
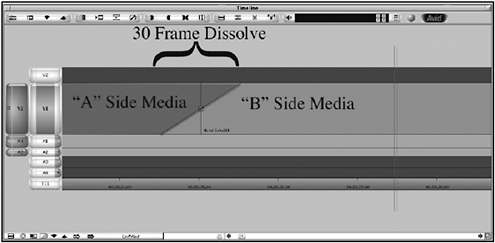
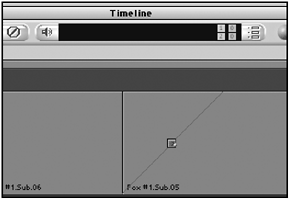
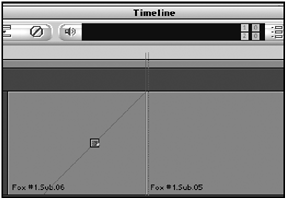
Centered on Cut is the default setting if the clips in the Timeline have enough handles to perform a center dissolve. When you add a dissolve to the Timeline, Avid Xpress uses additional material to create the effect. Because a cut is simultaneous, no additional media is needed. But a dissolve occurs over a period of time, for example, 30 frames. Because additional frames are need, Avid Xpress Pro gets these frames from the clips on either side of the transition (see Figure 8.7).
Figure 8.7. A dissolve centered on a transition uses additional frames from both clips.
Starting at Cut
There will be occasions where one of the clips, or both, don't have enough media to perform a dissolve that is centered. For example, suppose you edited in a clip only frames away from a bad camera move. If you added a dissolve that is centered, you would see a portion of the bad camera move. To prevent this from happening Avid Xpress Pro allows you to move the position of the transition. If you select "Starting at Cut," the transition uses the additional frames from the outgoing clip to perform the transition (see Figure 8.8).
Figure 8.8. A transition that starts at the cut.
Ending on Cut
A transition that is added "Ending at Cut" uses additional frames from the incoming clip to make the transition work. In this example, the transition is at the end of the cut and uses 30 frames from the incoming or B media (see Figure 8.9).
Figure 8.9. Ending on the Cut Dissolve.
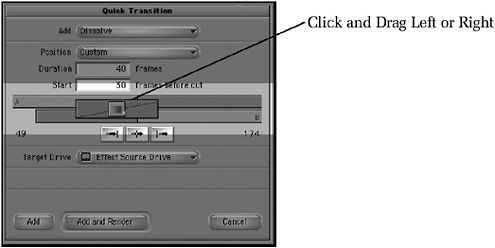
Custom
The other option you have is Custom. After you select a duration for your transition, you can set a customized time for the transition to start. In the Quick Transition window, type a value in the Start Frames Before Cut box (see Figure 8.10).
Figure 8.10. Changing the amount of frames before the cut.
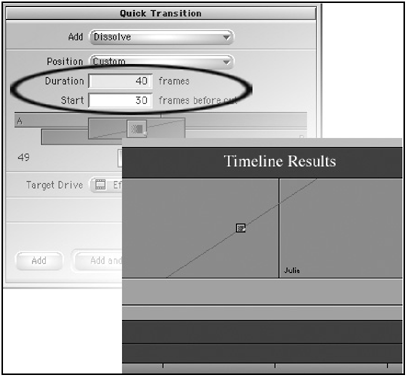
For example let's say you wanted to add a 40-frame dissolve and realize that there would be additional frames added that you don't want to see. If you select custom, you can type in any value, up to 40 frames, to start before the cut. If you typed 30 frames, 30 frames will be used before the cut and 10 frames after (see Figure 8.11).
Figure 8.11. A 40-frame customized transition.
You can also click on the dissolve icon in the Quick Transition window and move it left or right to make a custom transition (see Figure 8.12). You can also shorten or lengthen a transition with this icon. The buttons underneath this icon also allow you to reposition a transition.
Figure 8.12. You can change the position and the duration of a transition with this button.
Insufficient Source Material
Occasionally you'll want to add a transition between two clips that do not have enough extra material. Avid Xpress Pro automatically accounts for this and will change from the default setting of 30 frames, centered to a value and position that allows you to add the transition.
For example, suppose you place an OUT point on a clip just five frames from the end. A dissolve that is 30 frames long and centered needs to have at least 15 frames to play. If you try to add a dissolve, the Quick Transition box will not default to 30 frames centered. In this example, it changes to the duration to 20 frames and makes the transition start 15 frames before the cut and five frames after. If you change the position to centered, the duration of the transition changes to 10 frames.
If you do not have any additional frames on either side of the transition, you cannot add a dissolve, so the Add button is grayed out in the Quick Transition window.
Fades and Dips to Color
The other options, Fade From Color, Fade to Color, and Dip to Color all fade or dip to black. Although black is the default color, changing it is easy. You change the color using the Effect Editor, which is covered later in this chapter.
NOTE
![]() NOTE
NOTE
If you add a transition with the Quick Transition key, it remembers the last effect you chose. So if you placed a Dip to Color effect into the Timeline, the next time you click on the Quick Transition button, Dip to Color will be the default.
| [ LiB ] |