Selecting Tracks
| [ LiB ] |
Selecting Tracks
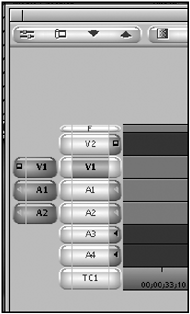
The track selection area is where you determine which tracks are edited. Avid Xpress Pro allows you to edit up to 24 tracks of video and 24 tracks of audio. By no means should you consider this a hindrance to your creativity, thanks to Avid's capability to mixdown tracks and its nesting features, covered in Chapter 11, "Nesting Effects". Let's examine the track selection area (see Figure 5.4).
Figure 5.4. The track selection area.

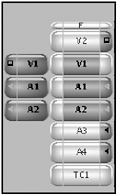
The source side of the track selection area is dictated solely by which tracks were selected in the Capture tool when the material was captured. If you open an audio clip, only audio tracks will appear on the source side. Avid Xpress Pro does not display a video track when one is not present, nor will it display an audio track if you recorded a video-only clip (see Figure 5.5).
Figure 5.5. A source clip that only has audio media files.

When a track is turned on, an edit can be performed. The following example is editing the source clips' video and the audio on to the Timeline (see Figure 5.6). If you deselect a track, only the tracks highlighted will be edited into the Timeline.
Figure 5.6. Video and audio are selected in the track selection.

Besides clicking on tracks, there are several ways to turn off and on tracks. The first method is to use the default keyboard settings. The 7 key through the = key act as track toggle keys. Pressing any one of these keys will turn a track on or off (see Figure 5.7). You can add additional tracks to your keyboard, which will be covered in detail in Chapter 14, "Media Management".
Figure 5.7. The default track keys on the keyboard.
![]()
A second method is to drag a lasso around particular tracks. This method will toggle the tracks on or off. In other words, if a track is on, the lasso will turn it off. This is a quick method of simply reversing your track selections.
A third method is to use the Cycle Picture/Sound button. This button, which you'll need to map, cycles through the tracks in your Timeline (see Figure 5.8). I'll explain mapping keys in Chapter 12, "Advanced Settings". The first time you press this button, the system turns on all the video tracks. Press it again to turn on all the video tracks and the audio tracks; if you press it one more time you'll only turn on the audio tracks. This cycle will continue every time you press this key. This is a great key to use when turning groups of tracks on and off quickly.
Figure 5.8. The Cycle/Picture Sound button.
![]()
Another method is to use the Command+A key (Macintosh OS) or the Control+A key (Windows) to select all tracks. Add the Shift key to these keys to deselect all the tracks in the Timeline.
NOTE
 TIP
TIP
I deselect all the clips (via Shift+Control+A or Shift+Command+A) to ensure that I'm performing the correct edit. There will be times when you're working on a sequence that has numerous audio and video tracks. Instead of scrolling up and down to view which tracks are turned on or off, I simply deselect all the tracks and then turn on only the ones I want to edit.
| [ LiB ] |