General Editing Tips
| [ LiB ] |
General Editing Tips
Some of the best tips and techniques involve simple editing commands. Some of these tips you'll use on a regular basis, others are great to know when you need them.
Tip 1: Maintain the Original IN Point with the Match Frame Function
The Match Frame function is one of those keys I strongly suggest you map to your keyboard (see Figure 16.1). I use it on a regular basis when a client wants to see an original shot or hear a piece of audio already edited in the Timeline. I even know some editors who use it to extend edits rather than use the Trim mode.
Figure 16.1. The Match Frame button is a good one to map to your keyboard.
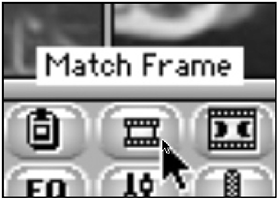
A problem can occur when using this function. When you choose Match Frame, the clip loads into the source monitor and Avid Xpress Pro automatically marks a new IN point and deletes the OUT point. This isn't always a great option. What if you wanted to maintain the original IN and OUT points? Don't worry, Avid Xpress Pro provides a technique to avoid moving the IN point. On the Macintosh, hold down the Option key when you click the Match Frame button. In Windows, use the Alt key. This technique loads the original clip into the source monitor, but will not move the IN or OUT point.
NOTE
 TIP
TIP
I use this option so much that I have actually created a key on my keyboard that performs this function. Instead of just mapping the Match Frame button to a key on your keyboard, you can add a modifier button along with the Match button. To add a modifier button, open the Command Palette from the Tools menu. Click on the Other tab; you'll see two modifier buttons (see Figure 16.2). These modifier buttons can be added to a key or a button in Avid Xpress Pro's layout. So now if you map the Match Frame button to a key on your keyboard along with this modifier button, a single keypress will perform the effect.
These buttons (shown are buttons for Macintosh users) can be added to a key on your keyboard or a button on Avid Xpress Pro's layout. They allow you to make keys or buttons perform multiple functions or as if you were holding down these keys.

Tip 2: Snap Audio Levels and Pan Levels
As you're working with the Audio Mix, you might want to reset your audio levels back to 0db or your pan levels back to Mid. Dragging these levels back to their default settings can be quite a task. A shortcut for resetting these levels is to click in the volume adjustment slider while holding down the Option key (Macintosh OS) or the Alt key (Windows). Doing so will reset the volume slider to zero (see Figure 16.3).
Figure 16.3. You can "snap" your audio levels back to zero quickly by Alt- or Option-clicking the volume sliders.
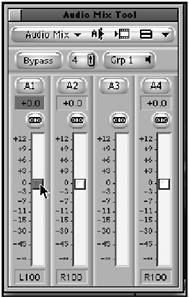
To adjust your panning levels to Mid, Option-click (Macintosh OS) or Alt-click (Windows) the Pan Level and Slider box. This will "snap" the levels to Mid.
NOTE
 TIP
TIP
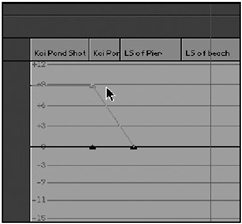
When you're adjusting keyframe audio levels in the Timeline, use the Command key (Macintosh OS) or the Control key (Windows) to force your keyframes to "snap" to the level indicators inside the Timeline (see Figure 16.4).
When you move these keyframes up or down, you can have them "snap" to certain levels displayed in the Timeline.
Tip 3: Adjust Your Audio Prior to Editing
Many editors are not aware of this tip. So many times an editor will add the audio clip into the Timeline and then add the AudioSuite plug-in to make changes. The problem with this method is that the editor is always making changes inside the Timeline. This can be very frustrating when trying to use the Time Compression Expansion plug-in, for example. If you attempt to slow down an audio track, you'll find yourself constantly trimming the clip to add more of the audio you're trying to slow down. To avoid this entire process, Avid Xpress Pro allows you to make adjustments to the clip prior to editing it in the Timeline. To apply a plug-in to a master clip, follow these steps:
-
Open the AudioSuite plug-ins from the Tools menu.
-
Drag the clip you want to adjust into the AudioSuite window.
-
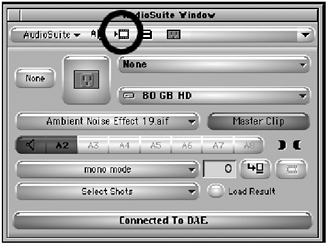
The AudioSuite window will expand to display additional controls (see Figure 16.5).
Figure 16.5. There's more to the AudioSuite window than some editors realize.
-
Make the adjustments you need and click on the render button inside the AudioSuite window.
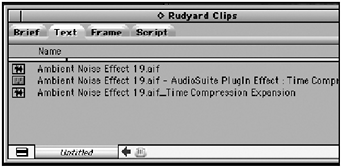
Not only will a new clip appear in the target bin, but an effect template will also appear. This is in case you want to use that same effect on another audio clip (see Figure 16.6).
Figure 16.6. After you render your effect, you'll see two new icons in the targeted bin.
This technique will certainly change how you use the AudioSuite window from now on. Your editing friends will marvel at this one.
| [ LiB ] |