Editing Your Movie Layout


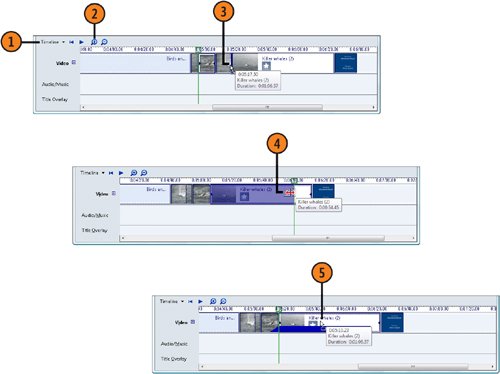
When you've assembled all the components of your movie, you'll probably want to tweak it by changing the order of the clips, perhaps trimming off part of a clip at the beginning or end of the movie, or even overlapping clips for special effects.

Tweak Your Clips

With Movie Maker running and all your clips placed on the Storyboard, choose Timeline from the View menu to show the clips by time.

Click Zoom Timeline In until you can easily see the clips and their beginnings or endings.

To move a clip, click it and drag it to a new location.

To trim a clip, play the movie until you locate the point at which you want to trim the clip, click the clip you want to trim, and drag either the beginning border to the right or the ending border to the left.

To overlay portions of two clips, select a clip, and then drag a portion of it to the left over the ending of the previous clip.

See Also

"Preparing to Produce a Movie" on pages 156157 for information about importing media into a Collections folder.


Try This!

Instead of trimming a clip, drag a border to extend the clip over another clip. Right-click another clip, and choose Fade In from the shortcut menu. Right-click another clip, and choose Fade Out from the shortcut menu. Play the movie to see how these changes affect the transitions between the clips.


Windows Vista Plain & Simple
How to Wow: Photoshop for the Web
ISBN: N/A
EAN: 2147483647
Year: 2006
Pages: 286

flylib.com © 2008-2017.
If you may any questions please contact us: flylib@qtcs.net