Developing Text
| Your presentation's text lays the foundation for the presentation. Keep these basic presentation rules in mind when developing your text.
PowerPoint provides several views that can help you organize your text. You can work with text and other objects one slide at a time in Normal view or, by clicking the Outline tab, you can work with all the presentation text on all slides at once. PowerPoint also offers many text formatting features traditionally associated with word processing software. You can apply fonts and text attributes to create the look you want. You can set tabs, indents, and alignment. Finally, you can edit and correct your text using several handy tools, including style, grammar, and spelling checkers. PowerPoint includes three types of text objects.
The first slide in a presentation typically contains title and text and a subtitle. Other slides often start with a title and then list major points in a bulleted list. Use text boxes only occasionallywhen you need to include annotations or minor points that don't belong in a list. When to Enter Text on a SlideUse the slide pane of Normal view to enter text when you are focusing on the text or objects of one slide at a time. 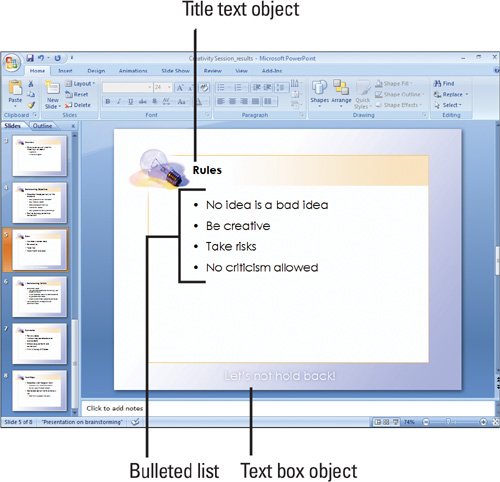 When to Enter Text in an OutlineIf you are concentrating on developing presentation content, but not on how the text looks or interacts with other objects on the slide, use the Outline tab in Normal view. This view lets you see the titles, subtitles, and bulleted text on all your slides at a single glance. The outline tab in Normal view is particularly useful for reorganizing the content of your presentation and ensuring that topics flow well from one to the next. You can easily move presentation topics up and down the outline. 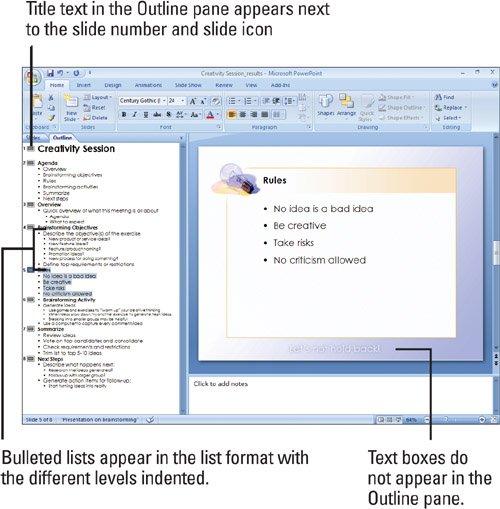 |
EAN: 2147483647
Pages: 348
- Chapter III Two Models of Online Patronage: Why Do Consumers Shop on the Internet?
- Chapter IV How Consumers Think About Interactive Aspects of Web Advertising
- Chapter X Converting Browsers to Buyers: Key Considerations in Designing Business-to-Consumer Web Sites
- Chapter XVII Internet Markets and E-Loyalty
- Chapter XVIII Web Systems Design, Litigation, and Online Consumer Behavior