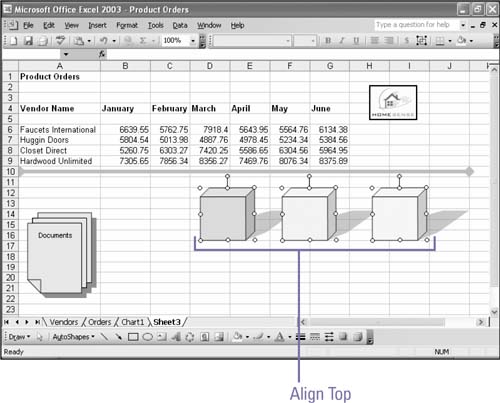
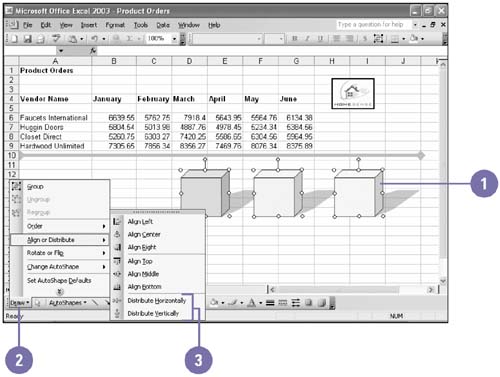
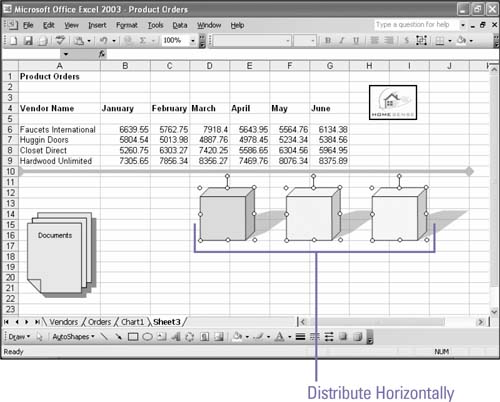
Aligning and Distributing Objects
Often when you work with three similar or identical objects,
they look best when aligned in relation to each other. For example,
you can align three objects so the tops of all three objects match
along an invisible line. Sometimes your task will not be alignment
but distributing objects evenly across a space. Excel includes
commands to distribute your items horizontally and vertically. You
can specify whether you want the distribution to occur in the
currently occupied space or across the entire worksheet.
Align Objects
-
|
Press Shift, and then click the objects that you want to
align.
|
-
|
Click the Draw button on the Drawing toolbar, and then point to
Align Or Distribute.
|
-
|
Click the alignment option you want.
|
-
Align Left
. Lines up the left edges of the selected
objects.
-
Align Center
. Lines up the centers of the selected
objects.
-
Align Right
. Lines up the right edges of the
selected objects.
-
Align Top
. Lines up the top edges of the selected
objects.
-
Align Middle
. Lines up horizontally the middles of
the selected objects.
-
Align Bottom
. Lines up the bottom edges of the
selected objects.
Distribute Objects
-
|
Press Shift, and then click the objects that you want to
distribute.
|
-
|
Click the Draw button on the Drawing toolbar, and then point to
Align Or Distribute.
|
-
|
Click the distribution option you want.
|
Did You Know?
You can
open
the Drawing toolbar
. If the Drawing
toolbar is not open, click the View menu, point to Toolbars, and
then click Drawing.
You can snap an object to a shape or grid
. When you
drag an object, you can have Excel snap the object you're dragging
to another object or an invisible grid on the worksheet. Click the
Draw button on the Drawing toolbar, point to Snap, and then click
To Grid or To Shape.
|
|