4.2 Installing fixes
|
| < Day Day Up > |
|
4.2 Installing fixes
This section covers how to apply fixes to WebSphere Application Server V5.0.2 for Linux on iSeries.
You need the update installer application to apply the fixes. It can be downloaded from the IBM Software Support Web site at:
http://www-3.ibm.com/software/support/
At a high level, the steps to install interim fixes and service fixes are the following:
-
Stop the WebSphere Application Server.
-
Install the update installer application.
-
Install the pertinent fixes.
-
Apply the fixes to WebSphere Application Server V5.0.2 for Linux on iSeries.
Details for each step follow.
Stop the WebSphere Application Server
Stop the WebSphere Application Server using the follow commands:
# cd /<WAS_HOME>/bin # ./stopServer <server>
Installing the update installer application
The steps to set up the update installer application are:
-
Using the mkdir command, create a /<WAS_HOME>/update directory if it doesn't already exist. The update directory is the directory which includes the update installer application and fixes.
-
Download the update installer application ZIP file to the /<WAS_HOME>/update directory. You can download it from the following site:
http://www-1.ibm.com/support/docview.wss?rs=180&context=SSEQTP&uid=swg24001908
-
Extract the contents of the ZIP file to the update directory using the following command:
# uzip <file_name.zip>
Installing the fixes
To install the fixes:
-
Create the update/fixes directory in which to store the fixes you need to install. Do this with the mkdir command.
Note You can create the update and fixes directory anywhere. However, we recommend these particular directories because they are easy to manage.
-
Download the interim fixes to the /<WAS_HOME>/update/fixes directory. The download site is:
http://www-3.ibm.com/software/support/
Applying the fixes to WAS for Linux on iSeries
To apply the fixes:
-
Start the update wizard using the following command:
# /<WAS_HOME/update/updateWizard.sh
-
In the language selection window, select your language and click OK. We chose English.
-
In the Welcome to WebSphere Application Server window, click Next.
-
Specify the product installation directory to apply the fix, and click Next as shown in Figure 4-6.
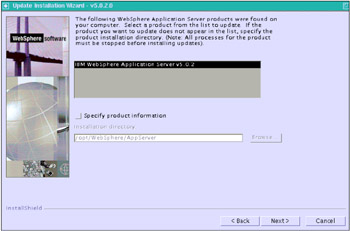
Figure 4-6: Specifying the product directory to apply the fix -
Select Install fixes if you want to install the interim fix, and click Next (Figure 4-7).
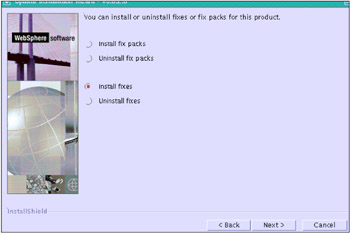
Figure 4-7: Select Install fixes -
Specify the directory where the fix is located, and click Next (Figure 4-8).
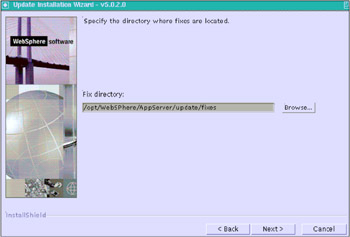
Figure 4-8: Specifying the directory where the fix is located -
The update installer finds the installable fixes and lists them. Select the fix which you want to install and click Next, as shown in Figure 4-9.
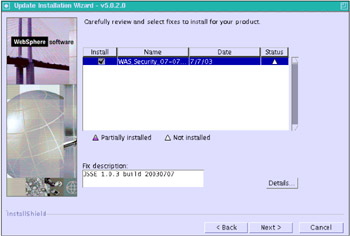
Figure 4-9: Selecting the fix to install -
Confirm the summary and click Next, as shown in Figure 4-10.
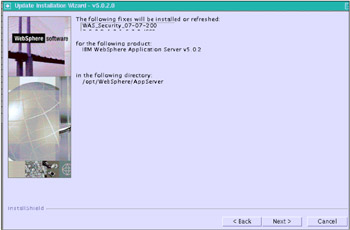
Figure 4-10: Confirming the summary -
The window shown in Figure 4-11 appears after successful installation. If you don't have the other fixes to install, click Finish.

Figure 4-11: Finishing the update wizard
|
| < Day Day Up > |
|
EAN: 2147483647
Pages: 56