Examples: Securing Web Applications
| There are several ways in which you can secure web applications. These include the following options:
The following examples use annotations, programmatic security, and/or declarative security to demonstrate adding security to existing web applications:
The following examples demonstrate adding basic authentication to an EJB endpoint or enterprise bean:
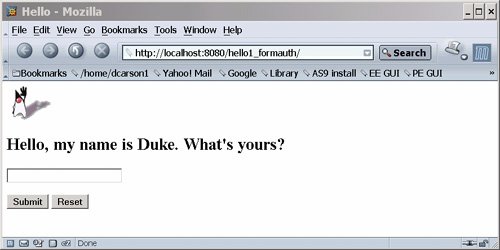
Example: Using Form-Based Authentication with a JSP PageThis example discusses how to use form-based authentication with a basic JSP page. With form-based authentication, you can customize the login screen and error pages that are presented to the web client for authentication of their user name and password. When a user submits their name and password, the server determines if the user name and password are those of an authorized user and, if authorized, sends the requested web resource. If the topic of authentication is new to you, please refer to the section Specifying an Authentication Mechanism (page 1010). In general, the following steps are necessary for adding form-based authentication to an unsecured JSP page, such as the one described in Web Modules (page 38). In the example application included with this tutorial, many of these steps have been completed for you and are listed here simply to show what needs to be done should you wish to create a similar application. The completed version of this example application can be found in the directory <INSTALL>/javaeetutorial5/examples/web/hello1_formauth/. The following steps describe how to set up your system for running the example applications, describe the sample application, and provide the steps for compiling, packaging, deploying, and testing the example application.
Creating a Web Client for Form-Based AuthenticationThe web client in this example is a standard JSP page, and annotations are not used in JSP pages because JSP pages are compiled as they are presented to the browser. Therefore, none of the code that adds form-based authentication to the example is included in the web client. The code for the JSP page used in this example, hello1_formauth/web/index.jsp, is exactly the same as the code used for the unsecured JSP page from the example application at <INSTALL>/javaeetutorial5/examples/web/hello1/web/index.jsp. The information that adds form-based authentication to this example is specified in the deployment descriptor. This information is discussed in Specifying a Security Constraint (page 1023). Creating the Login Form and the Error PageWhen using form-based login mechanisms, you must specify a page that contains the form you want to use to obtain the user name and password, as well as which page to display if login authentication fails. This section discusses the login form and the error page used in this example. The section Specifying a Security Constraint (page 1023) shows how you specify these pages in the deployment descriptor. The login page can be an HTML page, a JSP page, or a servlet, and it must return an HTML page containing a form that conforms to specific naming conventions (see the Java Servlet 2.5 specification for more information on these requirements). To do this, include the elements that accept user name and password information between <form></form> tags in your login page. The content of an HTML page, JSP page, or servlet for a login page should be coded as follows: <form method=post action="j_security_check" > <input type="text" name= "j_username" > <input type="password" name= "j_password" > </form> The full code for the login page used in this example can be found at <INSTALL>/javaeetutorial5/examples/web/hello1_formauth/web/logon.jsp. An example of the running login form page is shown later in Figure 306. Here is the code for this page: <html> <head> <title>Login Page</title> </head> <h2>Hello, please log in:</h2> <br><br> <form action="j_security_check" method=post> <p><strong>Please Enter Your User Name: </strong> <input type="text" name="j_username" size="25"> <p><p><strong>Please Enter Your Password: </strong> <input type="password" size="15" name="j_password"> <p><p> <input type="submit" value="Submit"> <input type="reset" value="Reset"> </form> </html> Figure 306. Form-Based Login Page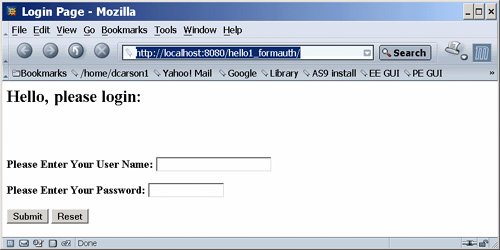 The login error page is displayed if the user enters a user name and password combination that is not authorized to access the protected URI. For this example, the login error page can be found at <INSTALL>/javaeetutorial5/examples/web/hello1_formauth/web/logonError.jsp. For this example, the login error page explains the reason for receiving the error page and provides a link that will allow the user to try again. Here is the code for this page: <html> <head> <title>Login Error</title> </head> <body> <c:url var="url" value="/index.jsp"/> <h2>Invalid user name or password.</h2> <p>Please enter a user name or password that is authorized to access this application. For this application, this means a user that has been created in the <code>file</code> realm and has been assigned to the <em>group</em> of <code>user</ code>. Click here to <a href="${url}">Try Again</a></h2> </body> </html>Specifying a Security ConstraintIn this example, we are taking a very simple JSP page-based web application and adding form-based security to this application. The JSP page is exactly the same as the JSP page used in the example described in Web Modules (page 38). All security for this example is declared in the deployment descriptor for the application. A security constraint is defined in the deployment descriptor that tells the server to send a login form to collect user data, verify that the user is authorized to access the application, and, if so, display the JSP page to the user. If this client were a web service endpoint and not a JSP page, we could use annotations to declare security roles and to specify which roles were allowed access to which methods. However, there is no resource injection in JSP pages, so we cannot use annotations and must use the equivalent deployment descriptor elements. Deployment descriptor elements are described in Declaring Security Requirements in a Deployment Descriptor (page 1002). The following sample code shows the deployment descriptor used in this example of form-based login authentication, which can be found in <INSTALL>/javaeetutorial5/examples/web/hello1_formauth/web/WEB-INF/web.xml. <!-- FORM-BASED LOGIN AUTHENTICATION EXAMPLE --> <?xml version="1.0" encoding="UTF-8"?> <web-app xmlns="http://java.sun.com/xml/ns/javaee" version="2.5" xmlns:xsi="http://www.w3.org/2001/XMLSchema-instance" xsi:schemaLocation="http://java.sun.com/xml/ns/javaee http://java.sun.com/xml/ns/javaee/web-app_2_5.xsd"> <display-name>hello1_formauth</display-name> <servlet> <display-name>index</display-name> <servlet-name>index</servlet-name> <jsp-file>/index.jsp</jsp-file> </servlet> <security-constraint> <display-name>SecurityConstraint</display-name> <web-resource-collection> <web-resource-name>WRCollection</web-resource-name> <url-pattern>/*</url-pattern> </web-resource-collection> <auth-constraint> <role-name>loginUser</role-name> </auth-constraint> <user-data-constraint> <transport-guarantee>NONE</transport-guarantee> </user-data-constraint> </security-constraint> <login-config> <auth-method>FORM</auth-method> <form-login-config> <form-login-page>/logon.jsp</form-login-page> <form-error-page>/logonError.jsp</form-error-page> </form-login-config> </login-config> <security-role> <role-name>loginUser</role-name> </security-role> </web-app> More description of the elements that declare security in a deployment descriptor can be found in Specifying Security Constraints (page 1006). Protecting Passwords with SSLPasswords are not protected for confidentiality with HTTP basic or form-based authentication, meaning that passwords sent between a client and a server on an unprotected session can be viewed and intercepted by third parties. To overcome this limitation, you can run these authentication protocols over an SSL-protected session and ensure that all message content is protected for confidentiality. A <transport-guarantee> element indicates whether or not the protected resources should travel over protected transport. For simplicity, this example does not require protected transport, but in a real world application, you would want to set this value to CONFIDENTIAL to ensure that the user name and password are not observed during transmission. When running on protected transport, you can run the application over the secure SSL protocol, https, and specify the secure port where your SSL connector is created (the default for the Application Server is 8181). If you do not specify the HTTPS protocol, the server will automatically redirect the application to the secure port. Adding Authorized Roles and UsersTo authenticate a user and allow that user access to protected resources on the Application Server, you must link the roles defined in the application to the users defined for the Application Server.
When an application is deployed, the application-specific security roles are mapped to security identities in the runtime environment, such as principals (identities assigned to users as a result of authentication) or groups. Based on this mapping, a user who has been assigned a certain security role has associated access rights to a web application deployed onto a server. As shown in the deployment descriptor for this example application, the security constraint specifies that users assigned to the role of loginUser are authorized to access any of the files in the hello1_formauth application. In this example, when a resource that is constrained by this same security constraint is accessed, for example, hello1_formauth/web/index.jsp, the Application Server sends the login form, receives the login information, and checks to see if the user is in a group that has been mapped to the role of loginUser. If the user name and password are those of an authorized user, access to the resource is granted to the requester. To set up users for this example application, follow these steps:
Mapping Application Roles to Application Server GroupsMap the role of loginUser defined in the application to the group of user defined on the Application Server by adding a security-role-mapping element to the sun-web.xml runtime deployment descriptor file. To deploy a WAR on the Application Server, the WAR file must contain a runtime deployment descriptor. The runtime deployment descriptor is an XML file that contains information such as the context root of the web application and the mapping of the portable names of an application's resources to the Application Server's resources. The runtime deployment descriptor for this example, <INSTALL>/javaeetutorial5/examples/web/hello1_formauth/web/WEB-INF/sun-web.xml, looks like this: <?xml version="1.0" encoding="UTF-8"?> <!DOCTYPE sun-web-app PUBLIC "-//Sun Microsystems, Inc.//DTD Application Server 9.0 Servlet 2.5//EN" "http://www.sun.com/ software/appserver/dtds/sun-web-app_2_5-0.dtd"> <sun-web-app> <context-root>/hello1_formauth</context-root> <security-role-mapping> <role-name>loginUser</role-name> <group-name>user</group-name> </security-role-mapping> </sun-web-app> Building, Packaging, and Deploying the Form-Based Authentication Example Using NetBeans 5.5To build, package, and deploy this application using NetBeans 5.5, follow these steps:
Building, Packaging, and Deploying the Form-Based Authentication Example Using AntTo build, package, and deploy this application using the Ant tool, follow these steps:
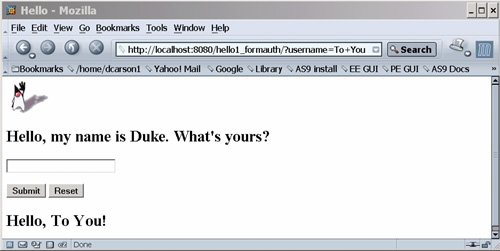
Testing the Form-Based Authentication Web ClientTo run the web client, follow these steps:
Example: Basic Authentication with a ServletThis example discusses how to use basic authentication with a servlet. With basic authentication of a servlet, the web browser presents a standard login dialog that is not customizable. When a user submits their name and password, the server determines if the user name and password are those of an authorized user and sends the requested web resource if the user is authorized to view it. If the topic of authentication is new to you, please refer to the section Specifying an Authentication Mechanism (page 1010). In general, the following steps are necessary for adding basic authentication to an unsecured servlet, such as the one described in Web Modules (page 38). In the example application included with this tutorial, many of these steps have been completed for you and are listed here simply to show what needs to be done should you wish to create a similar application. The completed version of this example application can be found in the directory <INSTALL>/javaeetutorial5/examples/web/hello2_basicauth/. The following steps describe how to set up your system for running the example applications, describe the sample application, and provide the steps for compiling, packaging, deploying, and testing the example application.
Declaring Security RolesThere are two annotations that can be used with servlets: @DeclareRoles and @RunAs. In this example, the @DeclareRoles annotation is used to specify which roles are referenced in this example. The following section of the <INSTALL>/javaeetutorial5/examples/web/hello2_basicauth/src/servlets/GreetingServlet.java file contains the code necessary to declare that the role of helloUser is used in this application: package servlets; import java.io.*; import java.util.*; import java.sql.*; import javax.servlet.*; import javax.servlet.http.*; import javax.annotation.security.DeclareRoles; /** * This is a simple example of an HTTP Servlet that can only be accessed * by an authenticated user. It responds to the GET * method of the HTTP protocol. */ @DeclareRoles("helloUser") public class GreetingServlet extends HttpServlet { public void doGet (HttpServletRequest request, HttpServletResponse response) throws ServletException, IOException You could also declare security roles using the <security-role> element in the deployment descriptor. If you prefer to declare security roles this way, read Declaring Roles Using Deployment Descriptor Elements (page 998). Specifying the Security ConstraintIn this example, we are taking a very simple servlet-based web application and adding basic authentication to this application. The servlet is basically the same as the servlet used in the example described in Web Modules (page 38), with the exception of the annotations added and discussed in Declaring Security Roles (page 1032). The security constraint for this example is declared in the application deployment descriptor. The security constraint tells the server or browser to perform the following tasks:
Deployment descriptors elements are described in Declaring Security Requirements in a Deployment Descriptor (page 1002). The following sample code shows the security elements for the deployment descriptor used in this example of basic authentication, which can be found in <INSTALL>/javaeetutorial5/examples/web/hello2_basicauth/web/WEB-INF/web.xml. <security-constraint> <display-name>SecurityConstraint</display-name> <web-resource-collection> <web-resource-name>WRCollection</web-resource-name> <url-pattern>/greeting</url-pattern> </web-resource-collection> <auth-constraint> <role-name>helloUser</role-name> </auth-constraint> <user-data-constraint> <transport-guarantee>NONE</transport-guarantee> </user-data-constraint> </security-constraint> <login-config> <auth-method>BASIC</auth-method> <realm-name>file</realm-name> </login-config> More description of the elements that declare security in a deployment descriptor can be found in Specifying Security Constraints (page 1006). Protecting Passwords with SSLPasswords are not protected for confidentiality with HTTP basic or form-based authentication, meaning that passwords sent between a client and a server on an unprotected session can be viewed and intercepted by third parties. To overcome this limitation, you can run these authentication protocols over an SSL-protected session and ensure that all message content is protected for confidentiality. A <transport-guarantee> element indicates whether or not the protected resources should travel over protected transport. For simplicity, this example does not require protected transport, but in a real world application, you would want to set this value to CONFIDENTIAL to ensure that the user name and password are not observed during transmission. When running on protected transport, you need to use the secure SSL protocol, https, and specify the secure port where your SSL connector is created (the default for the Application Server is 8181). Adding Authorized Roles and UsersTo authenticate a user and allow that user access to protected resources on the Application Server, you must link the roles defined in the application to the users defined for the Application Server.
When an application is deployed, the application-specific security roles are mapped to security identities in the runtime environment, such as principals (identities assigned to users as a result of authentication) or groups. Based on this mapping, a user who has been assigned a certain security role has associated access rights to a web application deployed onto a server. As shown in the deployment descriptor for this example application, the security constraint specifies that users assigned to the role of helloUser are authorized to access the URL pattern /greeting. In this example, when this resource (because it is constrained by a security constraint) is accessed, the Application Server sends a default login dialog, receives the login information, and checks to see if the user is in a group that has been mapped to the role of helloUser. If the user name and password are those of an authorized user, access to the resource is granted to the requester. To set up users for this example application, follow these steps:
Mapping Application Roles to Application Server GroupsMap the role of helloUser defined in the application to the group of user defined on the Application Server by adding a security-role-mapping element to the sun-web.xml runtime deployment descriptor file. The runtime deployment descriptor is an XML file that contains information such as the context root of the web application and the mapping of the portable names of an application's resources to the Application Server's resources. The runtime deployment descriptor for this example, <INSTALL>/javaeetutorial5/examples/web/hello2_basicauth/web/WEB-INF/sun-web.xml, looks like this: <sun-web-app> <context-root>/hello2_basicauth</context-root> <security-role-mapping> <role-name>helloUser</role-name> <group-name>user</group-name> </security-role-mapping> </sun-web-app> Building, Packaging, and Deploying the Servlet Basic Authentication Example Using NetBeans 5.5To build, package, and deploy the web/hello2_basicauth example application using NetBeans 5.5, follow these steps:
Building, Packaging, and Deploying the Servlet Basic Authentication Example Using AntTo build, package, and deploy the web/hello2_basicauth example using the Ant tool, follow these steps:
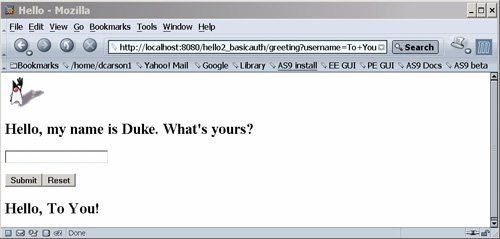
Running the Basic Authentication ServletTo run the web client, follow these steps:
Troubleshooting the Basic Authentication ExampleWhen doing iterative development with this web application, follow these steps if you are using NetBeans 5.5:
Follow these steps if you are using the Ant tool:
Example: Basic Authentication with JAX-WSIn this section, we discuss how to configure a JAX-WS-based web service for HTTP basic authentication. When a service that is constrained by HTTP basic authentication is requested, the server requests a user name and password from the client and verifies that the user name and password are valid by comparing them against a database of authorized users. If the topic of authentication is new to you, please refer to the section titled Specifying an Authentication Mechanism (page 1010). For an explanation of how basic authentication works, see Figure 302. For this tutorial, we will add the security elements to the JAX-WS service and client; build, package, and deploy the service; and then build and run the client application. This example service was developed by starting with an unsecured service, helloservice, which can be found in the directory <INSTALL>/javaeetutorial5/examples/jaxws/helloservice and is discussed in Creating a Simple Web Service and Client with JAX-WS (page 508). We build on this simple application by adding the necessary elements to secure the application using basic authentication. The example client used in this application can be found at <INSTALL>/javaeetutorial5/examples/jaxws/simpleclient-basicauth, which only varies from the original simpleclient application in that it uses the helloservice-basicauth endpoint instead of the helloservice endpoint. The completed version of the secured service can be found at <INSTALL>/javaeetutorial5/examples/jaxws/helloservice-basicauth. In general, the following steps are necessary to add basic authentication to a JAX-WS web service. In the example application included with this tutorial, many of these steps have been completed for you and are listed here simply to show what needs to be done should you wish to create a similar application.
Annotating the ServiceIn this example, annotations are used to specify which users are authorized to access which methods of this service. In this simple example, the @RolesAllowed annotation is used to specify that users in the application role of basicUser are authorized access to the sayHello(String name) method. This application role must be linked to a group of users on the Application Server. Linking the roles to groups is discussed in Linking Roles to Groups (page 1045). The source code for the original /helloservice application was modified as shown in the following code snippet (modifications in bold). This file can be found in <INSTALL>/javaeetutorial5/examples/jaxws/helloservice-basicauth/src/java/helloservice/basicauth/endpoint/Hello.java. package helloservice.basicauth.endpoint; import javax.jws.WebMethod; import javax.jws.WebService; import javax.annotation.security.RolesAllowed; @WebService() public class Hello { private String message = new String("Hello, "); @WebMethod() @RolesAllowed("basicUser") public String sayHello(String name) { return message + name + "."; } } The @RolesAllowed annotation specifies that only users in the role of basicUser will be allowed to access the sayHello (String name) method. An @RolesAllowed annotation implicitly declares a role that will be referenced in the application, therefore, no @DeclareRoles annotation is required. Adding Security Elements to the Deployment DescriptorTo enable basic authentication for the service, add security elements to the application deployment descriptor, web.xml. The security elements that need to be added to the deployment descriptor include the <security-constraint> and <login-config> elements. These security elements are discussed in more detail in Declaring Security Requirements in a Deployment Descriptor (page 1002) and in the Java Servlet Specification. Code in bold is added to the original deployment descriptor to enable HTTP basic authentication. The resulting deployment descriptor is located in <INSTALL>/javaeetutorial5/examples/jaxws/helloservice-basicauth/web/WEB-INF/web.xml. <?xml version="1.0" encoding="UTF-8"?> <web-app xmlns="http://java.sun.com/xml/ns/javaee" version="2.5" xmlns:xsi="http://www.w3.org/2001/XMLSchema" xsi:schemaLocation="http://java.sun.com/xml/ns/javaee http://java.sun.com/xml/ns/javaee/web-app_2_5.xsd"> <display-name>HelloService</display-name> <listener> <listener-class> com.sun.xml.ws.transport.http.servlet.WSServletContex- tListener </listener-class> </listener> <servlet> <display-name>HelloService</display-name> <servlet-name>HelloService</servlet-name> <servlet-class>com.sun.xml.ws.transport.http.serv- let.WSServlet</servlet-class> </servlet> <servlet-mapping> <servlet-name>HelloService</servlet-name> <url-pattern>/hello</url-pattern> </servlet-mapping> <session-config> <session-timeout>30</session-timeout> </session-config> <security-constraint> <display-name>SecurityConstraint</display-name> <web-resource-collection> <web-resource-name>WRCollection</web-resource-name> <url-pattern>/hello</url-pattern> </web-resource-collection> <auth-constraint> <role-name>basicUser</role-name> </auth-constraint> <user-data-constraint> <transport-guarantee>NONE</transport-guarantee> </user-data-constraint> </security-constraint> <login-config> <auth-constraint>BASIC</auth-constraint> <realm-name>file</realm-name> </login-config> </web-app> Linking Roles to GroupsThe role of basicUser has been defined for this application, but there is no group of basicUser defined for the Application Server. To map the role that is defined for the application (basicUser) to a group that is defined on the Application Server (user), add a <security-role-mapping> element to the runtime deployment descriptor, sun-web.xml, as shown below (modifications from the original file are in bold). The resulting runtime deployment descriptor is located in <INSTALL>/javaeetutorial5/examples/jaxws/helloservice-basicauth/web/WEB-INF/sun-web.xml. <?xml version="1.0" encoding="UTF-8"?> <!DOCTYPE sun-web-app PUBLIC "-//Sun Microsystems, Inc.//DTD Application Server 9.0 Servlet 2.5//EN" "http://www.sun.com/ software/appserver/dtds/sun-web-app_2_5-0.dtd"> <sun-web-app error-url=""> <context-root>/helloservice</context-root> <class-loader delegate="true"/> <security-role-mapping> <role-name>basicUser</role-name> <group-name>user</group-name> </security-role-mapping> </sun-web-app> Building and Deploying HelloService with Basic Authentication Using NetBeans 5.5To build, package, and deploy the jaxws/helloservice-basicauth example using NetBeans 5.5, follow these steps, or the steps described in Building, Packaging, and Deploying the Service (page 511).
Building and Deploying HelloService with Basic Authentication Using AntTo build, package, and deploy the jaxws/helloservice-basicauth example using the Ant tool, follow these steps, or the steps described in Building, Packaging, and Deploying the Service (page 511).
Building and Running the Client Application for HelloService with Basic Authentication Using NetBeans 5.5To build and run the client application, simpleclient-basicauth, using NetBeans 5.5, follow these steps. The helloservice-basicauth service must be deployed onto the Application Server before compiling the client files. For information on deploying the service, read Building and Deploying HelloService with Basic Authentication Using NetBeans 5.5 (page 1045).
The client displays the following output: [echo] running application client container. [exec] Retrieving the port from the following service: helloservice.basicauth.endpoint.HelloSer vice@c8769b [exec] Invoking the sayHello operation on the port. [exec] Hello, No Name. Building and Running the Client Application for HelloService with Basic Authentication Using AntTo build and run the client application, simpleclient-basicauth, using the Ant tool, follow these steps. The secured service must be deployed onto the Application Server before you can successfully compile the client application. For more information on deploying the service, read Building and Deploying HelloService with Basic Authentication Using Ant (page 1046).
The client displays the following output: [echo] running application client container. [exec] Retrieving the port from the following service: helloservice.basicauth.endpoint.HelloService@c8769b [exec] Invoking the sayHello operation on the port. [exec] Hello, No Name. |
 Open Project.