Chapter 6: Making .NET Web Services Available to Others
|
|
Throughout the last five chapters, you have learned how to create a wide range of web services. In this chapter, you will examine the steps you must perform to make your services readily available to others on the Internet (or within a local intranet). To start, you will learn how to create a “release version” of your service that disables debugging, in order to improve performance and security. Then, you will learn how to assign a namespace to your web service that uniquely distinguishes your service from others on the Web.
Next, you will examine several sites on the Web at which you can place your web services for consumption. You will then learn how Universal Description Discovery Integration (UDDI) can make it easier for other programs to learn about your service. You will also learn how to use the UDDI software development kit to write programs that interact with the UDDI registry to help you locate or post services.
Preparing to Publish Your Web Service
By default, when you create a web service within the .NET environment, Visual Studio .NET will include instructions within your service that a debugger can use to “step through” the statements that make up your service. After you have thoroughly tested your web service and you are ready to release the service for use, you should compile a “release version” of the service that omits the debugging instructions. In so doing, you will improve your service’s performance (because it must no longer execute the debugging instructions) and you may increase the service’s security (because a failed service will not launch a debugger that presents the service’s programming statements to an end user—or hacker).
To direct Visual Studio .NET to turn off debugging within your service, perform these steps:
-
Within Visual Studio .NET, open your web service project.
-
Select the Build menu and choose Configuration Manager. Visual Studio .NET will display the Configuration Manager dialog box.
-
Within the Configuration Manager dialog box, select the Configuration pull-down menu and choose Release, as shown in Figure 6.1.
-
Close the Configuration Manager dialog box and then select the Build menu Build Solution option.
For example, the RandomNumber web service provides methods that return a variety of random-number types:
Integer RandomInteger() Double RandomDouble() Integer RandomInteger0to1000() Double RandomDouble0to1000()
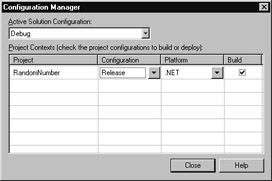
Figure 6.1: Building a release version of a web service with debugging disabled
To create the RandomNumber web service, perform these steps:
-
Within Visual Studio .NET, select the File menu New Project option. Visual Studio .NET will display the New Project dialog box.
-
Within the New Project dialog box Project Types list, click Visual Basic Projects. Then, within the Templates field, click ASP.NET Web Service. Finally, within the Location field, specify the folder within which you want to store the program and the program name RandomNumber. Select OK. Visual Studio .NET will display a page onto which you can drag and drop the service’s components.
-
Select the View menu Code option. Visual Studio .NET will display the program’s source code. Within the source code add the program statements in Listing 6.1.
Listing 6.1 RandomNumber.asmx.vb
<WebMethod()> Public Function RandomInteger() As Integer Dim RandomNumber As New Random(Now.Millisecond) RandomInteger = RandomNumber.Next() End Function <WebMethod()> Public Function RandomDouble() As Double Dim RandomNumber As New Random(Now.Millisecond) RandomDouble = RandomNumber.NextDouble() End Function <WebMethod()> Public Function RandomInteger0to1000() As Integer Dim RandomNumber As New Random(Now.Millisecond) RandomInteger0to1000 = RandomNumber.Next() Mod 1000 End Function <WebMethod()> Public Function RandomDouble0to1000() As Double Dim RandomNumber As New Random(Now.Millisecond) RandomDouble0to1000 = RandomNumber.NextDouble() * 1000 End Function
After you have tested the service and you are ready to release the service for use by the public, use the Configuration Manager as previously discussed to create a release version of the service.
Assigning a Unique Namespace to a Web Service
Within programs, identifiers such as variables have a scope that defines the locations within the program where the variable has meaning. To help programmers maintain unique identifiers throughout their code, many programming languages support the concept of a namespace. In general, a program can include several different namespaces. Each namespace must have a unique name. By combining the name of the namespace with the names of variables (or functions) the program defines within the namespace, each identifier is ensured a unique name.
In a similar way, across the Web other programmers may be working on web services they have named with names that conflict with those you have assigned to web services you have created. To ensure that each web service has a unique name, you can assign a namespace to your web service.
By default, within the .NET environment, Visual Studio .NET assigns each web service you create the namespace name http://tempuri.org. If you examine the code Visual Studio .NET creates for a web service, you will find the namespace assignment as shown here:
<WebService(Namespace := "http://tempuri.org/")> _
Before you place a web service on to the Internet for use by others, you should assign a name to the service that corresponds to your domain name. If you do not have a domain name, you should select an identifier that is unique to you, such as your name: http://FirstnameMiLastname.org.
To assign your own namespace to a web service, simply change the Namespace entry as shown here:
<WebService(Namespace := "http://JohnADoe.org/")> _
After you compile your web service, you can view the service’s WSDL entries to display the new namespace as shown in Figure 6.2.
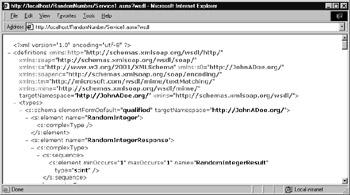
Figure 6.2: Viewing a web service’s namespace name within the WSDL entries
Placing Web Services on the Web
Throughout this book’s previous chapters, you have used web services that reside at various sites across the Web, such as www.XMethods.com, shown in Figure 6.3.
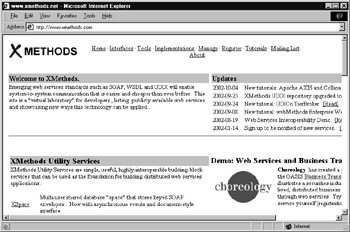
Figure 6.3: By posting a web service at XMethods.com, you make your service available to others.
Across the Web, there are many sites at which you can post your web services for use by others. One of the most widely used websites is salcentral, at www.salcentral.com. Within the salcentral site, shown in Figure 6.4, you can upload your web services, search for services posted by others, and keep current on new programming techniques.
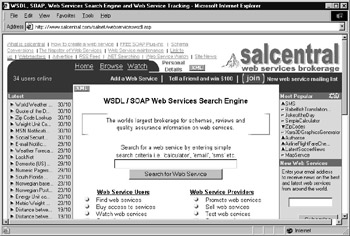
Figure 6.4: Using the web service repository at salcentral
Each of these web service repositories provides different ways you can promote your web service and ways you can bill programmers for using your service. In Chapter 15, “Making Money with Web Services,” you will examine a model you can implement that lets you track which programs are using your web service, so you can construct a billing model.
|
|
EAN: 2147483647
Pages: 161