Project: Product Sheet Front
| We'll be creating the front of a product sheet (we tackle the other side in the second half of this chapter) in 18 easy steps: STEPS
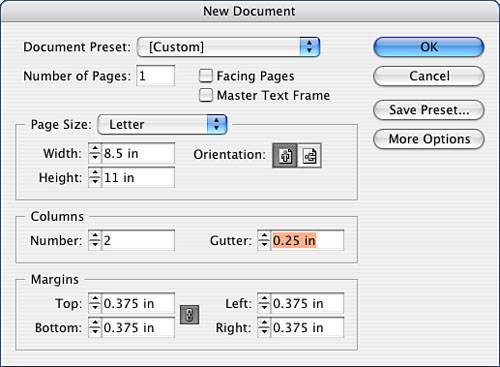
Step 1: Setting Up Your Document FormatLaunch InDesign and go to the File pull-down menu. Select New, Document and fill out the New Document window as indicated in Figure 6.1. Figure 6.1. Fill out the window as indicated for this two-column setup. Orient yourself to the layout and check out the Control palette at the top of the window. You will be using the x,y coordinate to accurately position your elements. Step 2: Importing ElementsGo to the File pull-down menu and select Place; then navigate to the 06Project_Files folder and select cabinet.tiff. A paintbrush icon appears. Click the icon and the image drops onto your page. Set your proxy to the upper-left corner of the matrix. With the image still selected, type in the following x,y coordinate: x: .375", y: 1". Your image should snap into position. Note
Step 3: Creating a Text ElementCreate a text box to fit the top of your page. The x,y coordinate should be .375",.375"; the width should be 7.75"; and the height should be .875". Step 4: Creating a Color SwatchOpen the Swatches palette found in the Window pull-down menu or check the collapsible palette bays that tuck along the edge of your window. Click the tab labeled Swatches and the palette will slide out. Note
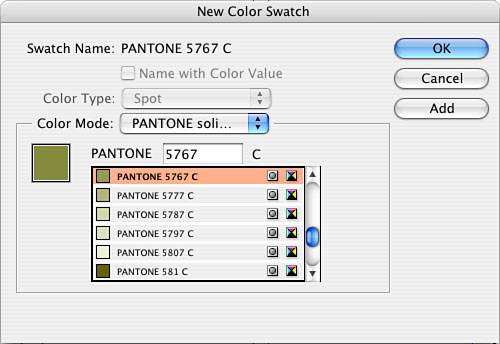
Let's add a swatch. If you are using the palette in the bay, pull down the menu from the triangle in the upper-left corner. If you are using the floating version of the palette, pull down the menu from the triangle in the upper-right corner of the palette. Select New Color Swatch and, from the Color Type menu, select Spot. From the Color Mode pull-down menu, select PANTONE Solid Coated. Type in the ink number you want (in our exercise, it's #5767) and click OK. Use Figure 6.2 for guidance. Figure 6.2. Your new swatch will land at the bottom of the list. Note the spot off to the right of the list. Step 5: Formatting TextWith the Text tool, click in the text box across the top of your page (it should be slightly overlapping the image) and type Wood Worker Guys: Custom Cabinets Since 1962. Feel free to adjust this to your situation if you prefer. Highlight the text with the Text tool and format it as follows: Adobe Caslon Pro, italic, 30 points, 10 tracking, center aligned. Select the box with the selection tool, go to the Object pulldown menu, and select Text Frame Options. At the bottom of the window, select Centered Vertical Justification. Your text should look similar to Figure 6.3. Figure 6.3. The text should look as if it's floating in the box. Tip
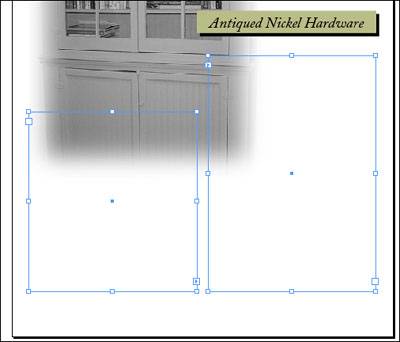
Step 6: Coloring TypeWith the text still highlighted, click the Swatches palette and click the Fill swatch so that it is selected (it will move forward or in front of the Stroke swatch). Click your newly added spot color, and the type should turn an olive green. Select the solid arrow or Selection tool. The text box itself should select; however, if you do not see the wire frame or anchor points around the text box, click to select it. Now, in the Swatches palette, with the fill swatch clicked to the forward position or selected and in front of the Stroke swatch, click the black swatch. The text box background should fill with black. Step 7: Creating a Shadow BoxOn the pasteboard, draw a text box measuring 4" wide by .5" deep. Click the Selection tool (which is the black arrow) and apply a black fill (no stroke) using the swatches in the Swatches palette. Make a copy of the box (make sure the box is still selected) by selecting Edit, Copy. Go back to the Edit pull-down menu and select Paste in Place. A duplicate black box is placed on top of the original. Color this box PANTONE 5767. Apply a tint of this spot color after you have selected your swatch by going to the top of the Swatches palette and typing 50% instead of the usual 100%. Select the Text tool again and click in the olive green box. Type The Primitive. The text should appear in black. Highlight the text with the Text tool and format it as follows: Adobe Caslon Pro italic, 30 points, centered alignment. Go to the Object pull-down menu and select Text Frame Options. At the bottom of this resulting dialog box is the Vertical Justification option. Select Alignment, Centered so your text will be centered (justified) both horizontally and vertically in your box (see Figure 6.4). Figure 6.4. Again, the text should look as if it's floating in the box. Select the Selection tool again and click the olive green box again. Now we will move the olive green box up and to the left ever so slightly. Rather than use the mouse, use your arrow keys to accomplish this. Each press of an arrow moves an element by 1 point. Move the box 4 points up and 4 points to the left. You have now created a basic shadow box; compare your work to Figure 6.5. Figure 6.5. This is an example of a very basic shadow construction. Step 8: Grouping ElementsSelect both boxes (green and black) and select Object, Group. The two boxes are grouped together, and the x,y coordinate for this group should be 4.125",1.75" (see Figure 6.6). Figure 6.6. Grouping the two elements with the Object, Group command.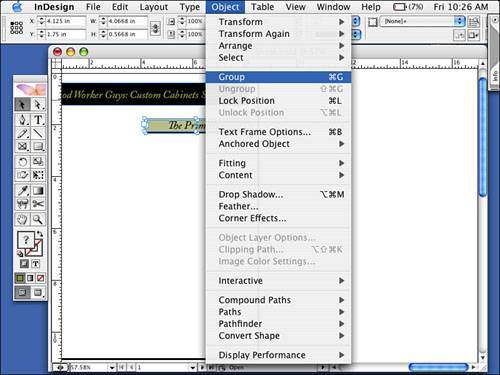 Step 9: Stepping and RepeatingWith the group still selected, you will step and repeat them twice down the side of your page. Go to the Edit pull-down menu and select Step and Repeat. Fill in the dialog box as shown in Figure 6.7. You now have two more groups, equally positioned down the right side of your page. Figure 6.7. Make sure there is no horizontal movement, only vertical. Select the Text tool, highlight the text in the second box, and type over it with different text. Do the same for the third box. Then adjust the type in both boxes to 24 points. I've typed in frame 2 Hand-planed, Maple Wood and in frame 3 Antiqued Nickel Hardware. Step 10: Creating Columns Versus Threading Text BlocksNow we have to insert some text to describe the product. The text will flow into the two columns on the page, but they will be uneven. A good choice for columns of varying depths is to thread the text blocks together. We will do this on the front of the product sheet. Draw two text boxes on this page. The first one should be drawn within the left column guide and the x,y coordinate should be.375",6"; the width should be 3.75"; and the height should be 4". The second text box should be placed and have an x,y coordinate of 4.375",4.75; a width of 3.75"; and a height of 5.25"(see Figure 6.8). Figure 6.8. The two text boxes.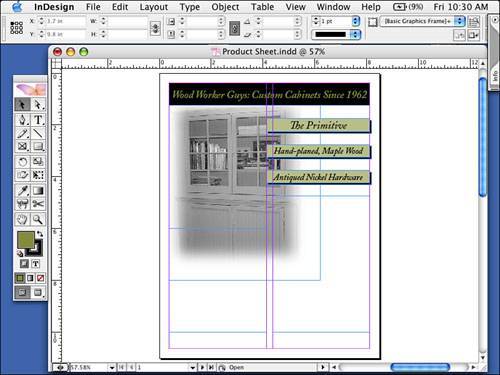 Step 11: Threading TextNow you are going to learn to thread text. With the Selection tool, click the first box. You will see little squares on the text box wire frame that look different from the anchor points. The little empty square in the upper-left corner is the in port, and the corresponding square in the lower-right corner is the out port. These squares facilitate the linking, or threading, of text boxes together. When they are both empty, they symbolize that the beginning and ending of this sequence of text begins and ends in that box alone (see Figure 6.9). Figure 6.9. These two boxes are threaded together. Note the triangles in the out port and in port. Note
Now we will connect the two text boxes. With the Selection tool, click the out port of the first text frame. You might see the Selection tool turn into a miniature text block. Hover your mouse over the second text block, and the tool turns into a couple of links. Click the second block and your two blocks are linked together. Note
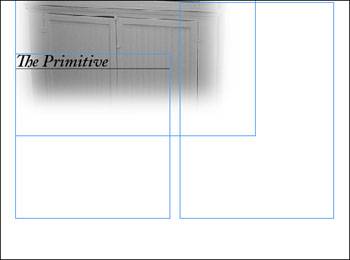
With the Text tool, click in the first box and type in your product or service. In this exercise, I typed The Primitive. Format the text as follows: Adobe Caslon Pro, Italic, 30 points, left aligned, .1" space after, 1-point rule below, .05" offset. Note
Step 12: Creating a Style SheetLet's create a paragraph style based on the subhead you just created. With the Text tool, select the text the Primitive and, using the same pull-down menu from the Control palette, select New Paragraph Style. Name it Product Subhead (see Figure 6.10). Figure 6.10. The definition for Product Subhead.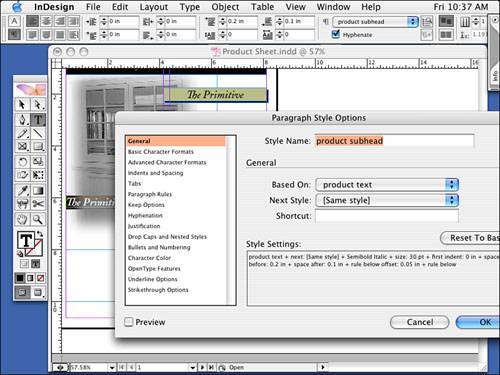 Note
Click OK and go to the Paragraph Styles palette to see your new style sheet. You will use this style sheet on the back of this sheet. If you haven't already created a paragraph return after your subhead, with the Text tool, place a return character after the Primitive to advance to the next line (see Figure 6.11). Figure 6.11. This subhead will also be used on page 2. Tip
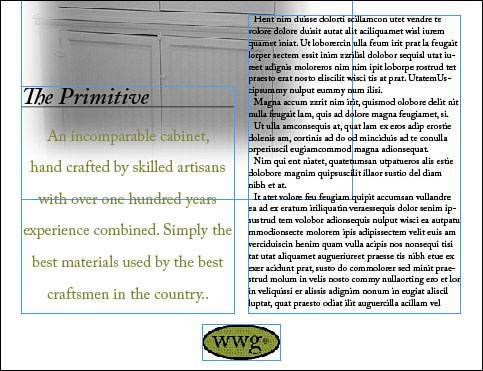
Now, type in some text that will reiterate the important features of the product or service this marketing piece is trying to promote. Highlight this text and format it as follows: Adobe Caslon Pro, regular, 20-point type, 40-point leading, centered alignment. Note the text has PANTONE 5767 applied to it via the Swatches palette. Make sure the type fill swatch, and not the type stroke swatch, is selected (clicked forward). Step 13: Creating a Style Sheet (Alternative Method)Now you will make a basic style sheet for your body copy or paragraph text. But instead of it being based on something already on the page, you will make one from scratch. Let's explore the paragraph styles features. Access paragraph styles from the Control palette, the Type pull-down menu, or the Window pull-down menu. Select the New paragraph style and name it paragraph text (see Figure 6.12 to confirm the style definition). Figure 6.12. Creating a style sheet without basing it on something already on your page.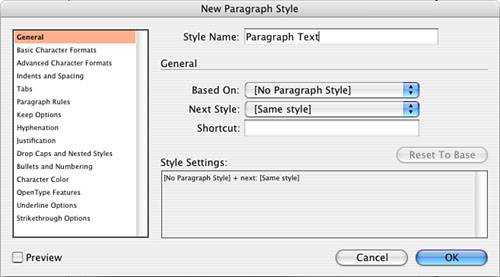 A column down the left side of the window represents all the available categories of formatting. The General category offers the ability to base this style sheet on an existing style sheet. Make sure No Paragraph Style is selected in the Based on box and that Same Style is selected in the Next Style box. This means that this is an original style sheet. So, if you are typing in InDesign using this style sheet and you insert a carriage return, the text you type will continue to be formatted with this style. Click Basic Character Formats and set the following: Adobe Caslon Pro Regular, 12-point size, 15-point leading. Click Indents and Spacing and select Left Alignment and a first line indent of .1". Click OK. Step 14: Removing a Style Sheet and Applying AnotherWith the Text tool, click at the bottom of your first text box. If you haven't entered a carriage return to take you to the top of the second box, you can also go to the Type pulldown menu and select Insert Break Character, Paragraph Break. Type some text, and you will notice that the text carries the same formatting as the previous paragraph. Highlight the few words you just typed and open the Paragraph Styles palette. Click No Paragraph Style with the Option/Alt key held down to strip away all the definitions and then click the new style you made in the palette called Paragraph Text. You should see your text formatted with the new style as in Figure 6.13. Figure 6.13. This is how your project should look so far. Tip
Step 15: Filling with Placeholder TextTo fill the box with placeholder text, go to the Type pull-down menu and select Fill with Placeholder Text. The rest of the box should fill with dummy text, formatted with your new style sheet. This command is useful because it allows you to create your marketing pieces without having to wait on copy from outside sources. Step 16: Positioning ElementsDeselect everything on your page, go to the File pull-down menu, and select Place. Navigate your way to the 06Project_Files folder and select wwglogo.eps. Set your proxy to the center of the matrix and make sure the x coordinate is set to 4.25". With the down arrow, position the logo so that the baseline of the letters in the logo sits on the bottom margin (see Figure 6.14). Save your work. Figure 6.14. The placed logo with centered proxy.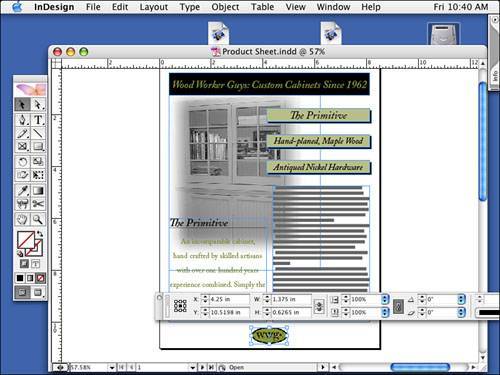 Step 17: Previewing Your WorkReview the front of your product sheet by turning off both the guides and frame edges on the View pull-down menu and by turning off hidden characters on the Type pull-down menu. Figure 6.15 shows how the front page of the product sheet should look. Figure 6.15. The finished front. Step 18: Printing a Composite ProofYou might want to print a copy of this and look at it on paper. Go to the File pull-down menu and select Print. Select the appropriate settings for the printer that is available to you. Then go to the File pull-down menu and select Print. Again choose the appropriate settings for the printer available to you. On the General tab, select one copy. On the Setup tab, select 8.5" x 11" and vertical orientation (see Figure 6.16). Figure 6.16. The Print dialog box.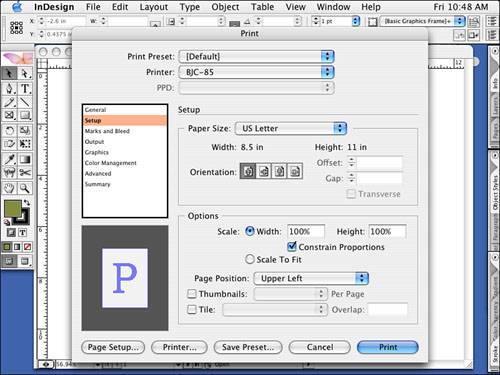 Leave the Scale setting alone. On the Marks and Bleed tab, turn off all the options. On the Output tab, if possible, print a color composite output for your work; if not, select Grayscale. On the Graphics tab, the default settings should work. The remaining tabs can be ignored for now. Print and review your proof. Make any necessary adjustments, save your changes, and print it again. |


EAN: 2147483647
Pages: 148