Installing and Configuring a Software Update Infrastructure
| One of the challenges most network administrators face is the need to distribute software updates to servers and workstations. In small environments, visiting each computer to perform the installation of an update might take only a few hours. However, in medium to large networks, administrators need a secure, reliable, and efficient way of distributing updates as they are released. One of the options available for distributing updates is Software Updates Services (SUS). SUS consists of two components: the server and the client. The server (which can be running Windows 2000 or Windows Server 2003) downloads updates from Microsoft and stores them locally. As soon as the updates are posted to the Windows Update site, they are downloaded and the network administrator is notified that they are available. The clients can then download the updates from the server instead of retrieving them from the Windows Update site. One of the benefits of using SUS is that updates can be tested before being deployed. This eliminates the possibility that clients will download updates before they have been tested and approved by the network administrator. Note Microsoft has recently updated SUS and it is now replaced by Windows Server Update Services (WSUS). You can read more about this product on the Windows Server Update Services website (http://www.microsoft.com/windowsserversystem/updateservices/default.mspx). The information in the following section pertains to both SUS and WSUS. Installing and Configuring Software Update ServicesSoftware Update Services (SUS) are installed on a server to centralize the distribution of software updates. Before you install SUS, make sure that the computer meets the hardware and software requirements outlined in the following lists:
Note A computer running SUS with the minimum hardware requirements listed here is capable of supporting up to 15,000 clients. The software requirements to run SUS are as follows:
Also keep in mind that SUS must be installed on an NTFS partition. The system partition of the SUS host must also be formatted with NTFS. If the computer does not meet the software requirements just outlined, the SUS setup program will not permit you to install the software. Installing Software Update ServicesAfter you have determined that your computer meets all the requirements, you are ready to begin the installation of SUS. The software can be downloaded for free from Microsoft's website. After SUS has been downloaded, you can run setup using the following steps:
Configuring Software Update ServicesIf you choose a typical installation, the SUS server is automatically configured with specific default settings:
If the default settings are sufficient, you do not need to reconfigure the SUS server. If you need to make configuration changes, an SUS server can be configured using the SUS web administration tools. You can access the administration tools in two ways. You can access the administration site using the following URL: http://SUSAdmin. You can also access the web page by clicking Start, Administrative Tools, and selecting Microsoft Software Update Services (see Figure 4.7). To begin configuring the SUS server, click the Set Options link. Figure 4.7. Microsoft Software Update Services Administration website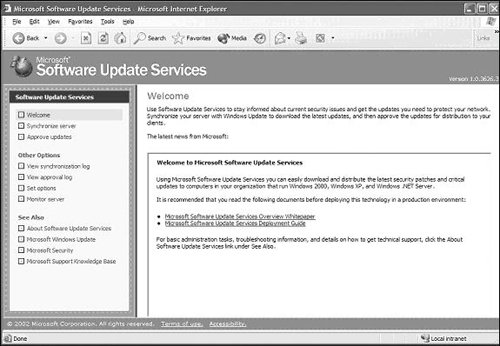 From the Set Options page shown in Figure 4.8, you can configure three different options. Under Select a Proxy Server Configuration, you can specify how the SUS server accesses the Internet. Figure 4.8. The Set Options page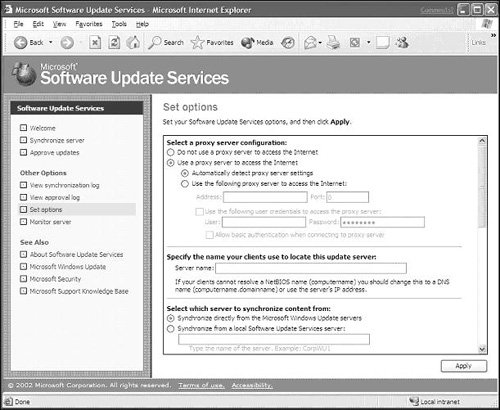 Choose one of the following options based on your network configuration:
The next section enables you to specify the name that clients will use to locate the SUS server. You can specify the NetBIOS name of the SUS server, or, if clients on the network do not support NetBIOS, you can specify the DNS name or the IP address. The final section on the Set Options window enables you to configure the location from which the SUS server will get software updates. An SUS server can retrieve software updates directly from Microsoft, or it can retrieve them from another SUS server. To have the SUS server retrieve updates from Microsoft, select Synchronize Directly from the Microsoft Windows Update Servers. To have the SUS server retrieve updates from another SUS server, select Synchronize from a Local Software Update Services Server and specify the name of the server. An administrator can also change how the SUS server handles updated content. This enables you to specify what the SUS server should do when software packages that are previously approved are updated. You can select from two options:
If you want to test an update before it is downloaded and installed by clients, you should select the second option (Do Not Automatically Approve New Versions of Previously Approved Updates. I Will Manually Approve These Later). This means that any software packages that you previously approved but that have been updated by Microsoft require approval again by the administrator before clients can install them. When an SUS server connects to the Microsoft Windows Update site, it can download two types of content. First, it downloads a file that describes the list of packages (Aucatalog1.cab). Second, it downloads the actual software packages. As an administrator, you can choose whether the SUS server should download the packages or just the catalog file. If the SUS server downloads only the catalog file, any clients that are configured for Automatic Updates first check the list of approved packages from the local SUS server and then connect to the Windows Update servers to download the approved packages. You can also choose to download the packages and store them locally on the SUS server. If the updates are stored locally on the SUS server, any clients configured for Automatic Updates will download the approved software packages directly from the local SUS server. On this screen, you can also specify the locales that will be downloaded by selecting each language that you need to support on the network. Installing and Configuring Automatic Client Update SettingsFor SUS to work, clients need to install a special version of Automatic Update software. When the updated version of Automatic Update is installed, clients can download updates from a server running SUS, and the updates can be installed at a preconfigured interval. The updated version of Automatic Update can run on Windows 2000 and later platforms. Installing Automatic Client UpdateThe Automatic Update client can be installed in a number of ways. You can run the setup locally on each client computer, or you can choose to perform a centralized deployment. Installing the client locally is a very simple process. Simply download the client from Microsoft's website and run the WUAU22.msi file. To install the client automatically using Active Directory, perform the following steps:
Configuring Automatic Client Update SettingsAfter you've installed the Automatic Updates software, you can configure the settings using the software interface on the client or through a Group Policy Object. A few steps must be completed before you can configure Automatic Updates via a Group Policy Object. First, you must load the Automatic Update policy settings template. To do so, open the appropriate Group Policy Object. Under either Computer Settings or User Settings, right-click Administrative Templates and click Add. Type in the name for the Automatic Updates ADM file (WUAU.adm) located in the Windows\inf directory and click Open. After you have completed these steps, you can begin configuring the Automatic Updates Group Policy Object settings for clients on the network. Table 4.1 summarizes the settings that are available (see Figure 4.9). Figure 4.9. Automatic Update group policy settings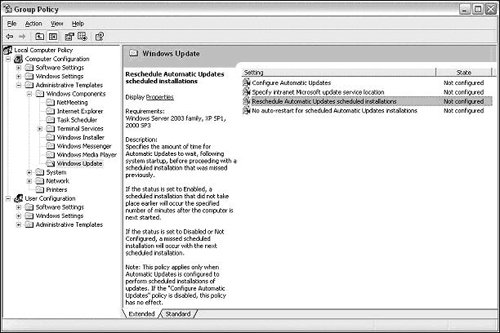
If an environment does not employ Active Directory, Automatic Update settings can be configured only by instituting various Registry entries to make the needed changes. To define which SUS server clients you should use to retrieve updates and send status information to, add the following entries under HKEY_LOCAL_MACHINE\ Software\Policies\Microsoft\Windows\WindowsUpdate:
To configure other settings, such as the day and time that updates should occur, add the following entries under HKEY_LOCAL_MACHINE\Software\Policies\ Microsoft\Windows\WindowsUpdate\AU:
|
EAN: N/A
Pages: 126