| Creating a full-bore eLearning presentation is out of the scope of this book. Instead, the bulk of this chapter is devoted to the features of Captivate that you will use in the creation of eLearning tutorials. These features include: As mentioned earlier, depending on the complexity of the learning objectives and the presentation, you can use these elements to branch to other areas of the presentation. Branching (the official eLearning term is contingency branching), in the context of New Media, should be regarded as nonlinear navigation. A Captivate movie is a linear production, moving in a straight line from the start to the end of the movie. Branching is the exact opposite. For example, a learner answers a question in a slide. Depending upon the response, the playback head could move to a slide later on in the movie or to a completely different movie. The whole process starts with setting the eLearning output options, setting the pass rate, and indicating whether the scoring will be presented to the student. To set the eLearning output options 1. | Open a Captivate movie and select Movie > Quiz Manager (Figure 11.1).
Figure 11.1. Select the Captivate eLearning options from the Quiz Manager. 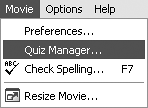
The Quiz Manager dialog box opens.
| 2. | Select the Reporting tab and select "Enable output options."
Your choice in this area determines which type of output is required (Figure 11.2):
- AICC Select if your LMS uses this standard. Be aware that because AICC output uses slide sets, selecting this option will not allow you to use a full screen display during export.
- SCORM Select if your LMS uses this standard.
- Questionmark Perception Select if you use this system.
- Authorware Select if the file is destined for inclusion in an Authorware project. If you do use Authorware, be sure to identify the separator. The default is a comma. Change this if you use a semicolon or other character as your separator.
- E-mail Select if the results are to be sent via email and enter the email address into the adjacent text input box.
Figure 11.2. The first step is to determine which type of output is required. 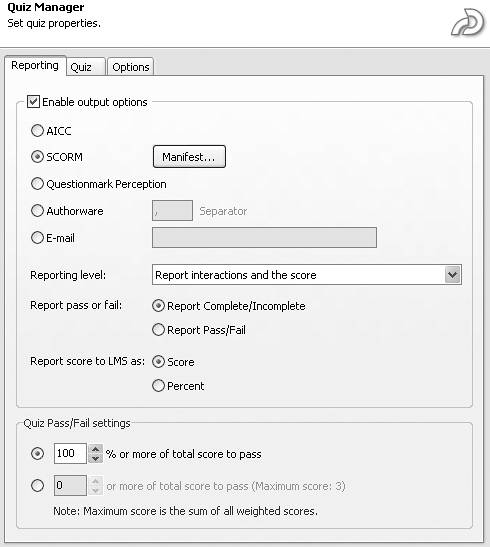
| 3. | In the "Reporting level" drop-down list, select a reporting level from the two options.
| 4. | Select how a pass or fail is reported.The choices are Report (this is traditionally used where no formalized grading structure is in place) or Report Pass/Fail.
| 5. | Choose whether the score should be reported as a percentage or fixed number.
|
 Tip Tip
Two of the choicesQuestionmark Perception and Authorwareare stand-alone products.Questionmark Perception is eLearning software available from the UK-based Question Mark Computing Limited. Selecting this option will output the results as a QML file, which Perception can then use. More details on this product can be found at www.questionmark.com/uk/home.htm. Authorware is a Macromedia product that has evolved from a New Media application into a robust eLearning and presentation software application. Details can be found at www.macromedia.com.
Setting the quiz Pass/Fail level In the "Quiz Pass/Fail settings" area of the Quiz Manager dialog box, you set the value for a passing grade. This number is usually determined by institutional grading standards (at some colleges, for example, a passing grade is 60% or higher) or other corporate/institutional standards. To set the quiz pass/fail level 1. | Open a Captivate movie and select Movie > Quiz Manager. The Quiz Manager dialog box opens.
| 2. | Select the Reporting tab.
| 3. | In the "Quiz Pass/Fail settings" area, select the first item and (Figure 11.3) enter the passing percentage or use the arrows to change the value. Alternatively, select the second item and enter the minimum number of correct questions that will result in a passing grade.
Figure 11.3. Set the passing or failing grade in this area. 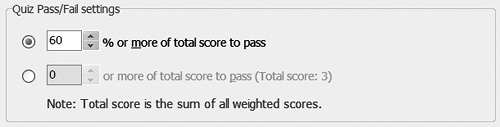
| 4. | Enter the maximum number of incorrect questions that will result in a passing grade.
|
To set the eLearning scoring display 1. | Open a Captivate movie and select Movie > Quiz Manager.
The Quiz Manager dialog box opens.
| 2. | Select the Quiz tab.
| 3. | Select "Show score at end of quiz." When the student finishes answering the questions during movie playback, he or she is presented with the results.
|
Tip
To set the SCORM course manifest options 1. | Open a Captivate movie and select Movie > Quiz Manager.
The Quiz Manager dialog box opens.
| 2. | Click the Reporting tab.
| 3. | Select "Enable output options," select SCORM, and click the Manifest button.
The Manifest dialog box opens (Figure 11.4).
Figure 11.4. In the Manifest dialog box, determine how the score is moved from Captivate to your LMS. 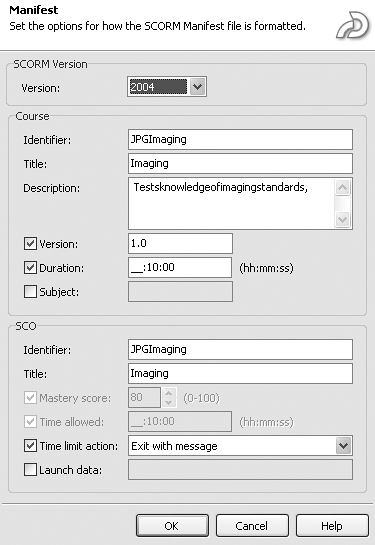
| 4. | Enter a course identifier (Figure 11.5).
Figure 11.5. Enter a course identifier and other information used by the manifest document. 
The course identifier is the keyword used to identify various manifests. The default value, which you can change, is the name of the movie that is currently open. This is a required field.
| 5. | Enter a title.
Students using the LMS will see the title. The default value, which you can change, is the name of the movie that is currently open. This is a required field.
| 6. | Enter a description.
This is a required field.
| 7. | Enter a version number.
This number will be used to differentiate manifests that have the same course identifier. This is a required field.
| 8. | Enter a duration value.
This is the amount of time the student will be given to work with the movie. This value must use the hh:mm:ss format. This is an optional field.
| 9. | Enter a subjecta short description of the movie using key words or phrases.
This is an optional field.
|
Tip
If your LMS uses Shareable Content Objects (SCOs), you can also set their properties and options. These objects are a key part of SCORM's XML-based framework used for learning objects so they can be shared easily among different LMSs. SCOs are reusable self-contained learning units that can be combined and assembled into a package for the LMS to use. To set SCO options 1. | In the Manifest dialog box, if required by the LMS, enter an SCO identifier (Figure 11.6).
Figure 11.6. Shareable Content Objects (SCOs), if any, are identified. 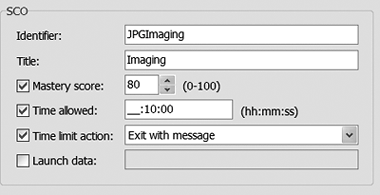
The default value is the name of the movie being used. Identifier is a required field.
| 2. | Enter a title for the SCO.
This is a required field.
| 3. | Enter a mastery score.
The value should be between 0 and 110. Only movies containing score reporting objects such as quiz slides and text entry boxes need to include this option. This is an optional field.
| 4. | Set the time allowed for the test.
This value must use the hh:mm:ss format.
This is an optional field.
| 5. | If you set a time limit for movie completion, select the action to be taken from the "Time limit action" drop-down menu.
| 6. | Select "Launch data" to specify initialization data expected by the SCO.
The adjacent text entry field is optional.
|
|