Launching the Lindows E-Mail Program
Lindows comes with an e-mail program that allows you to send and receive e-mail messages over the Internet. For the e-mail program to work properly, you will need to have access to the Internet through a modem or some other connection.
-
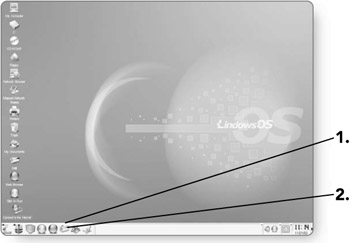
Position the mouse pointer over the E-mail button in the Quick Launch Bar.
-
Click once on the icon to start the e-mail program. By default the e-mail program is Netscape.
Configuring Your E-Mail
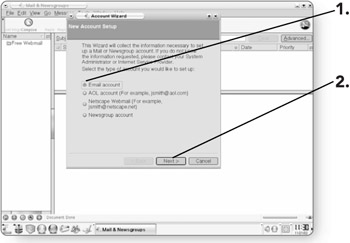
Before you get started setting up the e-mail program within Lindows, you will require some information from your Internet service provider (ISP). You'll need to know the incoming mail server, the outgoing mail server and port number, and your e-mail address. Once you have this information, you are ready to configure your e-mail. When you start the e-mail program for the first time, an Account Wizard dialog box will open to take you step by step through the configuration process.
-
Click on the Email account radio button if it is not already selected. A dot will appear in the circle when it is selected.
-
Click on Next . You'll proceed to the next page in the wizard.
-
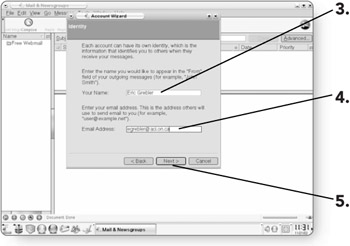
Type your name in the Your Name field. This is how your name will appear in the "From" section when you send people e-mail.
-
Type your e-mail address in the Email Address field. This is the address that your ISP provided you with. Typically it is in the form of <yourname@yourisp.com.>
-
Click on Next . You will proceed to the next page in the wizard.
-
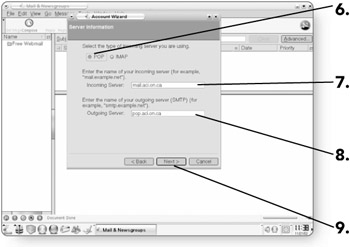
Click on the type of incoming server you are using. Your ISP can provide you with this information.
-
Type the name of the server in the Incoming Server field. Your ISP can provide you with this information.
-
Type the name of the server in the Outgoing Server field. Your ISP can provide you with this information.
-
Click on Next . You will proceed to the next page in the wizard.
-
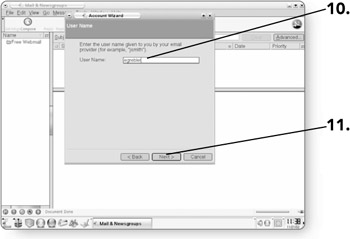
Type a name in the User Name field. Typically your user name is the part of your e-mail address before the @ sign. For example, in the e-mail address <kgrebler@teacher.com>, kgrebler would be the user name.
-
Click on Next . You will proceed to the next page in the wizard.
-
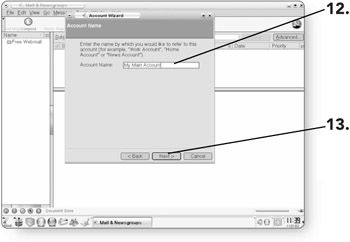
Type a name in the Account Name field. Since you can have more than one e-mail account set up, enter any name for the account. A good idea would be simply to put your name.
-
Click on Next . You will proceed to the next page in the wizard.
-
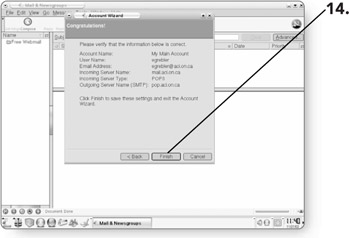
Click on Finish after reviewing that all the settings are correct.
-
Type in your password in the Enter your password dialog box. This is the password that your ISP provided you.
-
Click on OK. Your e-mail program will be configured and ready to use.

Note If for some reason the Account Wizard does not appear when you start the e-mail program, it can be accessed by clicking on File in the menu bar, then selecting New, and then clicking on Account.
Getting to Know the E-Mail Program
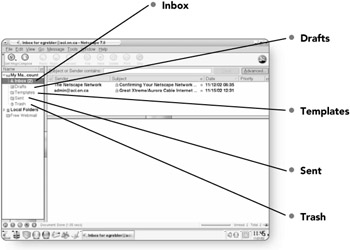
Now that your e-mail program is configured, it's time to get to know the main parts of the screen that you'll be working with.
-
Inbox . This is essentially your mailbox. When someone sends you an e-mail, it initially goes to your Inbox.
-
Drafts . When you create an e-mail, you don't have to send it right away. Unfinished or unsent e- mails can be stored in the Drafts folder.
-
Templates . This provides an area where you can store templates of e-mails that you would use often.
-
Sent . This folder keeps a copy of any e-mail messages that you have sent.
-
Trash . Similar to the Trash on your desktop, the Trash folder stores deleted e-mail until it is emptied.
-
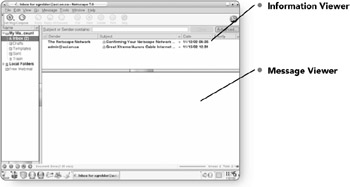
Information Viewer . This area lets you view your messages at a glance, including who sent the message and its subject.
-
Message Viewer . You can view the actual contents of your e-mail in this area.
EAN: 2147483647
Pages: 152