Lindows Fast & Easy
Authors: Grebler E. D.
Published year: 2005
Pages: 25-31/152
Buy this book on amazon.com >>

Viewing the Trash Contents

So you've gone on a trashing spree but can't remember what you've thrown out? Lindows makes it easy for you to view the contents of your Trash file.

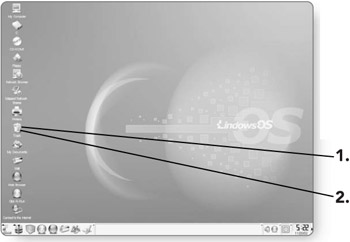
  1. Position your mouse pointer over the Trash on the desktop.

  2. Double - click on the Trash to open up a window that contains all the files that you've trashed.

    click to expand

Restoring the Trash Contents

This is the real reason behind having the Trash. In case you have inadvertently sent a file to the Trash, it can be recovered. Because the Trash is simply a directory on your computer, you can move or copy files in the Trash to other locations.

  1. Double - click on the Trash to open up a window that contains all of the files that you've trashed.

    click to expand

  2. Click and drag the item that you'd like to restore to its new location.

    click to expand

  3. Release the mouse button . A menu will appear.

  4. Click on Move Here. The file will be moved from the Trash directory to its new location.

    click to expand

Emptying the Contents of the Trash

If you are absolutely sure that you want to permanently delete files that you have sent to the Trash, then you can empty the Trash. Keep in mind that once these files have been emptied, they are gone for good.

  1. Position your mouse pointer over the Trash icon on the desktop.

  2. Right-click on the Trash . A menu will appear.

  3. Click on Empty Trash Bin . The files in the Trash will be permanently deleted.

    click to expand

Bypassing the Trash

If you have a file that you know you definitely want to delete from your computer, you can bypass the Trash entirely.

  1. Position the mouse pointer over the file you wish to delete.

  2. Click on it once so that it is selected.

    click to expand

  3. Press Shift+Del . A message will appear, confirming that you want to permanently delete the file.

  4. Click on Delete , and the file will be permanently deleted.

    click to expand

Avoiding the Trash Warning

So you're a person who knows what you want and don't like to be questioned. Whenever you delete a file, Lindows asks if you are sure you want to have that file sent to the Trash. You can bypass this warning so that when you delete a file it is automatic.

  1. Click on a file that you'd like to delete. The file will be highlighted.

  2. Press the Del key . A message will appear, warning you that the file will be sent to the Trash.

  3. Click on the box beside Do not ask again. An X will appear in the box once it is selected.

  4. Click on Trash. The file will be deleted, and you will no longer be warned before a file is sent to the Trash.

    click to expand

Chapter 6: Detective Work

Overview

Have you ever scrambled around the house, looking for your keys? That feeling of complete frustration and utter helplessness is second only to the feeling you get when you can't find your TV remote control! Wouldn't it be nice if you could click a button and, like magic, your keys, remote control, your youth, or anything else that seems to go missing, would magically appear? Although the likelihood of that happening is rather slim, it's nice to know that if you can't find a file in Lindows, that magic solution does exist. In this chapter, you'll learn how to:

  • Search for files or directories

  • Conduct advanced searches

  • Save search results

Searching

Rather than spending hours looking for files, directories, and programs, you can quickly search all areas of your computer using the Search function built into Lindows. There are a variety of options when it comes to searching your computer.

Searching for Files or Directories by Name

If you know the name of a file or directory you are looking for, you can easily search for it by name.

  1. Click on the Launch button . The Launch menu will appear.

  2. Click on Search to open up the Search dialog box.

    click to expand

  3. Type the name of the file or directory you are looking for in the Named text box.

    You now have to determine where you'd like your computer to search for the file.

    1. Type a forward slash (/) in the Look in text box if you want to search your entire computer for the file or directory.

      OR

      click to expand

    2. Click on the Browse button to open up a dialog box where you can choose a specific directory to search in.

  4. Click on the Find button . The search will begin.

    click to expand

    Note  

    Depending on the size of your hard drive, the directory you are searching, and the speed of your computer, the search time can vary.

As the computer finds files or directories that match the criteria that you have set up in the Search window, results will be displayed in the bottom portion of the window.

Tip  

You can double-click on a file in the Results window, and it will open in the application it was created in.

Sorting Search Results

Once the computer has found the files and directories that match your criteria, you can sort them based on their name, size, date they were last modified, and their location.

  1. Position your mouse pointer over the category you'd like to sort.

    click to expand

  2. Click once on the category, and all of the files found will be sorted in either ascending or descending order.

  3. Click on the category again to change the sort order.

    click to expand

    Note  

    A down arrow in the category indicates a descending sort, while an up arrow indicates an ascending sort.

Searching for Files by Type

Every file has a different file type or extension, depending on what program was used to create it. For example, a file created in Microsoft Word has the file extension .DOC after the file name, a simple text file has the extension .TXT, and many images have the file extension .GIF after the file name. You can search for files of a particular type within the Search window.

  1. Click and drag to highlight the area in the Named text box. Once it's highlighted, anything you type will replace the existing text.

    click to expand

  2. Type an asterisk with a period (*.) and then the file extension that you want to search for. For example if you were looking for an Adobe PDF file you'd type in *.PDF or if you were looking for a Microsoft Excel file you'd type in *.XLS.

    click to expand

    Note  

    The asterisk (*) is called a wild card and represents any combination of characters . This means that when you conduct a search using the wild card and a file extension, all files of that type, regardless of their name, will be found.

  3. Click in the Look in text box to select where you want to look.

  4. Type in a forward slash (/) to search your entire computer, or click on the Browse button to define a particular area to look in.

  5. Click on Find , and all the files with the extension you specified will be displayed.

    click to expand

Searching for Files by Date

If you happen to know when a certain file was last modified, you can search for it by date. This can be done in conjunction with or without a search with the file name. In other words, if you know the file name and about when it was created, you can search by both its name and by the date it was modified. Otherwise, if you only know about when it was created, you can search by date only.

  1. Click on the Date Range tab in the Search window. This will bring up your options for searching by date.

  2. Click on the check box beside Find all files created or modified. An X will appear in the box to indicate it is selected.

    click to expand

  3. Click on the between option if it is not already selected. This type of search is good if you know between what dates the file was last modified.

  4. Click on the down arrow beside the first date to bring up a calendar from which you can select an initial date to begin the search.

  5. Click on a date that you want to begin the search from.

    click to expand

  6. Click on the down arrow beside the second date to bring up a calendar to set the date to end the search.

  7. Click on a date that you want to end the search.

  8. Click on the Find button , and the search will begin.

    click to expand

Alternatively, if the file was modified recently, you can search for files modified within the last 60 hours.

  1. Click on the Date Range tab in the Search window. This will bring up your options for searching by date.

  2. Click on the during the previous text box . Here you can tell the computer how many hours back to look for that particular file.

  3. Type in a number , up to 60, for the number of hours back that the file may have been modified.

  4. Click on the Find button , and the search will begin.

    click to expand

Lindows Fast & Easy
Authors: Grebler E. D.
Published year: 2005
Pages: 25-31/152
Buy this book on amazon.com >>