| To create a project, click the New Project button. Alternatively, you can go through the File menu as well. The new project dialog appears. Figures 3-3 and 3-4 show the project types available for VB. Figure 3.3. The New Project dialog. 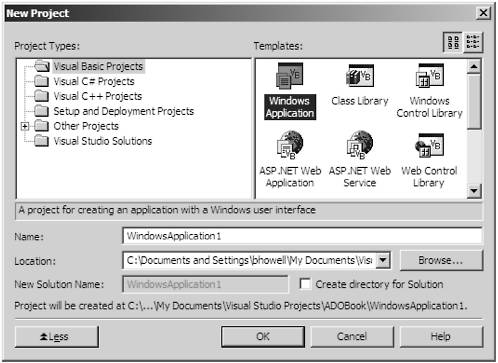 Figure 3.4. More project templates. 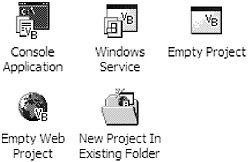 A similar list appears for C#. For C++ the list includes these types, plus Microsoft Foundation Classes (MFC) and Active Template Library (ATL) projects. If you click each icon, a brief description appears. We will be working with the Windows application, console application, and ASP .NET web application project types. We will create each type so you can become familiar with them. Creating a Console Project A console application is a command-line application. It does not have any UI built in. Console applications are useful for performing background processing where you do not need or want the overhead of a Windows graphical user interface (GUI). Some uses for this include posting large numbers of transactions to a database, producing character-based reports , and running batch-jobs during off hours using a scheduling program. To create a console application, choose the Console Application project template. Change the name of the project to ADOBook03-01 as in Figure 3.5 and click OK. Figure 3.5. Changing the project name. 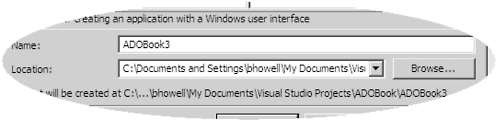 Visual Studio will create an empty console application with one code module. The code module will contain a procedure template for Sub Main(). This is the entry point for our application. Let's add one line of code to the Main procedure. Since this is our first application, we'll use the old "Hello World" standby. Module Module1 Sub Main() Console.WriteLine("Hello World") End Sub End Module Now let's compile our program. Select Build ADOBook03-01 from the Build menu (Figure 3.6). Figure 3.6. The Build menu. 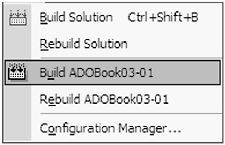 You will see the output window roll out and the display of the status of the compile. When the compile is finished, it will display any error statistics. Assuming all went well, we can run our little program. To do this, open a console window. Do not use the standard console icon that comes with Windows. If you look in the Start menu, under Microsoft Visual Studio .NET Tools you will see a Visual Studio .NET Command Prompt entry. This is just like a regular command prompt except that it sets up the environment for executing .NET applications. You may want to create a shortcut to this on your desktop or command bar for easy access. You may also want to create a shortcut so that the command prompt starts up in the Visual Studio Project folder so you can easily navigate to the folder your executable is in. Once the command prompt is started, navigate to the folder your program is in. By default, Visual Studio creates the executable in a bin subfolder under your project folder. On my machine the path is: C:\Documents and Settings\bhowell\My Documents\Visual Studio Projects\ADOBook\ADOBook03\ADOBook03-01\bin Once you have found the folder, type the name of our little program, ADOBook03-01 and press enter. You should see "Hello World" on the screen and the command prompt should return. TIP  | If you have Display the Full Path in the Address Bar Setting turned on in the folder options of explorer, you can copy the path to the clipboard and then paste it on to the command line in the Command window. Navigate to the bin folder in explorer, select the text in the address bar, and press Ctrl+C to copy it to the clipboard. Then go to the Command window, type cd (the change directory command) and a space, then open the System menu, and select EditPaste from the menu. The path will be pasted in and the command will execute. |
VB 6 The standard module in VB 6 was different than the standard module in VB .NET. VB 6 code modules were in the global namespace. Any public variables or functions declared in a module had application scope. In addition, variables and functions were public by default. VB 6 code modules did not have to be declared or instantiated, and were not reference types. In fact they were not types at all; they were just scope identifiers. Code and data in all modules were created when the program executed and remained in scope until the program terminated. In VB .NET, modules are full reference types. They behave much like classes except they cannot be instantiated or declared and they cannot inherit or be inherited. When I first started with VB .NET, I created my first app much the same way I did in VB 6. I always use Sub Main as my startup object. That way I can perform program initialization functions and any security checks before I show my main form. Well, the program started fine except that when I tried to transfer control to my startup form, the whole application terminated . What I discovered was that as soon as the last code in the module finishes executing, the module goes out of scope and terminates. Since my form was declared as a public module-level variable, it also was destroyed. In VB .NET when the last reference to an object is destroyed or goes out of scope, the object is automatically destroyed and all objects contained within it. I had to use the Application.Run(frmMainForm) method to successfully transfer control to my form without ending the program.
Creating a Windows Project To create a Windows application, click the New Project button and select the Windows application template icon. Change the name of the project to ADOBook03-02. When you are done, the project window should look like the one in Figure 3.7. Figure 3.7. A Windows Forms project. 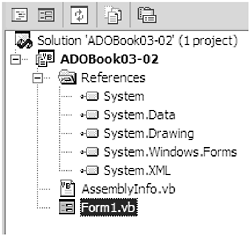 As expected, Visual Studio created a blank form and opened its designer window. As you can see in Figure 3.7, Visual Studio added new references to the project. System.Windows.Forms is the new Windows Forms class library. This library effectively wraps most of the Windows user API into a .NET class library. The System.Drawing library wraps the Graphical Device Interface (GDI+) APIs. Between these two, you have everything you need to create a robust UI. With the form's designer already open, resize the form and drop a button on it. Change the Text property of the form to Hello, and change the button's Text property to Say Hello. Your form should look like what is illustrated in Figure 3.8. Figure 3.8. Hello World form. 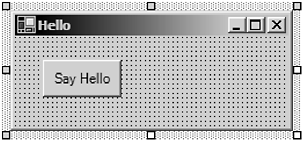 Next, double-click the Command button. This will create a function template for the button's click event. Add the following code to the click event: Private Sub Button1_Click(ByVal sender As System.Object, _ ByVal e As System.EventArgs) Handles Button1.Click MessageBox.Show("Hello World") End Sub Click the Run button to compile and run the program. We do not need the command prompt for this because it is a Windows program. After the program compiles, our window should appear. Click the Say Hello button. A message box should appear. Close the message box. To end the program, close the window.  | 