The ASP.NET Security Controls
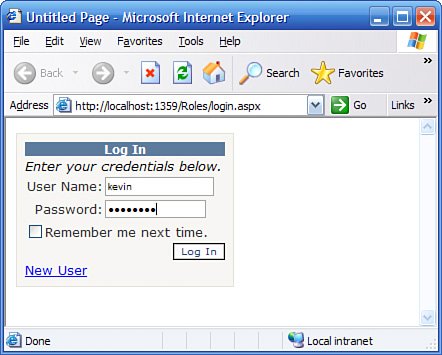
| One of the things that is possible now through the use of the Membership and Role providers is the creation of a standardized set of controls that provide a customizable user interface for many of the common tasks related to securing an ASP.NET application. With previous versions of ASP.NET, you not only had to create your own Membership and Role system, but you also had to create your own controls for facilitating login, user validation, password entry, display of the currently logged-in user, and much more. This section shows you the new controls that ship with ASP.NET 2.0 that sit on top of the provider model and will drastically reduce the amount of code you have to write and the amount of time you have to spend writing redundant security code. LoginThe Login control is a control that facilitates the prompting for a user's name and password. In addition, it can display a checkbox that controls whether or not the validation cookie is persistent. To use it, simply create a login page (usually called login.aspx) for your web application and open up the Toolbox. From the Toolbox, in the Login group, drag the Login control onto your form. This control has a host of configurable options. You can customize the appearance of every aspect, you can specify the URLs for icons for each option, you can choose whether to include a link to create a new user, and you have many more choices. Figure 28.3 shows a login control on a form that is fully functional, attached to the default Membership provider, and took just minutes to create. Figure 28.3. The Login control in action. LoginNameThe LoginName control is a simple control that displays the name of the currently logged-in user, regardless of the means by which they logged in. To use it, just drag it onto the form in the location where you want the user's name to appear and then change the properties to customize the look and feel as needed. For example: <asp:LoginName runat="server" FormatString="Welcome to the site, {0}" /> This will display the text "Welcome to the site, Kevin" if the user name is "Kevin." If the user is not authenticated, the LoginName control will be empty and not render any text. LoginStatusThe LoginStatus control indicates the user's logged-in status by presenting them with a link. If they are logged in, there is a link that will let them log out. If they are logged out, there is a link to let them log in. You can configure the URLs the user will be sent to for each action or use the defaults. As with many of the other controls, all you have to do is just drag this control into the appropriate location from the Toolbox and you're ready to go. Note that if your application doesn't allow anonymous access to the page on which the LoginStatus control exists, the user will be redirected to the login page upon clicking the Logout link. LoginViewOf all of the new controls that ship with ASP.NET 2.0, the LoginView control provides what is probably one of the biggest savings in terms of effort and lines coded. In past versions of ASP.NET, there was no easy way to design a page where certain users saw one piece of content while other users saw a different piece of content based on their Role membership. In addition, it was also cumbersome to render a page where logged-in users saw one view and anonymous users saw a different view. The LoginView control makes all of that easy and you can use the smart tags inside the Visual Studio 2005 editor to switch between views or use the HTML source and edit the views manually. The LoginView control allows you to encapsulate several different views using templates and show them to the user depending on their security access and logged-in status:
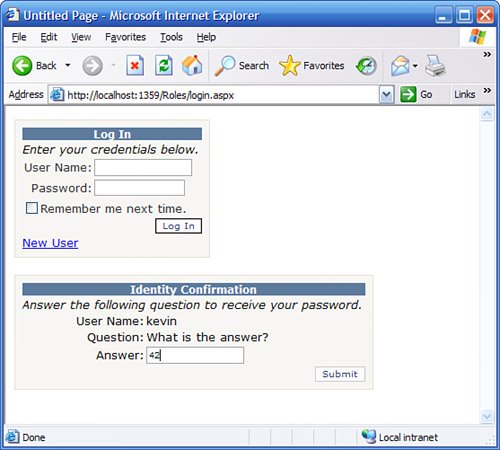
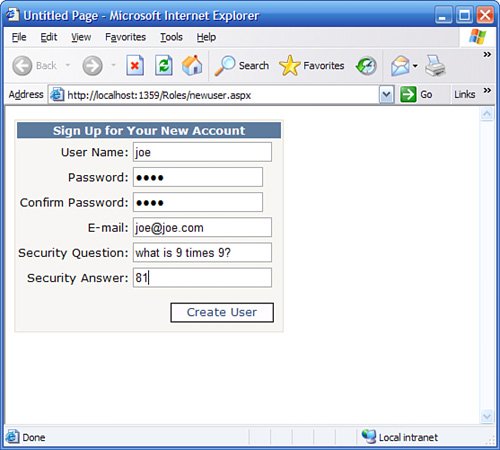
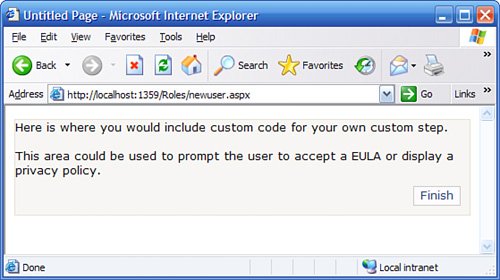
Take a look at the following code snippet, which uses some of the Roles defined earlier to render different content to different security levels: <asp:LoginStatus runat="server" /><Br /> <asp:LoginView runat="server"> <AnonymousTemplate> Greetings Guest User!<br /> </AnonymousTemplate> <RoleGroups> <asp:RoleGroup Roles="Administrators,Validated Users"> <ContentTemplate> <asp:LoginName runat="server" FormatString="Welcome to the site, {0}" /><br /> You have full access to this page! </ContentTemplate> </asp:RoleGroup> <asp:RoleGroup Roles="Applicants"> <ContentTemplate> You are an applicant and, as such, do not have full access to this page. </ContentTemplate> </asp:RoleGroup> </RoleGroups> </asp:LoginView> As you can see, it is extremely easy to take entire sections of your page and render different views conditionally based on security clearance, role membership, and authentication status. In the preceding sample, members of the Administrators and Validated Users roles will be given access to secure information, whereas members of the Applicants role will only receive a limited view of the page. You no longer have to create multiple panels and write code that conditionally makes some panels visible or invisible in your code-behind. It is now easy to separate the views of the page, the code is efficient and reusable, and anyone else reading your code should have no trouble figuring out what information is bound for which users. PasswordRecoveryAs we all know, users forget their passwords. One of the most annoying tasks of creating a secure ASP.NET application in version 1.1 was figuring out just how to support users who had forgotten their passwords. Often a complex series of pages needed to be created to deal with this situation, taking time and productivity away from coding the actual application and business logic. With ASP.NET 2.0, you can simply drag the PasswordRecovery control onto a form, and that form then automatically supports password recovery. If your membership provider has been configured to require the user to answer a security question, the PasswordRecovery control will not only prompt the user for that answer, but will validate the answer. You will need to tell the PasswordRecovery control the information it needs to construct and send e-mail messages, but other than that it takes very little effort to use. Figure 28.4 shows this control prompting the user for their security question. If the user enters the correct answer, their password will be emailed to them based on the email address stored for that user in the data source. Figure 28.4. The PasswordRecovery control in action. ChangePasswordThe ChangePassword control allows the end user to change their password. The control handles all of the work of verifying the old password, ensuring that the new password meets the password strength requirements, and storing the new password in the underlying Membership data store. Just like all the other controls in this section, the display is incredibly customizable, allowing you to specify text and icons for every major part of the control. In addition, you can choose to redirect the user to a different page if the password change was successful. To use this control, just drag it onto a form and you're ready to go. CreateUserWizardThe task of creating a new user is now also made extremely easy. To create a page that will create a new user, simply create an empty form and then drag a CreateUserWizard control onto it. By default, this control will prompt the user for their user name, email address, password (including confirmation), and a security question if the Membership provider is configured accordingly. You can choose to add your own custom steps to the middle of the process, prompting the user for additional information or injecting your own code into the process. One possible use for the additional steps for this wizard is to prompt for additional information or to do things like prompt for confirmation of a EULA or privacy policy. Figures 28.5 and 28.6 show the CreateUserWizard control in action. Figure 28.5. The CreateUserWizard first page. Figure 28.6. The CreateUserWizard displaying a custom wizard page. |
EAN: 2147483647
Pages: 298