| You have two primary ways of filling areas with a solid color. With the Fill dialog box, you can quickly blanket an entire layer or a selected area of a layer with color. The Paint Bucket tool operates in a more controlled manner, filling only portions of areas based on properties that you set on the options bar. Either method works especially well for those times when you want to cover large, expansive areas with a single color. To fill a selection or layer with color 1. | Using any of the selection or marquee tools, select the area of your image you want to fill with color.
If you want to fill an entire layer, it's not necessary to make a selection.
| 2. | To select a fill color, do one of the following:
- Click either the current foreground or background color swatch at the bottom of the toolbox (Figure 8.2) to open the Color Picker; then select a color.
Figure 8.2. Clicking the foreground or background color swatch in the toolbox opens the Color Picker. 
- From the Swatches palette, click any color to select it.
| 3. | From the Edit menu, choose either Fill Selection or Fill Layer to open the Fill Layer dialog box (Figure 8.3).
Figure 8.3. The Fill Layer dialog box offers several options for filling a layer or selection with color. 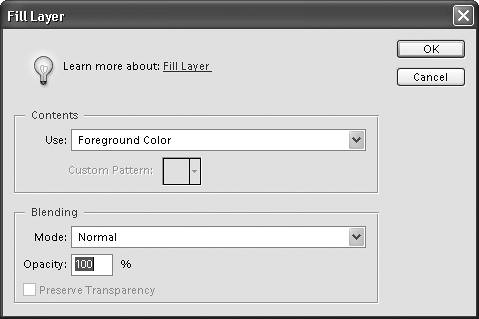
| 4. | From the Use drop-down menu, choose a source for your fill color (Figure 8.4).
Figure 8.4. The Use drop-down menu contains various sources from which to choose a fill color. Choose the Foreground Color option to apply a specific color chosen from the Color Picker or Swatches palette. 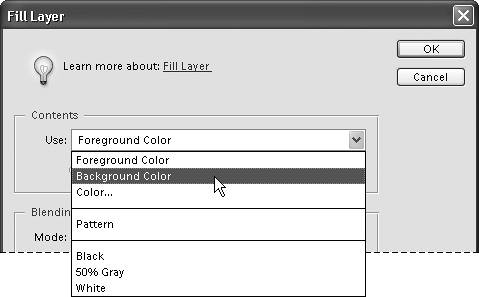
In addition to the foreground and background colors, you can use the Fill command to fill a selection or area with a pattern or with black, white, or 50 percent gray. Or you can choose Color to open the Color Picker and select a different color altogether.
| 5. | From the Blending area of the dialog box, select a blending mode and opacity for your fill. (For more information on blending modes, see "About Opacity and Blending Modes" in Chapter 5.)
| 6. | Click the Preserve Transparency check box if you want to preserve a layer's transparency when you apply the fill.
| 7. | Click OK to close the dialog box.
The selection or layer is filled with the color and properties you specified (Figure 8.5).
Figure 8.5. In this example, an area of the Background layer is selected (left), then filled with a color using the Fill dialog box (right). 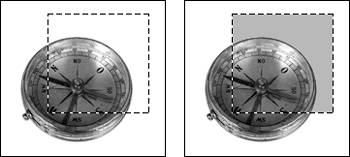
|
 Tips Tips
To save time, you can use simple keyboard shortcuts to fill a selection or layer with either the current foreground or background color. Alt+Backspace will fill a selection or layer with the current foreground color, and Ctrl+Backspace applies the current background color. To swap the foreground and background color swatches in the toolbox, press X. To convert the foreground and background color to black and white, press D.
About Preserving Transparency The Preserve Transparency check box works just like the Lock Transparent Pixels button on the Layers palette. If the check box is highlighted and you fill a layer that has both opaque and transparent pixels, the transparent areas will be locked (or protected), and only the opaque areas of the layer will be filled (Figure 8.6). If you check Preserve Transparency and then try to fill an empty layer (one containing only transparent pixels), the layer will remain unfilled. That's because the whole layer, being transparent, is locked. If you fill a flattened layer, like Photoshop Elements' default background layer, the check box is dimmed and the option isn't available because a background layer contains no transparency. Figure 8.6. When a layer (left) is filled using the Preserve Transparency option, the transparent areas of the layer will remain protected and untouched, and only the layer object will accept the fill color (right). 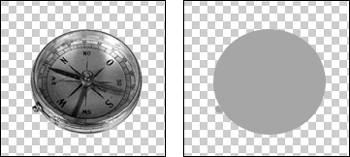
|
To apply fill color with the Paint Bucket tool 1. | Select the Paint Bucket tool from the toolbox (K) (Figure 8.7).
Figure 8.7. The Paint Bucket tool. 
| 2. | Select a foreground color from either the Color Picker or the Swatches palette.
| 3. | On the options bar, check that Foreground is selected in the Fill drop-down menu (Figure 8.8).
Figure 8.8. To fill an area with a color, Foreground must be selected on the options bar's Fill drop-down menu. 
The Paint Bucket tool can also be used to fill an area with a pattern.
| 4. | Again on the options bar, select a blending mode and opacity setting, if desired (Figure 8.9).
Figure 8.9. The Paint Bucket tool takes advantage of all of Photoshop Elements' blending modes and opacity options. 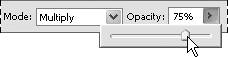
| 5. | Still on the options bar, set a Tolerance value; then specify whether you want the colored fill to be anti-aliased, to fill only contiguous pixels, or to affect all layers (Figure 8.10).
Figure 8.10. The options bar contains several settings you can use to fine-tune the Paint Bucket's fill properties. 
For more information on these options, see the sidebar "How Does That Paint Bucket Tool Work, Anyway?"
| 6. | Click the area of your image where you want to apply the colored fill.
The selected color is painted into your image (Figure 8.11).
Figure 8.11. The Paint Bucket tool fills areas based on their tonal values. Here it automatically selects and fills just the light-colored background area. 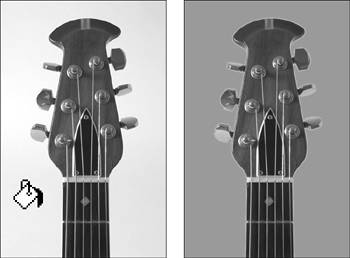
|
How Does That Paint Bucket Tool Work, Anyway? If you're familiar with other painting and drawing programs, Photoshop Elements' Paint Bucket tool may leave you scratching your head. In many paint programs, the Paint Bucket tool does little more than indiscriminately dump color across large areas of an image. But Photoshop Elements' Paint Bucket tool is much more intelligent and selective about where it applies color. Depending on the parameters you set in the options bar, it fills areas based on the tonal values of their pixels. The Tolerance slider determines the range of pixels the Paint Bucket fills. The greater the value, the larger the range of pixels is filled. Click Anti-aliased to add a smooth, soft transition to the edges of your color fill. Click Contiguous to limit the fill to pixels similar in color or tonal value that touch, or are contiguous with one another. If you're using the Paint Bucket tool to switch your car's color from green to blue, this ensures that only the car's green pixels are turned bluenot all the green pixels within the entire image. If you select the Use All Layers check box, Photoshop Elements recognizes and considers pixel colors and values across all layers, but the fill is applied only to the active layer. This means that if you click the Paint Bucket tool in an area of any inactive layer, the fill will be applied to the current active layer (Figure 8.12). Figure 8.12. If the All Layers check box is selected and you click the Paint Bucket tool in an inactive layer (top), the fill for that specific area is applied to the active layer (bottom). 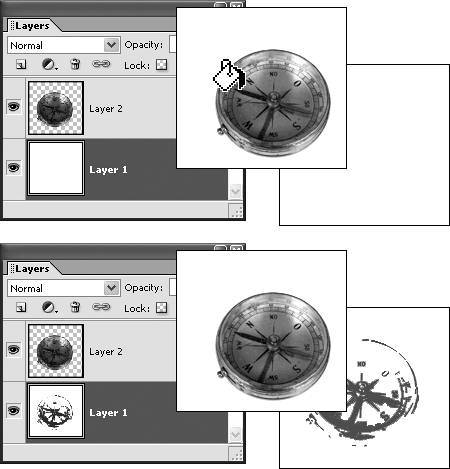
|
|