| With the Save for Web command, Photoshop Elements provides a simple, automated method that not only saves an optimized copy of your original image, but also preserves the original high-resolution image, untouched and intact. Simply choose from a list of 12 predefined settings, and your image is instantly optimized for the Web. You may want to experiment with the custom optimization settings, but the 12 predefined settings should satisfy the requirements of most of your optimization tasks. To save an image for the Web 1. | Open the image you want to optimize.
| 2. | From the File menu, choose Save for Web (Figure 10.3), or press Alt+Shift+Ctrl+S. The Save for Web dialog box opens on top of the active image window, displaying the image in side-by-side original and optimized previews (Figure 10.4).
Figure 10.3. Open the Save for Web dialog box from the File menu. 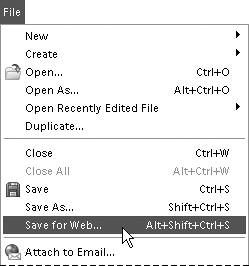
Figure 10.4. The Save for Web dialog box. The image on the left shows the original image. The image on the right shows a preview of what the same image will look like after it's been optimized. 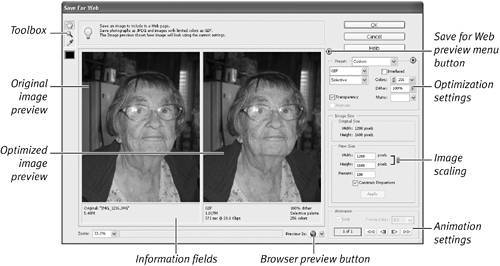
| 3. | From the Preset drop-down menu in the Save for Web dialog box, choose a predefined optimization setting (Figure 10.5).
Figure 10.5. Choose from the list of predefined settings for JPEG and GIF or PNG optimization formats. 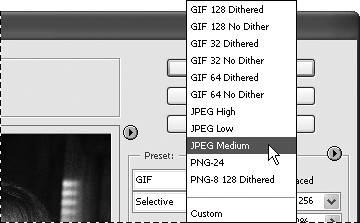
The various drop-down menus within the Preset portion of the dialog box change to reflect the setting you've selected (Figure 10.6), as does the optimized preview in the center of the dialog box.
Figure 10.6. Once you've chosen a predefined optimiza tion setting, the rest of the options change accordingly. Here, the options have automatically changed to reflect the Medium JPEG optimization format. 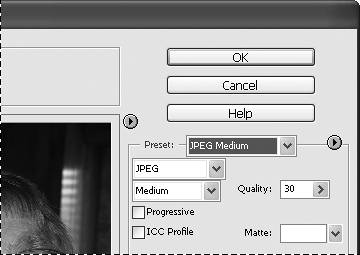
| 4. | Click the OK button in the Save for Web dialog box (Figure 10.7).
Figure 10.7. Click OK in the Save for Web dialog box to save your optimized image. 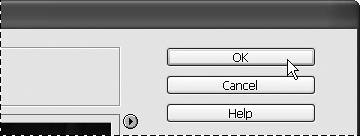
| 5. | In the Save Optimized As dialog box, type a new name for your file and verify that the file type matches the optimization format you chose in the Save for Web dialog box (Figure 10.8).
Figure 10.8. Enter a name and destination for your optimized file in the Save Optimized As dialog box. 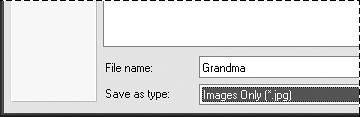
| 6. | Choose a location for your file and click Save.
The Save Optimized As and Save for Web dialog boxes will automatically close, and your optimized image will be saved to the location you specified.
|
The Save for Web Preview Menu The Preview menu (Figure 10.9), which you can find by clicking the triangle button to the right of the optimized image in the Save for Web dialog box, is one of those easy-to-overlook tools in a space already packed with check boxes, palettes, and drop-down menus. Figure 10.9. It's a little hard to find, but you can use the Preview menu to control the appearance of the optimization preview and the information displayed below it. 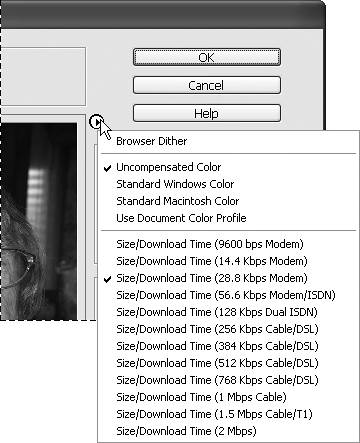
As its name implies, the Preview menu works with the image preview (the optimized side of the image preview, to be exact) and establishes parameters for the way that the image preview is displayed. Depending on the color space you select in the top portion of the Preview menu, you can view your image as it would appear in a browser on your own monitor or on a standard Macintosh or PC monitor, or you can see a preview of how it would appear if it were saved with its color profile. The bottom portion of the menu offers a variety of standard dial-up and high-speed Internet connection settings. Whichever connection speed you choose here determines the estimated connection speed value displayed in the information box below the optimized preview image (Figure 10.10). So, by doing nothing more than selecting from a handful of menu options, you can get a good idea of how much time it will take anyone, with any number of connection speeds, to download and display your image. Figure 10.10. After you've chosen a connection speed from the preview menu, the Save for Web dialog box uses that input, along with the optimization format you've selected, to estimate the size the file will be when optimized and the time it will take to download. That information is displayed below the optimized preview. 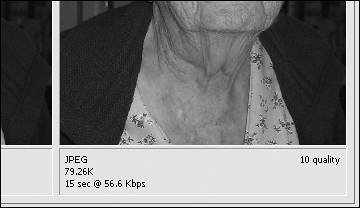
None of the settings you choose from the Preview menu affect the actual image file in any way. They're for the purpose of previewing only and are completely independent of the attributes you actually apply to an image in the Settings portion of the dialog box. There's no way to include a setting for connection speed with an image, since connection speed is completely dependent on an individual's modem and the service offered by that person's Internet provider. |
About Color Models and Color Lookup Tables Although you certainly don't have to be proficient in Web color theory to successfully save images for the Web, a little background information on the different color models will help you to make more informed decisions as you make color choices for your Web images. When you optimize an image using the GIF format, Photoshop Elements asks you to pick a color model from the Color Reduction Algorithm drop-down menu. Since GIF images are limited to just 256 colors, color models help to define which colorsfrom the vast spectrum of millions of colorswill be used in any individual optimized image. Sets of colors are given priority over others depending on the color model chosen, as follows: Perceptual color leans toward colors to which the human eye is most sensitive. Selective color draws from the largest possible range of colors, incorporating colors from the Web-safe palette as much as possible. Selective is the default option. Adaptive color favors those colors that appear most often in a particular image. For instance, a seascape may contain colors primarily from the blue spectrum. Restrictive (Web) is limited to the standard 216 Web colors and typically produces color the least true to the original image. Most browsers and personal computer monitors are capable of displaying in thousands and millions of colors, so you'll probably have very little occasion to use this option. After you've selected a color model and chosen a maximum number of colors from the Colors drop-down menu, Photoshop Elements builds a color lookup table specific to the image you're optimizing. A color lookup table can be thought of as a palette of color swatches. If an original image contains more colors than you specify for its GIF version's color lookup table, any missing colors will be re-created as best they can, using the existing number of colors in the color palette. If the original image contains fewer colors than you've specified, the color lookup table will shrink and will contain only the colors in the image. Either way, no unnecessary color information is included in the color lookup table, meaning that your image's file size is kept to a minimum. |
|