| This section discusses the new feature called Secure Socket Layer (SSL) VPN or Web VPN on the VPN Concentrator. SSL VPN provides remote access connectivity from almost any Internet-enabled location using a Web browser and its native SSL encryption. This section presents a general discussion, configuration steps and troubleshooting issues for different modes of operation for SSL VPN. SSL VPN can be operated in one of the three modes based on your corporation needs and requirements: Clientless This mode of operation is for web-based applications (web server access with http/https), and file shares (CIFS). A standard browser acts as a VPN client in this mode, and the VPN Concentrator acts as a proxy. Thin client This mode of operation is for fixed TCP port applications (such as e-mail/Telnet/ssh, terminal services, and so on). Any multi-channel protocol that requires port negotiation (FTP, for example) does not work with this mode. Java applet (generally less than 100K) is downloaded using a browser on a client PC which proxies TCP connections. SSL VPN Client (SVC) A larger client (generally around 500K max) is delivered to the end user and the applications that can be accessed are very similar to those available via regular IPsec Remote Access VPN client. This client is delivered via a web page, and never needs to be manually distributed or installed.
The next few sections present more detailed discussions on all three modes of operation. Clientless SSL VPN As mentioned before, in Clientless SSL VPN mode of operation, a standard browser is used as a VPN client. There is no requirement to download any applet on the client PC, as the VPN Concentrator acts as a proxy in this mode. Clientless SSL VPN is supported for website access and web applications such as NT and Active Directory file sharing (CIFS). For websites, the URL is mangled to present to the end user. For NT and Active Directory file sharing, the application is translated to HTTP, and presents to users in HTML format. The sections that follow discuss the following topics: Configuration steps for basic SSL VPN connection Troubleshooting steps for Basic SSL VPN connection Configuration steps for web server access Troubleshooting steps for web server access Configuration steps for CIFS access Troubleshooting steps for CIFS access
Configuration Steps for Basic SSL VPN Connection Work through the following steps to configure Basic SSL VPN Connection: Step 1. | Go to Configuration > Interfaces > Ethernet2, and check Allow WebVPN HTTS sessions to turn on WebVPN. If you want to allow the HTTPS web access to the VPN Concentrator for Management purpose, check Allow Management HTTPS sessions.
| Step 2. | Be sure WebVPN box is checked under Tunneling Protocols when you go to the General tab on the page Configuration > User Management > Base Group. You also can set this up in the specific group.
| | | Step 3. | To enable client authentication using digital certificates for both HTTPS administrative and WebVPN sessions, go to the Configuration > Tunneling and Security > SSL > HTTPS page, and check the Enable HTTPS box, define the HTTPS port 443, and check Client Authentication. Note that WebVPN sessions require an active authorization server. By default Client Authentication is not checked.
| Step 4. | Go to the Configuration > Tunneling and Security > SSL > Protocols page and check at least one encryption protocol. The default is that all three protocol options are checked. It is recommended to set everything at the default.
|
Troubleshooting Steps for Basic SSL VPN Connection When working with Basic SSL VPN Connection, you may encounter these problems, which are described in the sections that follow: Inability to Establish SSL Session with VPN 3000 Concentrator Work through the following steps to troubleshoot the inability to establish an SSL session: Step 1. | To verify general connectivity, ping by name and IP address of the VPN Concentrator's from the client PC. If the ICMP is blocked between the client and the VPN Concentrator, try http or https on the public interface and see if you can connect.
| Step 2. | If one vendor's browser does not work, try a different browser and check to see if you get the web portal page.
| Step 3. | Be sure the interface you are connecting to is configured to support WebVPN Connections by going into the Configuration > Interfaces > Ethernet2 page.
| Step 4. | Verify that the Interface you are connecting to has an SSL certificate and that the certificate is valid by going into Administration > Certificate Management. Look under the SSL Certificates section. View the certificate to see the details and validity of the certificate.
| Step 5. | Enable Allow Management HTTPS Sessions on the interface and try connecting to https://VPN_Concentrator_IP_Address/admin. This also will fail if the issue is with the certificate.
| Step 6. | Verify that the group the user is connecting to supports WebVPN.
| Step 7. | Verify the SSL/HTTPS configuration by verifying that the HTTPS is enabled, the port defined and authentication is turned on.
| | | Step 8. | Turn on SSL Event Class severities 1-9. This gives you general reason codes for the failure.
| Step 9. | Use an external sniffer to trace the network traffic. Verify that the three-way TCP handshakes complete successfully. If the TCP handshake completes, you should see an SSL handshake occur. The sniffer also helps you determine the cipher suites being negotiated and where in the session the establishment process is breaking.
| Step 10. | Verify that the cipher being offered by the client is supported by the configuration of the concentrator:
- Server Gated Cryptography (SGC) is not supported. - Minimum 56 bit keys. - Verify that the certificates you are using are valid; the smart card certificate can be read by the browser. - Try using the self-signed concentrator certificates.
| Step 11. | If you still fail to create a HTTPS session to the concentrator, contact the Cisco Support Team.
|
Inability to Log in to VPN 3000 Concentrator If you can get the Web VPN portal but cannot establish an SSL VPN connection because of login failure, work through the following steps to diagnose the problem: Step 1. | Enable logging for the auth and webvpn classes at severity levels 19, try to connect to the SSL VPN, and see if it shows any error.
| Step 2. | If you are using an external AAA server, verify that you have network connectivity to the AAA server.
| Step 3. | Verify that the client's browser is not configured to use a proxy server.
| Step 4. | Perform a test authentication to the external AAA server from the VPN 3000 Concentrator.
|
Configuration Steps for Web Server Access To provide the links of the websites on the Web VPN portal after the user logs in, work through the following steps: Step 1. | Complete the configuration steps explained in the section entitled "Configuration Steps for Basic SSL VPN Connection."
| | | Step 2. | Configure access to URLs in the Configuration > Tunneling and Security > WebVPN > Servers and URLs screen. To add a new URL for the website, click on Add. In the Add page, specify the Name as it should appear on the Web VPN portal page, server type (HTTP/HTTPS Server), and the actual web site URL.
|
Note Outlook Web Access (OWA) on the Microsoft Exchange Server can be accessed using the procedure previously explained, as OWA on Exchange Server works just like any other web application.
Troubleshooting Steps For Web Server Access You might run into one of the following problems with web server access through SSL VPN connection: The sections that follow detail the troubleshooting of these two issues. But before you delve into those details, it is important to know how to turn on debug for website access issues on the VPN Concentrator. The next section discusses this topic. Turning on WEBVPN Event Class for Logging Work through the following steps to turn on debug and collect the log to troubleshoot issues pertaining to web access through SSL VPN tunnel: Step 1. | From VPN Concentrator GUI, go to the Monitoring > WebVPN Logging page, and turn on the logging by checking Enable. Be sure to define the username and path to capture the amount of information you desire.
| Step 2. | View or copy the log files from the Administration > File Management page. WebVPN Logging creates pairs of files; Mangled.xxx and Original.xxx. The Original file contains the request sent from the Concentrator to the Web Server and the response sent from the Web Server to the Concentrator. The Mangled file contains the response message sent from the Concentrator to the browser.
|
Inability to Browse to Website If you cannot browse to a website, work through the following steps to troubleshoot the issue: Step 1. | Try to access the website directly (locally) without going through the SSL VPN connection.
| | | Step 2. | Be sure DNS Server is configured and functioning correctly on the VPN 3000 Concentrator by pinging to the website using the domain name from the Administration > Ping page. If you do not get a DNS response, check to be sure that the DNS server is defined correctly, by going to the following page: Configuration > System > Servers > DNS. Be sure that the DNS server IP address is defined correctly and Enabled is checked.
| Step 3. | Check to see if the Proxy server configuration is needed for website access. If so, from the VPN GUI, go to Configuration > Tunneling and Security > WebVPN > HTTP/HTTPS Proxy and define the proxy server.
| Step 4. | Go to Configuration > System > Events > Classes > Add and set the severities of WEBVPN Event Class to 1-8, which will display basic connectivity. Use the WEBVPN Logging tool or Sniffer trace to track down the failure.
|
Website Displays Incorrectly Work through the following steps to troubleshoot issues with website displays: Step 1. | Try to access the website directly (locally) without going through the SSL VPN connection.
| Step 2. | Clear the browser's cache and retry with a new window.
| Step 3. | Be sure that there are no pop-up blockers enabled for the browser. Pop-up blockers can cause a page to be blocked, resulting in a blank page.
| Step 4. | Establish another WebVPN session using a different type of browser (for example, if Internet Explorer is not working, then try Mozilla or Netscape), and try accessing the website again.
| Step 5. | Verify proxy settings/requirements on the browser.
| Step 6. | Refer to the current VPN 3000 Concentrator version release notes, or the new version release notes, and check for any possible bug.
| Step 7. | If no known bug found is found, then enable WEBVPN logging and start the log right before the failed display with the procedure shown in the section entitled "Turning on WEBVPN Event Class For Logging."
|
Configuration Steps for CIFS Access With SSL VPN, you can allow shared drives and folders to be navigated through a WebVPN session. Sharing and authentication rules defined on the server will be enforced. Work through the following steps to configure CIFS access on the VPN 3000 Concentrator: Step 1. | Complete the configuration steps explained in the section entitled "Configuration Steps for Basic SSL VPN Connection."
| | | Step 2. | On the VPN 3000 Concentrator GUI, go to the Configuration > System > Servers > NBNS page and define a WINS Server IP address, and turn it on by checking Enabled.
| Step 3. | Configure access to URLs in the Configuration > Tunneling and Security > WebVPN > Servers and URLs screen. To add a new URL for the file server, click on Add. In the Add page, specify the Name as it should appear on the Web VPN portal page, the server type (CIFS Server), and the actual File Server location.
|
Troubleshooting Steps for CIFS Access Work through the following steps if you cannot browse to a file share: Step 1. | Check to see if you can locally access the CIFS without going through the SSL VPN.
| Step 2. | Verify the access method. Check to see if it is a configured server or if it is the user entering the server name or trying to browse the network.
| Step 3. | Verify that the access method desired is allowed from the group the user is mapped to.
| Step 4. | Make sure an NBNS server is defined and it is working. Go to Configuration > System > Servers > NBNS on VPN 3000 Concentrator GUI and be sure that the WINS server IP address is correct and that the Enabled box is checked.
| Step 5. | Verify that the resource you are trying to access is allowed.
| Step 6. | Keep in mind that when browsing to a non-shared service, you will still be prompted for a username and password. Hence, you need to determine if the failure is a login failure or access is not allowed for reading the file.
|
Thin Client Not every application can be translated to the web format as discussed in the previous section. Hence, a thin client may be required to support additional applications that cannot be webified. Using a port-forwarding configuration, it is possible to access some common TCP-based applications. Port forwarding requires a very small application that runs on the end user's system, often in the form of Java or ActiveX. The client application is a port forwarder. It listens for connections on a port that is defined for each application. When packets come in on that port, they are tunneled inside of an SSL connection to the SSL VPN device, which unpacks them and forwards them to the real application server. To use the port forwarder, the end user simply points the application he wants to run at his own system rather than at the real application server. You can also think of this as a local proxy server that accepts connections on a local host address on the remote user's computer and proxies the traffic over the SSL VPN through the SSL VPN gateway to the destination server. Port forwarding is an effective technique, but it also has some limitations. For port forwarding to work, the applications need to work well and predictably in their network connectivity patterns and requirements. ActiveX or Java applet support is required on the client machine, along with the permissions in the browser to run them. Examples of applications that are not web-enabled but can be addressed with port forwarding are common mail protocols, including SMTP, POP3 and MAPI, and remote shell programs, such as Telnet. The thin client is delivered via Java from the Concentrator to the client PC. A local thin client acts as a proxy and tunnels and forwards (most) TCP application traffic. Some system permissions may be required, particularly for hostname mapping. Port mapping works on TCP-based applications, with static ports. The WebVPN user chooses this mode when downloading the Java Applet by clicking the Start Application Access option from the portal page or from the floating toolbar. The VPN 3000 Concentrator can be configured to automatically download the applet on the client PC. The client PC should have Java Runtime Environment (JRE) 1.4.1 or greater. When the applet is downloaded to start Port Forwarding mode, the hosts file (available at C:\WINNT\system32\drivers\etc\hosts) is backed up as "hosts.webvpn". Once the original file is backed up, the applet then adds a Mapping in the hosts file for each port forwarding entry configured in the port forwarding list that is assigned to the user. The sections that follow cover the following topics: Configuration steps for port forwarding Java applet debugging Troubleshooting steps port forwarding Configuration steps for MAPI proxy Troubleshooting Steps for MAPI proxy Configuration steps for E-mail Proxy Troubleshooting steps for E-mail Proxy
Configuration Steps for Port Forwarding Work through the following steps to configure port forwarding for a single channel TCP-based application: Step 1. | Complete the configuration steps explained in the "Configuration Steps for Basic SSL VPN Connection" section.
| | | Step 2. | Go to the Configuration > User Management > Groups to select your group. Click on the WebVPN Port Forwarding tab, then click on Add to add the port forwarding mapping for a single-channel TCP application. You need to define the Name and local/remote TCP Port. The local port can be any port between 1024 to 65535. The remote port is the actual Application port. The Remote Server IP address is the application server IP address. Port forwarding can be configured globally on the Configuration > Tunneling and Security > WebVPN > Port Forwarding page for all SSL VPN groups.
| Step 3. | Go to Configuration > User Management > Groups > Modify to edit group configuration. Under WebVPN tab, Enable Port Forwarding."
|
Java Applet Debugging Before you delve into the details of troubleshooting steps for Port Forwarding and MAPI Proxy, you must know how to run Java Applet Debug, which is discussed in this section. Work through the following steps to enable the Java applet debugging: Step 1. | Open the Control Panel.
| Step 2. | Select Java Plug-in.
| Step 3. | Click the Advanced tab (this might vary based on the JRE version).
| | | Step 4. | For Java Runtime Parameters, make entries as shown in Figure 8-9:
-Dcisco.webvpndebug=n
Here, n = 0, 1, 2, 3 or 4
- 0 = debug messages are disabled - 1 = errors and configuration messages - 2 = warnings and status messages - 3 = stats, data and stack dumps (to debug applet crashes) - 4 = additional stack traces
A debug level of 2 should be sufficient to obtain useful debugging information for the Java applet.
Figure 8-9. Java Run-time Debug Settings 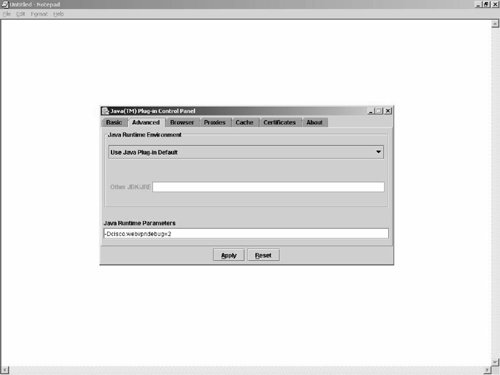
|
Troubleshooting Steps for Port Forwarding If a single-channel TCP application does not work over port forwarding, work through the following steps to correct the problem: Step 1. | Verify that the right version of JRE is installed on the client PC.
| | | Step 2. | From DOS, enter netstat a to ensure that the right ports have been opened on the client PC.
| | | Step 3. | Verify that the hosts file has been modified correctly, if the name of the application server is defined. If the hosts file is not modified, ensure that you are not running into any write permission issues. Look at the following files on the c:\WINNT\system32\drivers\etc directory:
C:\WINNT\system32\drivers\etc>dir Volume in drive C is SYSTEM Volume Serial Number is E891-B6C4 Directory of C:\WINNT\system32\drivers\etc 06/13/2005 10:53p <DIR> . 06/13/2005 10:53p <DIR> .. 06/13/2005 10:52p 16,000 hosts 02/25/2005 10:43a 740 hosts.webvpn C:\WINNT\system32\drivers\etc>
The hosts file should contain the port forwarding mapping. The hosts.webvpn file is the original hosts file that will be restored when the Port Forwarding application is closed.
As an example, the hosts file should contain Port Forwarding address mappings that look like this:
127.0.0.2 TAC.cisco.com # added by WebVpnPortForward at Fri Feb 25 10:43:20 EST 2005 127.0.0.2 HTTS # added by WebVpnPortForward at Fri Feb 25 10:43:20 EST 2005
Improper termination might require you to restore the hosts file manually by renaming hosts.webvpn back to hosts. If the hosts file cannot be modified, the Application Access Applet will be populated with loopback interface addresses and port numbers.
| Step 4. | Verify that DNS is working correctly from the Concentrator.
Go to Administration > Ping and ping to the TCP application using the domain name. If with domain name you are unable to ping, but with IP address, you can ping, then the problem is with the DNS, and you need to check the DNS Server IP to make sure that one is defined and that it is a correct DNS Server.
| Step 5. | Verify that the right port numbers are defined on the Concentrator local Port that is local to the PC; Remote Port is the translated port through the applet.
| Step 6. | Get a sniffer trace from the private side of the concentrator, which will give details on communication information between the VPN Concentrator and the end application.
| Step 7. | Use the procedure discussed in the section entitled "Java Applet Debugging" to debug the applet-related issues.
|
Configuration Steps for MAPI Proxy Even though MAPI Proxy uses a Port Forwarding mechanism to communicate with the Exchange server, you do not need to configure any port forwarding mapping on the VPN Concentrator. One very important requirement is that you must have connected your Outlook MAPI client to the Exchange server locally before you configure the VPN Concentrator for the MAPI Proxy. Work through the following steps to configure the MAPI Proxy: Step 1. | Connect your Outlook 2000 MAPI Client to the VPN Exchange server on your Local LAN. This will load all the mapping information to the registry of the client PC.
| Step 2. | Complete the configuration steps explained in the "Configuration Steps for Basic SSL VPN Connection" section.
| | | Step 3. | Go to the Configuration > User Management > Groups > Modify page to edit the group you have configured. Go to the WebVPN tab, and check Enable Outlook/Exchange Proxy.
| Step 4. | You do not need any other configuration on the Outlook2000 MAPI Client.
|
Note Outlook2000 MAPI client support was introduced in Version 4.1.5. Outlook2003 MAPI client is not supported in any version. However, you can use the Full Tunneling feature on Version 4.7, which does not rely on Port Forwarding.
Troubleshooting Steps for MAPI Proxy Work though the following steps to troubleshoot the MAPI Proxy: Step 1. | Work through the troubleshooting steps as explained in the "Troubleshooting Steps for Single Channel TCP Application" section.
| Step 2. | You must have already successfully connected to the exchange server through LAN access. The Application Access Applet on the client PC will read Registry Keys populated during the LAN connection to the Exchange Server. Both Global Catalog Server and Exchange server can be detected through the registry entries.
| | | Step 3. | The Application Access Applet is populated with the server names determined from the following registry entries:
- HKCU\Software\Microsoft\Windows NT\CurrentVersion\Windows Messaging Subsystem\Profiles\<default profile> - HKCU\Software\Microsoft\Windows Messaging Subsystem\Profiles\<default profile> - Exchange server Key: 13dbb0c8aa05101a9bb000aa002fc45a\001e6602 - Global catalog server Key: dca740c8c042101ab4b908002b2fe182\001e6602
If either the Exchange Server or Global Catalog server is not found, MAPI Proxy will fail. Example 8-16 shows JAVA console output (refer to the section entitled "Java Applet Debugging" for details on how to turn on debug for Java Applet) when Exchange server is found but the Global Catalog server is not found.
Example 8-16. Java Console Debug Output when Exchange Server Is Found But Global Catalog Server Is Not Found| [View full width] user diretory = C:\Documents and Settings\mygroup\ Looking for DLL: "C:\Documents and Settings\mygroup\WebVpnRegKey4-63-67-72-190.dll" DLL exits? YES System dir: C:\WINDOWS\System32 Windows dir: C:\WINDOWS System dir: C:\WINDOWS\System32 Windows dir: C:\WINDOWS WebVPN Service: debug level: 3 Default Exchange Profile: Mygroup Exchange Looking for exchange server in: Software\Microsoft\Windows NT\CurrentVersion\Windows Messaging Subsystem\Profiles\Mygroup Exchange\13dbb0c8aa05101a9bb000aa002fc45a Exchange server: My-local-exchange Server Looking for global catalog server in: Software\Microsoft\Windows NT\ CurrentVersion\Windows Messaging Subsystem\Profiles\Mygroup Exchange\ dca740c8c042101ab4b908002b2fe182 Registry error: Query value key failed updateRegistry: orig value: ncalrpc,ncacn_ip_tcp,ncacn_spx,ncacn_np,netbios,ncacn_vns_spp updateRegistry: new value: ncalrpc,ncacn_http,ncacn_ip_tcp,ncacn_spx,ncacn_np,netbios  ,ncacn_vns_spp Found hosts file: C:\WINDOWS\System32\drivers\etc\hosts Exchange = true ,ncacn_vns_spp Found hosts file: C:\WINDOWS\System32\drivers\etc\hosts Exchange = true
|
| Step 4. | Ensure that you have Enable Outlook/Exchange Proxy checked under the group setup.
| Step 5. | Ensure the DNS is working from the Concentrator.
|
Configuration Steps for E-mail Proxy With the E-mail Proxy configuration (this is different than MAPI Proxy as discussed earlier), the Concentrator acts as a relay for secure e-mail protocols. Work through the following steps to configure E-mail Proxy: Step 1. | Go to Configuration > Interfaces > Ethernet 2 to modify public interface settings. Under the WebVPN tab, check Allow POP3S sessions, Allow ICAP4S sessions, and Allow SMTPS sessions.
| Step 2. | Browse to Configuration > Tunneling and Security > WebVPN > E-mil Proxy page to define Authentication, mail server IP, and so on.
| Step 3. | Refer to the following link for additional details on VPN Concentrator and e-mail client configuration: http://www.cisco.com/univercd/cc/td/doc/product/vpn/vpn3000/4_7/config/enduser2.htm#wp1589079
|
Troubleshooting Steps for E-mail Proxy Work through the following steps if the e-mail client is unable to send and receive e-mail: Step 1. | Be sure SMPTS, POP3s, or IMAP4S are open on the public interface.
| | | Step 2. | Be sure SSL is enabled for incoming and outgoing mail in the e-mail client.
| Step 3. | If the client is trying to use an incorrect port number or if SSL is not enabled on the client, there is no notification from the concentrator.
| Step 4. | Be sure that SSL is working between the VPN Client and the Concentrator.
| Step 5. | If the SSL connection is failing, you will see SSL events on the VPN Concentrator as follows:
71 06/02/2005 14:38:04.410 SEV=6 SSL/20 RPT=1 172.16.172.119 Received an SSL alert fatal/SSL_ALERT_UNKNOWN_CA. 72 06/02/2005 14:38:04.410 SEV=6 SSL/15 RPT=617 172.16.172.119 Socket is closing (context=0x6A0004): received alert. 73 06/02/2005 14:38:04.410 SEV=5 EMAILPROXY/47 RPT=172.16.172.119
| Step 6. | Verify that the concentrator configuration is for Required Authentication.
| Step 7. | Verify the username and password that is set on the client with respect to the configuration on the concentrator.
| Step 8. | If piggyback authentication is configured, verify that the username/password format is correct as follows:
vpnusername:mailusername vpnpassword:mailpassword
With Piggyback authentication, be sure the WebVPN session is up; otherwise, piggyback will not work.
It is important to note that Concentrator log messages generally will display what happens in the process but will not display failures in client-server authentication.
| Step 9. | Test the account locally, and then through the concentrator. Generally if SSL can come up and the account works, the E-mail Proxy should work fine.
|
Thick Client (SSL VPN Client) Thick Client, or the SSL VPN Client, provides the full tunneling ability for the Remote Access VPN Connection on VPN Concentrator. Thick client, or the SSL VPN Client software (generally 500K max), is delivered via automatic download (Active X, Java, or EXE) to the user PC. This client is delivered via a web page (the device that the user is connecting to) and never needs to be manually distributed or installed. No reboot is required after the SSL VPN client is downloaded and installed. It provides similar access to traditional IPsec VPN client, but provides better accessibility over firewalls and NAT than the traditional IPsec VPN Client. SSL VPN Client usually requires administrative privileges for initial install, but in the absence of admin privileges, a stub-installer is used. The sections that follow discuss both the configuration and troubleshooting of SSL VPN Client implementation. The discussion is organized as follows: Configuration Steps for SSL VPN Client Work through the following steps to configure the SSL VPN client configuration on the VPN 3000 Concentrator: Step 1. | Complete the configuration steps explained in the "Configuration Steps for Basic SSL VPN Connection" section.
| Step 2. | Go to Configuration > User Management > Groups > Modify to edit the group that you have configured for Basic SSL VPN connection. Under the WebVPN tab, check Enable Cisco SSL VPN Client to turn on the SSL VPN client option. The Require Cisco SSL VPN Client option is used if you want to allow the users to use only the SSL VPN client. If you do not want to remove the SSL VPN Client at the end of the session, check the Keep Cisco SSL VPN Client option.
| Step 3. | For IP address assignment, DNS/WINS Server address, and so on, follow the configuration steps explained in the section entitled "VPN Concentrator Configuration" under "Remote Access VPN Connection."
|
Troubleshooting Steps for SSL VPN Client (SVC) The sections that follow examine the following issues that can arise with SSL VPN Client implementations: SSL VPN Client Establishment Issues Before the VPN Concentrator can push the SSL VPN client software to the client PC, the tunnel must be established. Follow the configuration and troubleshooting steps in the section entitled "Basic SSL VPN Connection" to correct SSL VPN connection issues. Once the SSL VPN connection is established, the SSL VPN client software is downloaded and installed on the client PC. After that, SSL VPN client builds a full tunnel with the VPN Concentrator. If the SSL VPN Client installs correctly, usually you will not run into any tunnel establishment problems for the SSL VPN client. If you run into problems with the SSL VPN client installation, follow the steps outlined in the next section to correct the problem. SSL VPN Client Installation Issues If you can navigate to the WebVPN Portal page, but the client does not install, work through the following steps to fix the problem: Step 1. | Verify the group configuration for SSL VPN client.
Go to Configuration > User Management > Groups > Modify to verify that the group your user is in has Enable Cisco SSL VPN Client enabled.
| Step 2. | Check which account is being used and what rights it has.
You can do this by right-clicking on My Computer and going to Users and Groups. Select the Users by double-clicking on it, and then find out which group it is a member of. With Groups, Administrators, and Power Users, both ActiveX and Java are enabled by default. The Users group has more restrictions applied and only Java is allowed to run with default privileges.
| | | Step 3. | Verify the browser settings.
The following Internet Explorer settings are required for SSL VPN Client (SVC) Installation. Use these settings as a guideline for other browsers:
- To access and launch the executable page, enable the following parameters: Scripting > Active scripting > Enable Downloads > File download > Enable - To launch ActiveX, enable the following parameters: Scripting > Active scripting > Enable ActiveX controls and plug-ins > Download signed ActiveX controls > Enable ActiveX controls and plug-ins > Run ActiveX controls and plug-ins > Enable - To launch Java using the Microsoft Virtual Machine, enable the following parameters: Scripting > Active scripting > Enable Scripting > Scripting of Java applets > Enable ActiveX controls and plug-ins > Download signed ActiveX controls > Enable Microsoft VM > Java permissions > High, medium or low safety
This information can be found from the following link:
http://www.cisco.com/univercd/cc/td/doc/product/vpn/ciscosec/csd/csd30/csdfaq.htm#wp1056392
| Step 4. | Add the VPN 3000 Concentrator to the trusted Zone list. This ensures that the security settings are set to low, which by default allows both ActiveX and Java to be run as described in the following Release note: http://www.cisco.com/en/US/partner/products/hw/vpndevc/ps2284/prod_release_note09186a0080405b6c.html#wp535991
You can go to Configuration > System > Servers > Firewall to add the VPN 3000 Concentrator to the trusted zone list.
| Step 5. | Check the version of Sun Java.
If Sun Java is being used, then ensure that there is a "Java Plug-In" option under the control panel and select this to check that your browser of choice is selected under the Browser Tab.
| Step 6. | Clear the browser cache and cookies.
Clear the browser cache and cookies, and be sure to restart the browser.
| Step 7. | Try a different browser vendor.
If one browser vendor does not work, try a different browser vendor.
| Step 8. | Try a different website.
If one site does not work, try to access a different website that you know uses ActiveX or JAVA.
| Step 9. | Verify the proxy settings.
SSL VPN Client can read and work only with Microsoft Internet Explorer proxy settings as of the writing of this book.
| Step 10. | Analyze the client PC environment.
If you still have issues, the application and system event logs on the client PC might not be indicating failures. In this case, use the WINMSD.exe file to generate a full dump of the client PC, and look at the SetupApi.log file to look at specific install issues that may exist.
|
|