Part III: Browsing the Catalog
In this part, you will create the Web page that displays the catalog items for the selected category. The display includes photos and text descriptions of the catalog items.
Step 1
If you don't already have the Catalog project open, open it now. Open the file DEFAULT.HTM. Add the code on the facing page to the SCRIPT section of the page to trap the OnClick event for a category. When a user clicks a category, your program will display a page featuring the items in that category.
Sub divCategories_OnClick() ` User selects a category ` Variables Dim objEvent Dim strTarget Dim strQuery On Error Resume Next ` Get target element Set objEvent = Window.Event strTarget = objEvent.SrcElement.ID ` Build query string If strTarget <> "divCategories" Then ` Build target URL Select Case strTarget Case "Category1" strQuery = "catalog.asp?Category=1" Case "Category2" strQuery = "catalog.asp?Category=2" Case "Category3" strQuery = "catalog.asp?Category=3" Case "Category4" strQuery = "catalog.asp?Category=4" End Select End If ` Navigate to the new page Window.Navigate strQuery End Sub
Save the Web page, and close it.
Step 2
Choose New from the File menu. In the New dialog box, add an ASP page to the project, name the page CATALOG.ASP, and click OK. This is the only piece of the project that depends on server-side functionality. You will use the server side only for receiving the submitted category identifier from the home page.
Step 3
The CATALOG.ASP page is used to view all the items in a particular category. The items for the category are retrieved by using the ADC. The query run by the ADC is based on the category that received the click on the home page. Add the following lines to the BODY section of the code to insert the ADC in the page:
<!-- The Advanced Data Control --> <OBJECT ID="datItems" CLASSID="CLSID:BD96C556-65A3-11D0-983A-00C04FC29E33" ALIGN="baseline" BORDER="0" WIDTH="10" HEIGHT="10"> <PARAM NAME="SQL" VALUE= "SELECT * FROM Products WHERE CategoryID=<%=Request.QueryString("Category")%>"> <PARAM NAME="SERVER" VALUE="[your site name]"> <PARAM NAME="CONNECT" VALUE="DSN=HomePage"> </OBJECT> WARNING: This project was written using Preview 2 of Internet Explorer 4.0 and Remote Data Services. Verify that the CLSID for the Advanced Data Control has not changed. This can be done by selecting Into HTML/ActiveX Control from the Visual InterDev Insert menu and inserting the ADC into the Web page.
Step 4
Close CATALOG.ASP in Visual InterDev, and right-click it on the FileView tab in the project window. Choose Open With from the pop-up menu. In the Open With dialog box, open the file by using Microsoft FrontPage Editor.
In FrontPage Editor, choose Background from the Format menu. Set the page background color to white, and click OK.
Step 5
The navigation toolbar for this page will be a set of four pushbuttons in a table. To create the table, move to a new line in the page and choose Insert Table from the Table menu. In the Insert Table dialog box, select one row and four columns, set the table width to 100 percent, and click OK. Save your work, and return to Visual InterDev.
Open CATALOG.ASP in the text editor of Visual InterDev, and locate the table that you just inserted in the page. Use the <INPUT> tag to add a pushbutton to each of the four cells in the table. Here is the code:
<TABLE BORDER="0" WIDTH="100%"> <TR> <TD WIDTH="25%"> <INPUT TYPE="BUTTON" NAME="BtnBack" VALUE="BACK"> </TD> <TD WIDTH="25%"> <INPUT TYPE="BUTTON" NAME="BtnNext" VALUE="NEXT"> </TD> <TD WIDTH="25%"> <INPUT TYPE="BUTTON" NAME="BtnOrder" VALUE="ORDER"> </TD> <TD WIDTH="25%"> <INPUT TYPE="BUTTON" NAME="BtnHome" VALUE="HOME"> </TD> </TR> </TABLE>
Step 6
Your page will use Dynamic HTML to display product information as the user browses the catalog. Add the following lines to the BODY section of the code to insert two product information text areas in the page:
<CENTER> <P> <!-- The item name --> <SPAN ID="ItemName" STYLE="font-family:verdana; font-size:20;"> </SPAN> </P> <P> <!-- The item description --> <SPAN ID="ItemDescription" STYLE="font-family:verdana; font-size:12;"> </SPAN> </P> </CENTER>
Step 7
Each item description should be accompanied by a photo. To display a photo of any item in the catalog, insert an <IMG> tag between the two <SPAN> tags in the code. Here is the code for the image:
<!-- The item photo --> <P><IMG ID="imgItem" SRC=""></P>
Step 8
You must also add some code to the page to display the information from the database. You want to show the first item in the category when the page is first loaded. You can accomplish this by creating a Window_OnLoad event in the HEAD section. Here is the code:
<SCRIPT LANGUAGE="VBScript"> <!-- Sub Window_OnLoad() DisplayData End Sub Sub DisplayData() ` Variables Dim objRecordset Dim objTextRange ` Get objects Set objRecordset = datItems.Recordset ` Display item name ItemName.InnerText = objRecordSet("ProductName").Value & ", $" & _ objRecordset("ProductPrice").Value ` Display item GIF imgItem.src = "/Catalog/Images/" & _ objRecordset("ProductImage").Value ` Display item description ItemDescription.InnerText = _ objRecordset("ProductDescription").Value & "" End Sub --> </SCRIPT> Step 9
Next provide code for operating the navigation toolbar you created in step 5. This code accesses the Recordset object of the Advanced Data Control to move between the records. (The Advanced Data Control can bind to elements in a Web page, and you will often use it for this. Chapter 4 contains examples of binding the ADC. However, in this project, you do not want to bind data; you want to use script code to read the data out and present it in a different way. The Recordset object provides a means for accessing data in the ADC when it is not functioning as a bound control.)
The Recordset object used in the ADC is closely related to the ActiveX Data Objects (ADO) used in Active Server Pages. Methods associated with ADO Recordsets can also be used with the ADC Recordset object. This allows navigation through the familiar MoveFirst, MoveLast, MoveNext, and MovePrevious methods. Accessing any individual field in the current record is done by referencing the field name in parentheses—for example, MyRecordset ("MyField").
Add the following SCRIPT section to your code so that users will be able to browse the database:
<SCRIPT LANGUAGE="VBScript"> <!-- Sub btnNext_OnClick ` Move to next item datItems.Recordset.MoveNext If datItems.Recordset.EOF Then datItems.Recordset.MoveLast Else DisplayData End If End Sub Sub btnBack_OnClick ` Move to previous item datItems.Recordset.MovePrevious If datItems.Recordset.BOF Then datItems.Recordset.MoveFirst Else DisplayData End If End Sub Sub btnHome_OnClick ` Go home Window.Navigate "/Catalog/default.htm" End Sub Sub btnOrder_OnClick `Go to order page Window.Navigate "/Catalog/orders.asp?Product=" & _ lblName.Caption End Sub --> </SCRIPT>
Step 10
Save your work, and test the catalog browsing features. Your Web page should look like the one in Figure 7-9.
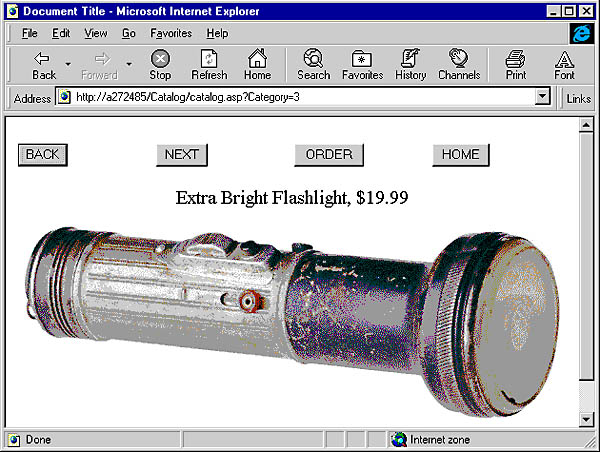
Figure 7-9. Browsing the catalog.
EAN: 2147483647
Pages: 84