Part IV:Taking Orders
In this part, you will take orders from the catalog and write them to a database by using the ADC.
Step 1
Open the Catalog project. To add a new Web page for taking product orders, choose New from the File menu. In the New dialog box, add a new ASP page, name the page ORDERS.ASP, and click OK.
Step 2
Right-click the file ORDERS.ASP in the project window, and choose Open With from the menu. In the Open With dialog box, open the file with Microsoft FrontPage Editor. Change the page's background color to white by selecting Background from the Format menu.
To insert a banner into the page, choose Image from the Insert menu. In the Image dialog box, insert the image from the following location:
/CATALOG/IMAGES/ORDER.JPG
Insert a horizontal rule below the image by choosing Horizontal Line from the Insert menu.
Step 3
To insert a table for the orders, choose Insert Table from the Table menu. In the Insert Table dialog box, create a table with 2 columns and 10 rows. In the first column, add text to the cells to identify the fields in the table as Date, Product, First Name, Last Name, Address1, Address2, City, State, and Zip.
Step 4
Save your work, and return to Visual InterDev. Open ORDERS.ASP in the Visual InterDev text editor. Identify the table that you inserted in FrontPage Editor, and modify the table to add text boxes and a pushbutton to the page. The finished form should look like the one pictured in Figure 7-10 on page 172. The code is shown on the following pages.
<TABLE BORDER="0"> <TR> <TD> <FONT FACE="Verdana"><STRONG>Date</STRONG></FONT> </TD> <TD> <INPUT DATASRC="#datOrders" DATAFLD="Date" NAME="txtDate"> </TD> </TR> <TR> <TD> <FONT FACE="Verdana"><STRONG>Product</STRONG></FONT> </TD> <TD> <INPUT DATASRC="#datOrders" DATAFLD="Product" NAME="txtProduct"> </TD> </TR> <TR> <TD> <FONT FACE="Verdana"><STRONG>First Name</STRONG></FONT> </TD> <TD> <INPUT DATASRC="#datOrders" DATAFLD="FirstName" NAME="txtFirstName"> </TD> </TR> <TR> <TD> <FONT FACE="Verdana"><STRONG>Last Name</STRONG></FONT> </TD> <TD> <INPUT DATASRC="#datOrders" DATAFLD="LastName" NAME="txtLastName"> </TD> </TR> <TR> <TD> <FONT FACE="Verdana"><STRONG>Address1</STRONG></FONT> </TD> <TD> <INPUT DATASRC="#datOrders" DATAFLD="Address1" NAME="txtAddress1"> </TD> </TR> <TR> <TD> <FONT FACE="Verdana"><STRONG>Address2</STRONG></FONT> </TD> <TD> <INPUT DATASRC="#datOrders" DATAFLD="Address2" NAME="txtAddress2"> </TD> </TR> <TR> <TD> <FONT FACE="Verdana"><STRONG>City</STRONG></FONT> </TD> <TD> <INPUT DATASRC="#datOrders" DATAFLD="City" NAME="txtCity"> </TD> </TR> <TR> <TD> <FONT FACE="Verdana"><STRONG>State</STRONG></FONT> </TD> <TD> <INPUT DATASRC="#datOrders" DATAFLD="State" NAME="txtState"> </TD> </TR> <TR> <TD> <FONT FACE="Verdana"><STRONG>Zip</STRONG></FONT> </TD> <TD> <INPUT DATASRC="#datOrders" DATAFLD="Zip" NAME="txtZip"> </TD> </TR> <TR> <TD> <FONT FACE="Verdana"><STRONG></STRONG></FONT> </TD> <TD> <INPUT TYPE="BUTTON" NAME="cmdOrder" VALUE="Order!"> </TD> </TR> </TABLE>
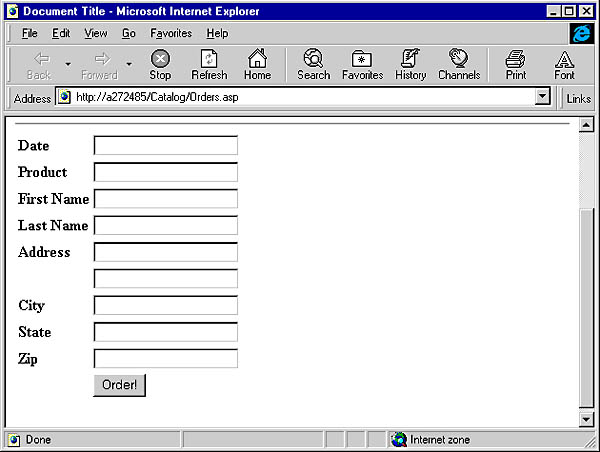
Figure 7-10. The Orders form.
Step 5
The table you created will be filled by the ADC, which will read the Orders table from the database and store the new order information. Add the following lines to the BODY section of your code to connect to the database:
<!-- The Advanced Data Control --> <OBJECT ID="datOrders" CLASSID="CLSID:BD96C556-65A3-11D0-983A-00C04FC29E33" ALIGN="baseline" BORDER="0" WIDTH="50" HEIGHT="50"> <PARAM NAME="Connect" VALUE ="DSN=HomePage"> <PARAM NAME ="Server" VALUE ="[your Web server]"> <PARAM NAME ="SQL" VALUE="SELECT * FROM Orders WHERE FirstName=`New Customer'"> </OBJECT>
Step 6
Although the ADC can handle recordsets on the client, it cannot add new records to the database. You will have to rely on the ActiveX Data Objects (ADO) to add new records. (You can still use the ADC to update entries.) Add the following lines to the HEAD section of your code to generate a new record:
<% ` Add a new blank record to the database Set db = Server.CreateObject("ADODB.Connection") db.Open "HomePage" ` Create SQL strSQL = "INSERT INTO Orders (FirstName, Product) VALUES " & _ "(`New Customer','" & Request.QueryString("Product") & "`)" db.Execute strSQL %> Step 7
When all the data is filled in, you will want to save the new order in the database. However, before you allow the data to be saved, you should validate the values in the text fields. Add the following SCRIPT section to your code to perform the data validation:
<SCRIPT LANGUAGE="VBScript"> <!-- Function Validate() Validate = True ` Validate date If Not IsDate(txtDate.Value) Then MsgBox "Invalid date!" Validate = False End If ` Validate text fields If txtProduct = "" Or _ txtFirstName = "" Or _ txtLastName = "" Or _ txtAddress1 = "" Or _ txtCity = "" Or _ txtState = "" Or _ txtZip = "" Then MsgBox "Please fill in all fields!" Validate = False End If End Function --> </SCRIPT>
Step 8
After the data has been validated, it can be saved in the database. To save the data, use the OnClick event of the cmdOrder button. Here is the code:
Sub cmdOrder_OnClick() ` Validate the data If Not Validate Then Exit Sub ` Submit the form to the Orders table datOrders.SubmitChanges ` Thank the customer MsgBox "Thanks for your order!" ` Move to the home page Window.Navigate "default.htm" End Sub
Step 9
Save your work, and view the site in Internet Explorer 4.0.
EAN: 2147483647
Pages: 84