Exercise 8-1: Building a Smart Document
Exercise 8-1: Building a Smart Document
Smart documents can bring significant value to end users. Typically when users create a document, they start with a template and little else. Generally the information required by the template is locked in line-of-business systems and is not easily retrieved. In most cases, end users complete documents by cutting and pasting from line-of-business systems into Microsoft Word. In this exercise, you will create an invoice using the Northwind database. Figure 8-11 shows the task pane from the final document with a product name ready to insert into the invoice.
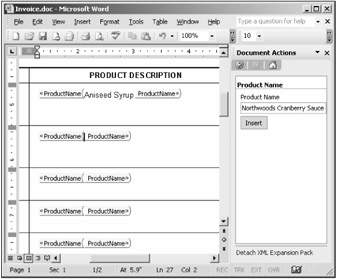
Figure 8-11: The task pane for the exercise
Prerequisites
Before you begin this project, make sure that you have installed the primary Interop assemblies for Microsoft Word and Smart Tags 2.0. If you are using the standard configuration described in this book, then you should install the PIAs on both SPSPortal and SPSClient . The PIAs are required on SPSClient because this is where you run the completed smart document. The PIAs are required on SPSPortal because this is where you originally installed Visual Studio. You could optionally install the entire Office suite on SPSPortal to make your exercise easier. Along with the PIAs, be sure to download and install the Office 2003 Smart Document SDK from msdn.microsoft.com . Finally, you may want to download an appropriate template for your smart document. I found a simple invoice template to use, but it is not required. Even a blank document will do for the exercise.
Setting Up the Project
Your smart document begins by creating a new project in Visual Studio where you can build the XML expansion pack. In this project, you will build the assembly, create the schema, and write the manifest. For this exercise, you will write the assembly in VB.NET.
To set up the project, follow these steps:
-
Start Visual Studio and select File New Project from the menu.
-
In the Add New Project dialog, click the Visual Basic Projects folder.
-
Create a new Class Library project and name the new project SmartInvoice .
-
In the Solution Explorer, rename the Class1.vb file to Northwind.vb .
-
Select Project Add Reference from the Visual Studio menu.
-
In the Add Reference dialog, click the COM tab.
-
Select to add references to the Microsoft Smart Tags 2.0 Type Library and Microsoft Word 11.0 Object Library.
-
Click OK.
-
Open the Northwind.vb file. Change the class name and add the import statements as shown in Listing 8-7.
Listing 8-7: The Initial Code

Imports System Imports System.Data Imports System.Data.SqlClient Imports Microsoft.Office.Interop.SmartTag Imports Word = Microsoft.Office.Interop.Word Public Class Northwind End Class
Creating the XML Schema
Before you code the assembly, you must create the XML schema that you will use to map the assembly functionality to the smart document. In this exercise, you are going to map the product catalog from the Northwind database to the smart document. This will include not only product description information, but prices as well. This will allow you to use some different types of data in the document.
To create the XML schema, follow these steps:
-
In Visual Studio, select Project Add New Item.
-
In the Add New Item dialog, select XML Schema and name the file SmartInvoice.xsd .
-
Modify the schema file to appear exactly as shown in Listing 8-8.
Listing 8-8: The Schema for the Smart Invoice
<?xml version="1.0" encoding="utf-8" ?> <xsd:schema xmlns:xsd="http://www.w3.org/2001/XMLSchema" xmlns="urn:schemas-microsoft-com.DataLan.SmartInvoice" targetNamespace="urn:schemas-microsoft-com.DataLan.SmartInvoice" elementFormDefault="qualified" attributeFormDefault="unqualified" id="ProductInfo"> <xsd:element name="ProductID" type="xsd:string"/> <xsd:element name="ProductName" type="xsd:string"/> <xsd:element name="QuantityPerUnit" type="xsd:string"/> <xsd:element name="UnitPrice" type="xsd:double"/> </xsd:schema>
Creating the Control Sets
Once the schema is created, you can create the control sets associated with each of the XML nodes in your schema. This process follows the steps outlined earlier in the chapter. You must first implement the ISmartDocument interface and then code each required property and method. You will not use every method in the interface, just the ones needed for your specific functionality.
In order to implement the ISmartDocument interface, you should open Northwind.vb in Visual Studio. On the line directly below the class definition, type Implements ISmartDocument and hit the Enter key. This should automatically place all of the interface stubs in your code.
Building the User Interface
Building the user interface follows the same life cycle steps that we discussed earlier in the chapter. In most cases, the code is fairly straightforward. You simply respond to each request for information made by the smart document infrastructure. Initially, you'll create some constants to make it easier to handle the node references in the XML schema. The following code shows the constants to add.
'Variables Public Const URI As String = "urn:schemas-microsoft-com.DataLan.SmartInvoice" Public Const PRODUCTID As String = URI & "#ProductID" Public Const PRODUCTNAME As String = URI & "#ProductName" Public Const QUANTITYPERUNIT As String = URI & "#QuantityPerUnit" Public Const UNITPRICE As String = URI & "#UnitPrice" Dim intSelectedIndex As Integer = 0 Dim objDataSet As DataSet
Specifying the Number of Control Sets
The first piece of information is to specify how many nodes in your schema will have a control set. In this exercise, all the nodes will have a control set. Therefore, you simply return a fixed value from the SmartDocXmlTypeCount property. Code the property as follows:
Public ReadOnly Property SmartDocXmlTypeCount() As Integer Implements _ Microsoft.Office.Interop.SmartTag.ISmartDocument.SmartDocXmlTypeCount Get Return 4 End Get End Property
Specifying Which Nodes Have Control Sets
Once the smart document infrastructure knows how many control sets to create, it needs to know which nodes will have the control sets. It determines this by calling the SmartDocXmlTypeName property once for each control set. An element name is subsequently returned for each call. Code the SmartDocXmlTypeName property as shown in Listing 8-9.
| |
Public ReadOnly Property SmartDocXmlTypeName _ (ByVal XMLTypeID As Integer) As String _ Implements Microsoft.Office.Interop.SmartTag.ISmartDocument.SmartDocXmlTypeName 'Returns the the element name 'Order is not important Get Select Case XMLTypeID Case 1 Return PRODUCTID Case 2 Return PRODUCTNAME Case 3 Return QUANTITYPERUNIT Case 4 Return UNITPRICE End Select End Get End Property
| |
Specifying Control Set Captions
For each control set, a caption is assigned by the smart document infrastructure. It does this by calling the SmartDocXmlTypeCaption property for each control set. A text caption is subsequently returned for each call. Code the SmartDocXmlTypeCaption property as shown in Listing 8-10.
| |
Public ReadOnly Property SmartDocXmlTypeCaption(ByVal XMLTypeID As Integer, _ ByVal LocaleID As Integer) As String Implements Microsoft.Office.Interop.SmartTag.ISmartDocument.SmartDocXmlTypeCaption 'Order must be the same as in Step 2 Get Select Case XMLTypeID Case 1 Return "Product ID" Case 2 Return "Product Name" Case 3 Return "Quantity per Unit" Case 4 Return "Unit Price" End Select End Get End Property
| |
Specifying How Many Controls Are in Each Set
The smart document infrastructure next needs to know how many controls are in each set. It determines this by calling the ControlCount property. The control count is subsequently returned for each call. Code the ControlCount property as shown in Listing 8-11.
| |
Public ReadOnly Property ControlCount(ByVal XMLTypeName As String) As Integer _ Implements Microsoft.Office.Interop.SmartTag.ISmartDocument.ControlCount Get Select Case XMLTypeName Case PRODUCTID Return 2 Case PRODUCTNAME Return 2 Case QUANTITYPERUNIT Return 2 Case UNITPRICE Return 2 End Select End Get End Property
| |
Specifying Unique IDs for Each Control
In order to track the controls in each set internally, the smart document infrastructure needs to assign them unique identifiers. It does this by calling the ControlID property. An identifier is returned for each call made. Code the ControlID property as shown in Listing 8-12.
| |
Public ReadOnly Property ControlID(ByVal XMLTypeName As String, _ ByVal ControlIndex As Integer) _ As Integer Implements Microsoft.Office.Interop.SmartTag.ISmartDocument.ControlID 'ControlIndex is just the index for each set 1,2,3... 'Therefore, we add an arbitrary number to guarantee uniqueness Get Select Case XMLTypeName Case PRODUCTID Return ControlIndex Case PRODUCTNAME Return ControlIndex + 100 Case QUANTITYPERUNIT Return ControlIndex + 200 Case UNITPRICE Return ControlIndex + 300 End Select End Get End Property
| |
Adding the Controls to the Schema
The smart document infrastructure adds the controls to the schema so that they can be used with the document. It does this by creating a unique node name for each control through calls to the ControlNameFromID property. A node name is returned for each call. You can code the ControlNameFromID property as shown here:
Public ReadOnly Property ControlNameFromID(ByVal ControlID As Integer) As String _ Implements Microsoft.Office.Interop.SmartTag.ISmartDocument.ControlNameFromID Get Return URI & ControlID.ToString End Get End Property
Specifying Individual Control Captions
The smart document infrastructure assigns individual captions to each control in the set. It does this by calling the ControlCaptionFromID property. Then a caption is returned for each call. You can code the ControlCaptionFromID property as shown in Listing 8-13.
| |
Public ReadOnly Property ControlCaptionFromID(ByVal ControlID As Integer, _ ByVal ApplicationName As String, ByVal LocaleID As Integer, _ ByVal Text As String, ByVal Xml As String, ByVal Target As Object) _ As String _ Implements Microsoft.Office.Interop.SmartTag.ISmartDocument.ControlCaptionFromID Get Select Case ControlID Case 1 Return "Product ID" Case 2, 102, 202, 302 Return "Insert" Case 101 Return "Product Name" Case 201 Return "Quantity Per Unit" Case 301 Return "Unit Price" End Select End Get End Property
| |
Specifying the Type for Each Control
The smart document infrastructure needs to determine what types of controls make up each set. It uses the ControlTypeFromID property to determine this. A control class is returned for each call. You can code the ControlTypeFromID property as shown in Listing 8-14.
| |
Public ReadOnly Property ControlTypeFromID(ByVal ControlID As Integer, _ ByVal ApplicationName As String, ByVal LocaleID As Integer) _ As Microsoft.Office.Interop.SmartTag.C_TYPE Implements _ Microsoft.Office.Interop.SmartTag.ISmartDocument.ControlTypeFromID Get Select Case ControlID Case 1 Return C_TYPE.C_TYPE_COMBO Case 2, 102, 202, 302 Return C_TYPE.C_TYPE_BUTTON Case 101, 201, 301 Return C_TYPE.C_TYPE_TEXTBOX End Select End Get End Property
| |
Handling the Controls
Once the control sets are created, you can fill them with the initial values that will appear in the task pane. For buttons , this is a simple matter of setting the caption text, but for your lists and text boxes, you want to extract information from the Northwind database. Start by coding the PopulateOther method to place captions on the button as shown in Listing 8-15.
| |
Public Sub PopulateOther(ByVal ControlID As Integer, _ ByVal ApplicationName As String, _ ByVal LocaleID As Integer, ByVal Text As String, _ ByVal Xml As String, ByVal Target As Object, _ ByVal Props As Microsoft.Office.Interop.SmartTag.ISmartDocProperties) _ Implements Microsoft.Office.Interop.SmartTag.ISmartDocument.PopulateOther 'Set control values Select Case ControlID Case 2, 102, 202, 302 Text = "Insert" End Select End Sub
| |
Filling the List
In this exercise, you provide a list of Product IDs to begin. A user can select one of these entries to start filling in the invoice. However, this assumes that you are dealing with users who know the Product IDs well and prefer to work that way. In other applications, you might choose to use a product name as the starting point.
You can access the Northwind database in the PopulateListOrComboContent method. Most of the code here is standard data access code. Note, however, that you populate the list by referencing the List argument. You also tell the list how many items it contains by using the Count argument. Finally, you indicate that the first item in the list is selected through the InitialSelected argument. Add the code from Listing 8-16 to code this method.
| |
Public Sub PopulateListOrComboContent(ByVal ControlID As Integer, _ ByVal ApplicationName As String, ByVal LocaleID As Integer, _ ByVal Text As String, ByVal Xml As String, ByVal Target As Object, _ ByVal Props As Microsoft.Office.Interop.SmartTag.ISmartDocProperties, _ ByRef List As System.Array, ByRef Count As Integer, _ ByRef InitialSelected As Integer) _ Implements _ Microsoft.Office.Interop.SmartTag.ISmartDocument.PopulateListOrComboContent Select Case ControlID Case 1 'Set up connection string from custom properties Dim strPassword As String = "" Dim strUserName As String = "sa" Dim strDatabase As String = "Northwind" Dim strSQLServer = "SPSPortal" Dim strConnection As String = "Password=" & strPassword strConnection += ";Persist Security Info=True;User ID=" + strUserName strConnection += ";Initial Catalog=" + strDatabase strConnection += ";Data Source=" + strSQLServer 'Create SQL String Dim strSQL As String = "SELECT ProductID, ProductName, " & _ "QuantityPerUnit, UnitPrice FROM Products" 'Try to run the query With New SqlDataAdapter objDataSet = New DataSet("root") .SelectCommand = New SqlCommand _ (strSQL, New SqlConnection(strConnection)) .Fill(objDataSet, "Products") End With 'Fill List Dim index As Integer = 0 Dim objTable As DataTable = objDataSet.Tables("Products") Dim objRows As DataRowCollection = objTable.Rows Dim objRow As DataRow 'Set the number of items in the list Count = objTable.Rows.Count For Each objRow In objRows index += 1 List(index) = objRow.Item("ProductID") Next 'Select the first item InitialSelected = 1 End Select End Sub | |
Populating the Text Boxes
After a Product ID is selected, the remaining control sets are populated based on the value selected in the list. This allows the user to review the value before inserting it into the document. The text boxes are populated through calls to the PopulateTextboxContent method. Add the code in Listing 8-17 to retrieve the values from the DataSet and place them in the appropriate text boxes.
| |
Public Sub PopulateTextboxContent(ByVal ControlID As Integer, _ ByVal ApplicationName As String, ByVal LocaleID As Integer, _ ByVal Text As String, _ ByVal Xml As String, ByVal Target As Object, _ ByVal Props As Microsoft.Office.Interop.SmartTag.ISmartDocProperties, _ ByRef Value As String) Implements _ Microsoft.Office.Interop.SmartTag.ISmartDocument.PopulateTextboxContent 'Variables for insert text Dim txtProductName As String Dim txtQuantityPerUnit As String Dim txtUnitPrice As String 'Get values based on Product ID selection If objDataSet.Tables.Count > 0 Then txtProductName = _ objDataSet.Tables("Products").Rows.Item(intSelectedIndex) _ .Item("ProductName").ToString txtQuantityPerUnit = _ objDataSet.Tables("Products").Rows.Item(intSelectedIndex). _ Item("QuantityPerUnit").ToString txtUnitPrice = _ objDataSet.Tables("Products").Rows.Item(intSelectedIndex). _ Item("UnitPrice").ToString End If 'Set control values Select Case ControlID Case 101 Value = txtProductName Case 201 Value = txtQuantityPerUnit Case 301 Value = txtUnitPrice End Select End Sub | |
Handling Events
Your smart document needs to react when a new product ID is selected or when text is inserted in the document. You can code events for both the buttons and the list to capture user actions. When the buttons are pushed , you insert text into the document. When the list selection changes, you trap the index so that you can use it to fill the other controls with appropriate information. Add the code from Listing 8-18 to handle the events.
| |
'List Public Sub OnListOrComboSelectChange(ByVal ControlID As Integer, _ ByVal Target As Object, _ ByVal Selected As Integer, ByVal Value As String) Implements _ Microsoft.Office.Interop.SmartTag.ISmartDocument.OnListOrComboSelectChange intSelectedIndex = Selected - 1 End Sub 'Buttons Public Sub InvokeControl(ByVal ControlID As Integer, _ ByVal ApplicationName As String, _ ByVal Target As Object, ByVal Text As String, _ ByVal Xml As String, ByVal LocaleID As _ Integer) Implements Microsoft.Office.Interop.SmartTag.ISmartDocument.InvokeControl Dim objRange As Word.Range objRange = CType(Target, Word.Range) 'Create insert text from a text control based on which button is pushed Select Case ControlID Case 2 Dim intIndex As Integer = _ objRange.XMLNodes(1).SmartTag.SmartTagActions(1).ListSelection objRange.XMLNodes(1).Text = "Product " & _ objDataSet.Tables("Products").Rows.Item(intSelectedIndex).Item("ProductID") Case 102, 202, 302 objRange.XMLNodes(1).Text = _ objRange.XMLNodes(1).SmartTag.SmartTagActions(1).TextboxText Case 203 End Select End Sub | |
Deploying the Smart Document
In order to deploy your smart document solution, you must create a manifest file and configure security. In this exercise, you will keep things simple by deploying directly from the \bin directory where you compile the assembly. You will create a manifest that will be placed in the same directory, and set up your machine to trust the file location.
Creating the Manifest
As we discussed earlier in the chapter, the manifest file contains the details regarding the contents of the XML expansion pack. Using Visual Studio, add a new XML file named manifest.xml to the project. Modify the file to appear exactly as shown in Listing 8-19.
| |
<?xml version="1.0" encoding="UTF-8" standalone="no"?> <manifest xmlns="http://schemas.microsoft.com/office/xmlexpansionpacks/2003"> <version>1.0</version> <updateFrequency>20160</updateFrequency> <uri>urn:schemas-microsoft-com.DataLan.SmartInvoice</uri> <solution> <solutionID>{BDE88D2F-FA67-4890-A674-A2BEE936A1A4}</solutionID> <type>smartDocument</type> <alias lcid="1033">Smart Invoice</alias> <documentSpecific>False</documentSpecific> <targetApplication>Word.Application.11</targetApplication> <file> <type>solutionActionHandler</type> <version>1.0</version> <filePath>SmartInvoice.dll</filePath> <CLSNAME>SmartInvoice.Northwind</CLSNAME> <managed/> <runFromServer>True</runFromServer> </file> </solution> <solution> <solutionID>schema</solutionID> <type>schema</type> <alias lcid="1033">Smart Invoice</alias> <file> <type>schema</type> <version>1.0</version> <filePath>SmartInvoice.xsd</filePath> </file> </solution> </manifest> | |
Configuring Security
Normally when you distribute an XML expansion pack, you need to digitally sign the manifest file and the assembly. For this exercise, however, you will disable the signature check for the manifest and the assembly. Disabling the manifest check is simple if you have installed the Office 2003 Smart Document SDK. A tool is available directly from Start All Programs Microsoft Office 2003 Developer Resources Microsoft Office 2003 Smart Document SDK Tools Disable XML Expansion Pack Manifest Security. This tool should be run on SPSClient . In order to trust the assembly, you must configure the .NET security for the SPSClient . Once again, you will rely on tools available in the SDK.
To trust the assembly, follow these steps:
-
Copy the assembly named SmartInvoice.dll and the manifest file into a directory on SPSClient .
-
From SPSClient , select Start Administrative Tools Microsoft .NET Framework 1.1 Wizards.
-
In the .NET Wizards window, click Trust an Assembly.
-
In the Trust an Assembly wizard, select "Make changes to this computer" and click the Next button.
-
Browse to the directory where you copied the project files, locate the assembly named SmartInvoice.dll , and click Next.
-
Move the slider up to Full Trust and then click Next.
-
Verify the settings and click Finish.
| Note | By default, the version number of your assembly is incremented each time you compile it. As a result, you have to repeat these steps each time the assembly is rebuilt.You can remedy this behavior by replacing the wildcard characters in the version number found in the AssemblyInfo file. |
Loading the XML Expansion Pack
Once the security configuration is complete, you are ready to load the XML expansion pack into Word. Because you intend to run the pack from the \bin directory, copy the schema and manifest file into the \bin directory with the assembly file. Once the three files are together in the same directory, you can use the XML expansion pack. If you have selected a template to use with the XML expansion pack, you can open it now in Word. Otherwise, just open a blank document.
To load the XML expansion pack, follow these steps:
-
From Word, select Tools Templates and Add-Ins.
-
In the Templates and Add-Ins dialog, click the XML Expansion Packs tab.
-
On the XML Expansion Packs tab, click Add.
-
Navigate to the directory where you copied the project files and locate the manifest file you created earlier.
-
Click Open.
-
When you receive a security warning about the unsigned manifest, click No.
-
In the Templates and Add-Ins dialog, click OK to finish loading the schema and then open the task pane.
-
In the task pane, drop down the menu and select XML Structure.
-
Using the list of available nodes, add a single node of each type to the document.
-
Once you have added nodes, select Document Actions from the dropdown menu in the task pane.
-
Place the document cursor in the ProductID node. You should see a list of product codes in the task pane.
-
Select a ProductID and click Insert.
-
Now place the document cursor in the ProductName node. The text box should automatically fill with the associated product name.
-
Click Insert to add the product name to the document.
EAN: N/A
Pages: 92