Your System
| Your Ubuntu system is a little like an ecosystem. For certain things to work, other things must be already working. When you are new to any operating system (OS), it can often be a little difficult to get to know how some of these core system functions work. In this section we cover the core system technology in Ubuntu and problems that can crop up when using it. Ubuntu Won't Start!When Ubuntu first starts, the GRUB bootloader loads an OS for you. If you only have Ubuntu installed on your computer, it is loaded automatically. Otherwise, if you have more than one OS (such as Ubuntu and Microsoft Windows), you can pick the relevant one from a menu. If you don't see the menu, restart your computer, wait until you see the word GRUB, and press Enter. Now use your arrow keys to select an option. The core chunk of software that is loaded when Ubuntu starts is the kernel, and sometimes there are a few different kernels installed on your system. On the menu, each kernel version (such as 2.6.15) has two options: the stock kernel and one called "recovery mode." Try booting the newest nonrecovery mode kernel, and see if your system starts. The BootloaderIf your system still fails to start, it is likely that your bootloader is broken. When you use a bootloader such as GRUB, a tiny file (called the boot sector) is copied into the very first part of your hard disk. If this file is broken or corrupted, your system often won't boot. Don't worry, though, you can fix this! Restart your computer, and choose the newest rescue mode option. When using rescue mode, the system starts in a limited single-user command line mode. You can use this mode to fix any problems from the command line. In this case, you need to fix the GRUB bootloader. To do this, go to /boot/grub, and load menu.lst in a text editor. Unfortunately we don't have the space to cover GRUB configuration here, so it is recommended that you consult the excellent documentation on the GRUB Web site at www.gnu.org/software/grub/. Backing Up and Restoring Your Boot SectorWhen GRUB runs, the boot sector part of your hard disk contains information about which OS you can boot. This sector sometimes gets corrupted due to a system crash or power loss and your computer won't boot. Luckily, with a few carefully chosen commands, you can back up and restore this important sector. Back it up using this command: foo@bar:~$ sudo dd if=/dev/hda of=MBR-backup bs=512 count=1 The dd command copies the sector from the first disk (/dev/hdachange this to your disk) and saves it as MBR-backup in the current directory. Quick Tip When referring to boot sectors you may see it prefixed as MBRthis is short for master boot record. To restore the sector, run this command: foo@bar:~$ sudo dd if=MBR-backup of=/dev/hda bs=512 count=1 When you boot your computer in rescue mode, you can use these commands to manage your boot sector. The Ubuntu Logo Appears Corrupted or Just Looks Odd While BootingWhen your system starts it uses a special splash image to make the boot process more attractive, as shown in Figure 6-1. Figure 6-1. The graphical boot screen can be switched off if needed. If you have problems with this splash screen, you can disable it. To do this, load the /boot/grub/menu.lst file into a text editor, and scroll to the bottom of the file. You should see a line such as this: kernel /boot/vmlinuz-2.6.15-10-386 root=/dev/hda1 ro quiet splash Just remove the splash word from the line and restart your computer. Now plain text boot messages are displayed when the system starts. When I Start My Computer I Get Text Instead of a Graphical InterfaceThe graphical interface used in Ubuntu comes in two parts: X and GNOME. The X server is an underlying chunk of software that ensures your graphics card and monitor work, and it provides a base for GNOME to run on. The GNOME desktop uses X as an engine to create the rich desktop platform you have been using. If you start the computer and you can only see text and no graphical interface, this is a problem with X. First, reboot your computer to see if that fixes the problem. When your computer has booted, if you still have the same problem, Ubuntu may have told you that it cannot start X. If you did not see this message, press Ctrl-Alt-F7 to see if you can access the graphical interface. If this does not work, there is a configuration problem with X. X stores its configuration in /etc/X11/xorg.conf. Before you fiddle with your configuration, it is always wise to make a backup of the file. Even if X is not starting, some other parts of the configuration may be working fine. foo@bar:~$ cd /etc/X11 foo@bar:~$ sudo cp xorg.conf xorg.conf.old First you move to the /etc/X11 directory and then you use the cp command to copy the existing file (xorg.conf) to a backup file (xorg.conf.old). You now have both an xorg.conf and an xorg.conf.old with the same information in them. Now run the X configuration process: foo@bar:~$ sudo dpkg-reconfigure xserver-xorg A configuration routine will start, and you should experiment with different settings in the routine. Unfortunately, we don't have the space to cover X configuration in detail, so refer to https://wiki.ubuntu.com/debuggingxauto configuration. Tip: Restricted Drivers Ubuntu only ships with fully Open Source graphics drivers. There are, however, closed source drivers available for ATI and NVidea cards. For more information about these drivers, visit the respective manufacturer's Web site. I Tried to Use a Word or PowerPoint Document, and the Fonts Are All WrongWhen loading Microsoft Office documents in OpenOffice.org, the document may require Windows fonts that are not on your system. Many of these fonts are available online and can be automatically downloaded with the msttcorefonts package from the multiverse repository. When you install msttcorefonts, it automatically downloads and installs the following common Windows fonts:
With the installation complete, restart X, and the fonts are available. How Do I Install a Package?In Ubuntu, all components (applications, documentation, artwork, etc.) are split up into separate packages. Each package serves one purpose. For instance the package Firefox contains Mozilla Firefox, and Ubuntu-audio contains the Ubuntu default audio theme. To install a program, select Applications > Add/Remove. When asked for a password, enter your login password. Select a category in the left pane. This corresponds to the Applications menu. Click an empty checkbox for any application you want in the upper right pane to select it for installation. Or deinstall an application by deselecting the application's checkbox. Nothing will actually happen until you click Apply or OK. A dialog box lists the pending changes, and if you click OK the required packages are downloaded and installed (or deinstalled if that's what you chose). When it's finished, click Close. If you can't find what you're looking for, enter a word into the search box in the upper right corner. For instance if you enter "picture," it will show the GIMP, a powerful tool to edit pictures. You can also search for a specific application, such as Patience. When you still can't find it, or you want to install a package not listed in Add/Remove, click the Advanced button. You can also open Synaptic by selecting System > Administration > Synaptic Package Manager. Enter your login password if prompted. First click the Reload button on the toolbar to download the latest package lists. To search for a package, click Search on the toolbar. For example, enter "Tux Paint," and click Search. Successive search queries are stored in the left pane, and the results are shown in the right pane. To install a package, click the box to the left of the name. Select Mark for Installation from the list. Synaptic will warn when other packages (dependencies) have to be installed for the package you want to install. Click Mark to automatically mark the required packages for installation. The package you've selected is highlighted in green. Packages marked for removal appear in red. For Tux Paint, you see two other packages highlighted in green. Other required packages marked for installation do not appear in the search results for Tux Paint, because they are not specifically made for Tux Paint, and hence can also be used by other applications. To browse for packages click Components in the lower left corner. The categories presented in the left pane are not corresponding to the Applications menu. The "universe" and "multiverse" categories hold packages not supported by Ubuntu. It is advisable only to install them if you know what you are doing. When you have selected a package, a description is shown in the bottom pane. To obtain more detailed information (such as the download and installed size), click Properties on the toolbar. When you are done marking packages, click Apply on the toolbar. This opens a dialog where you can see the pending changes. If you are sure, click Apply. The required packages are then downloaded and installed. When it's finished, click Close. I Want to Install an Application That Is Not in SynapticAlthough Synaptic contains a huge selection of packages, sometimes the package you need is not included. The first thing you should check is that you have enabled the additional repositories such as universe and multiverse. Open Synaptic from System > Administration > Synaptic Package Manager. Now click Settings > Repositories > Add. Ensure that all of the Components check-boxes are selected. See https://wiki.Ubuntu.com/AddingRepositoriesHowto for more details. The Repository RundownThe universe repository contains the thousands of packages that are part of the Debian distribution, upon which Ubuntu is based. All of these packages are entirely free and supported by a community of Ubuntu contributors. The multiverse repository contains a number of packages that are freely available to download but are not fully Open Source. If you only want to run Open Source software, you may not want to use this repository. If you have enabled these extra repositories and your package is still not there, have a quick hunt around with a search engine to see if you can find a repository (known as a Debian or APT repository) for your package. If you find one, use the Repositories dialog box you have just played with to add the new repository, and then use Synaptic to install the package. If no repository is available, look for a Debian package (.deb) for the application. If you find one, download it, and double-click it to install. If no Debian Package exists, look for an Autopackage. (Details about Autopackage installation are later in this chapter.) Finally, if all else fails, download the source code and compile it. Nautilus Is Painfully SlowHow Can I Make It Run Faster?There are a number of options you can deactivate to make using Nautilus a faster process. First, click Edit > Preferences, find the tab marked Preview, and click on it. If Show Text in Icons (the first option) is enabled it will preview some of the contents of text documents in their icons. Set this option to Never. Next, there's an option called Show Thumbnails. This option will preview image files as thumbnails. Set this option to Never to further improve the speed of Nautilus browsing. If enabled, the option Preview Sound Files will make it possible to preview sound files without actually opening them. Set this to Never as well. The last option, Count Number of Items, shows how many items are within the folders listed in the directory you're currently browsing. Set this to Never. If you are still not satisfied with the speed of Nautilus, you could check out some other file managers, such as Rox Filer or Thunar. Add TrueType Fonts to Your Desktop QuicklyFonts have a huge impact on how attractive and usable your desktop is. Although Ubuntu comes with a range of high-quality fonts, you may want to install some additional fonts. This is often the case when you need to use a specific company font. On modern OS, most fonts come in the form of TrueType fonts. Ubuntu offers full support for TrueType fonts, and it is simple to add new fonts. To add a font, press Alt+F2. In the resulting dialog box type fonts:///, and press Enter. A font folder opens up such as that seen in Figure 6-2. Drag and drop your new font(s) to the folder that opens up. Figure 6-2. Installing fonts is as simple as dropping them in the font directory.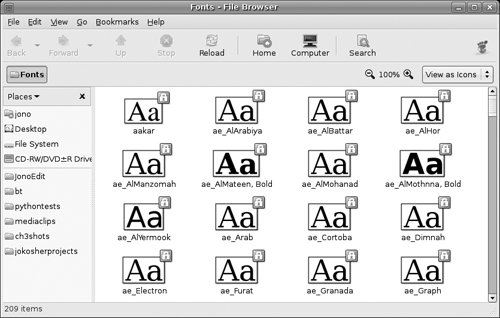 To check to see if the new fonts are installed, press Alt+F2, and in the dialog box type ~/.fonts. You should see your new font in the folder that appears. Try out the new font in an application such as GIMP. You will have to restart open applications before they detect the new fonts. Note If you perform these steps as an ordinary user, the fonts will only be available to your user account. How Can I Test That an ISO File Works?Whenever you download a Linux distribution such as Ubuntu, you will typically download an .iso file, a file that contains an image of a CD. This file is then used to create an installation CD that can be used to install the distribution. After downloading the file you may want to first check that the file works and, second, verify that the file is a legitimate download. Checking That the ISO WorksOpen a terminal, and then go to the folder where the ISO image has been downloaded. As an example, if you saved it to your disk in Firefox, it will have saved it to the Desktop folder in your home folder: foo@bar:~$ cd Desktop To test that the ISO image works, you are going to mount it and access the files in a particular folder. First, create this folder: foo@bar:~$ mkdir test_iso Now mount it on that folder: foo@bar:~$ sudo mount -o loop -t iso9660 my_iso_file.iso test_iso That's it! Now you can browse the folder test_iso. Verifying the ISOTo verify the iso, fire up a terminal, and run the following command: foo@bar:~$ md5sum my_iso_file.iso Wait a little while and Ubuntu will print a "word" that is 33 characters long. Now go to the site from which you downloaded the file, and compare this word with the md5sum given by the owner of the iso file, usually a file named MD5SUMS. The words should match. I Downloaded an Autopackage But I Don't Know How to Run ItAutopackages are software packages that install on any Linux distribution, including Ubuntu. Autopackages offer an ideal way of installing software on your system that is not available via Synaptic. If you need something Synaptic can't offer, Autopackages are a great alternative. Tip: Replacing an Application with an Autopackage If you are running an existing application that was installed via Synaptic, and you want to replace it with an Autopackage, make sure that you uninstall the application first with Synaptic. Autopackage does not work in conjunction with Synaptic, so ensure that you remove any applications before you install the Autopackage. When you find an Autopackage that you want to install, download it to your desktop. Now, right-click the package, and select Properties. In the Permissions tab, select the Execute checkbox on the Owner row. Now close the dialog box, and double-click the package. The installation program now begins, and you can just follow the onscreen instructions. How Do I Compile an Application?When a distribution package is not available, the source code is always available to compile with Open Source applications. Compilation is the process of converting programming code into a program that you can run and use. Although it sounds like a devilishly difficult process, it is typically fairly simple. You should first have a look on the application's Web page, or in the INSTALL or README file that is included with the code to see what software the application needs to run. When you know what is required, use Synaptic to search for the required tools. Many of the requirements will be software libraries (software that applications require to run), and these libraries typically have "lib" at the start of the package name. As an example, if you need to have the Vorbis audio codec installed, do a search in Synaptic for Vorbis, and libvorbis will be one of the packages. You should also install with -dev at the end of the package name (such as libvorbis-dev). These packages allow you to compile software for that library. The process of compiling software involves three steps: (1) configuration, (2) compilation, and (3) installation. Open a terminal, move into the directory from which you extracted the source code, and configure it: foo@bar:yourapp$ ./configure When you run ./configure, it checks to see that you have all the required software. If it throws an error, it is likely that a required tool or library is missing. Find out what it is, and install it. Typically, configure will tell you what you need to install. If the configure script works fine, compile the code with this command: foo@bar:yourapp$ make If a problem appears when compiling the software, it may be a bug or problem in the source code. It is best to refer your problem to the author of the code for further help. If the compile process was successful, install the application with this command: foo@bar:yourapp$ sudo make install The software is now fully installed. Quick Tip If you want to ensure you have all the right tools installed to build your application, run the following command: foo@bar:~$ sudo apt-get build-dep packagename I Can't See the Hidden Dot Files and Folders in the File ManagerFiles and directories that begin with a dot (such as .openoffice2) are typically used to store settings and configuration details for a particular application. By default, the file manager does not show these files. So how do you view, move, and copy them? Simple. Just click View > Show Hidden Files, or press Ctrl-H and your hidden files are displayed, as shown in Figure 6-3. Figure 6-3. Displaying hidden files can be useful when you need to edit them.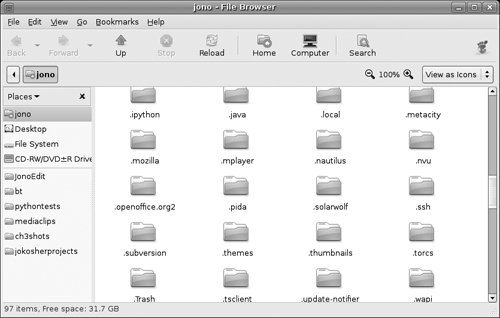 Tip: Warning! Don't ever mess around with hidden files and directories unless you know exactly what you are doing. Making the wrong move with one of these files or directories could break something! How Do I Restore Something I Deleted in the File Manager?When you delete something in Ubuntu, the files are not deleted immediately and are instead moved to the wastebasket. If you accidentally deleted your important report and want to avoid limb removal by your boss, open the wastebasket by double-clicking the small wastebasket icon in the bottom right-hand corner of the screen, and then drag your files back into the file manager. The world now returns to the happy place it was before you accidentally deleted your files. The Desktop Has HungWhat Do I Do?In the rare situation that the desktop hangs, first try to restart it by pressing Alt-Ctrl-Backspace at the same time. This kills and restarts the X server. Another method of killing the X server is to press Alt+F2 to jump to a terminal, log in, and then run this command: foo@bar:~$ /etc/init.d/gdm stop This command stops the graphical login screen, which in turn stops the X server. You can restart it with this command: foo@bar:~$ /etc/init.d/gdm start My Screen Resolution Is WrongIf your screen resolution is incorrect, click System > Preferences > Screen Resolution, and select a new resolution from the combo box. If the box does not show the resolution that you want, refer to the recipe that reconfigures your X server. How Can I Automatically Login without Having to Enter My Login Details?If logging in is a drag for you, click System > Administration > Login Screen Setup, and select the Login a User automatically on first bootup checkbox. In the checkbox below it, select the user who should be logged in automatically. Be careful when automatically logging inanyone will have access to the computer when it is started. If you would prefer certain people not have access to the computer, automatically logging in may not be such a good idea. Tip: Automatically Logging in Root In the Security tab of the window, you can allow root to login automatically. Although possible, this is not recommended due to the security implications. Automating a root login could allow anyone to tamper with your computerso be careful! I Tried to Upgrade My System, but I Get an ErrorIf you try to install some software or upgrade your computer, and you get an error, the package manager may have tied itself in a knot. To try to resolve this, open a terminal, and run the following commands: foo@bar:~$ sudo apt-get update foo@bar:~$ sudo apt-get -f install The first command updates your package list, and the second command tries to fix your package manager. If this is successful the packages that failed will be installed correctly. In addition to these commands, you can reconfigure any packages that have not yet been configured by running: foo@bar:~$ sudo dpkg configure pending I Am Running Out of Disk SpaceHow Do I Free Up Some Space?If you are concerned you may be running out of disk space, there are a few techniques that you can use to clear some room. Before you do anything you should get a report of how much disk space is available. Load up a terminal, and run the following command: foo@bar:~$ df -h The df command prints a listing of the free space on your disk. By passing it the -h option, more readable file sizes are displayed (e.g., 9.5G as opposed to 9887776). In addition to the file size, a percentage of how much space is left is displayed. If the line with / in the Mounted On column is nearing 100 percent, you need to clear some room. The / partition is where most of the software is installed. The first thing you should do is to clean out your package cache. Every time a package is downloaded with Synaptic or with the automatic upgrade manager, it is stored in /var/cache/apt/archives/. You can clean out these packages without affecting your system. Just run the following command: foo@bar:~$ sudo apt-get clean With the package cache cleaned, you should now look for the largest directories on your system. This is where the command line can really come into its own. Run the following command: foo@bar:~$ du -h /home | sort -nr | less The du command lists disk usage for the /home directory (where users store their files). Again, the -h option makes the sizes more readable. The output of this command is fed into sort which organizes the output numerically (-n) and reverses the order (-r) to display the largest files first. Finally, the output is fed into less, which lets you scroll up and down through the listing. Find the largest directories, and remove any unwanted files by either using the graphical file manager or the rm command. Tip: A Graphical Option A useful little tool called Baobab can be installed to provide a graphical means of exploring hard disk usage. Baobab also includes a script for Nautilus so that you can right-click a folder to use Baobab to explore that folder. Baobab is packaged and ready to install for Ubuntujust use Synaptic to download and install it. I Deleted Something in the File Manager, but I Don't See the Extra Disk SpaceWhen you delete files in the file manager, they are copied to the wastebasket. To finally delete them, right-click the wastebasket in the bottom right-hand corner of the screen, and click Empty the Wastebasket. A dialog box pops up asking you to confirm the deletion. Click the Empty the Wastebasket button, and the files are removed. Another Version of Ubuntu Is OutHow Do I Upgrade to It?If a new version of Ubuntu is released, the update manager will notify you via an upgrade notification pop-up bubble. To upgrade, click the Upgrade button, and follow the instructions. If you want to manually upgrade, first find out the codename for the next version of Ubuntu (in the same vain as Warty, Hoary, Breezy, and Dapper). Now open /etc/apt/sources.list, and replace the word "dapper" with the new codeword. Now run: foo@bar:~$ sudo apt-get updates This command updated your package list. Now upgrade the system: foo@bar:~$ sudo apt-get dist-upgrade You are asked if you wish to continue. Press Y, and then press Enter to continue. Your entire system is now upgraded. Tip: As Usual... Remember to back up all your important files before doing a distribution upgrade! |
EAN: 2147483647
Pages: 133