| By offering users a predefined list of field entry choices, value lists save lots of time and aggravation. The more people you have entering data into a database, the more important value lists become in maintaining record consistency and accuracy. Don't worry about locking yourself in: Like so many things in FileMaker, value lists can be altered any time. A quick-and-dirty explanation for formatting value lists is included in this section, but you'll want to read Creating Layouts on page 143 to get a fuller sense of your formatting options for value lists. While value lists often are created at the same time you create a field, they exist independently of any particular field and can be created at any time. To define a custom value list 1. | Choose File > Define > Value Lists (Figure 9.14).
Figure 9.14. To create a value list, choose File > Define > Value Lists. 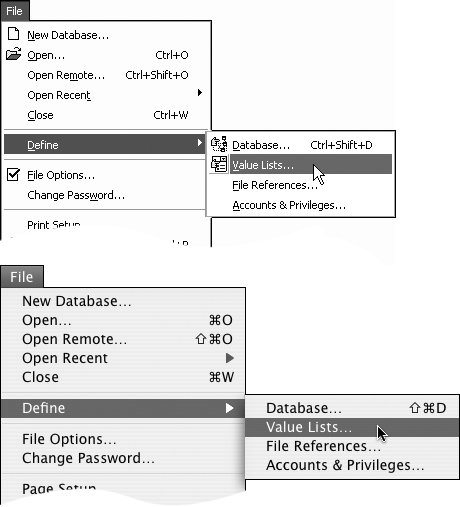
| 2. | When the Define Value Lists dialog box appears, click New to create a new list or Edit if you want to change an existing value list (Figure 9.15).
Figure 9.15. When the Define Value Lists dialog box appears, click New to create a new list or Edit if you want to change an existing value list. 
| 3. | When the Edit Value List dialog box appears, a generic name appears in the Value List Name text box and the Use custom values radio button will be selected. Type in a distinctive name for your new value list, then click inside the blank text box to enter the custom values you want (Figure 9.16). (You can also create a value list using values from another field or database. See To define a value list using another field or database on page 109.)
Figure 9.16. When the Edit Value List dialog box appears, Use custom values will be selected, so type your values into the text box, and click OK. 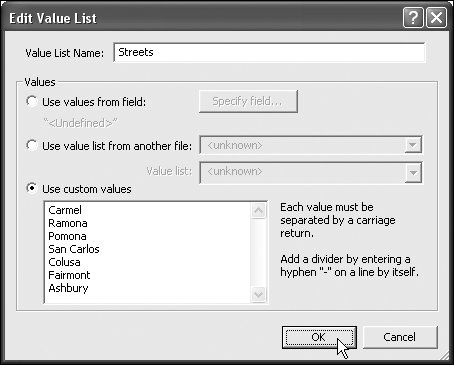
| | | 4. | Type in your first value, then press  (Windows) or (Windows) or  (Mac) to begin a new value. When you're done adding values to the list, click OK to close the dialog box. To create another value list, repeat steps 2 and 3. (Mac) to begin a new value. When you're done adding values to the list, click OK to close the dialog box. To create another value list, repeat steps 2 and 3.
| 5. | When you've finished creating lists, click OK to close the Define Value Lists dialog box (Figure 9.17). Though you've made the field into a value list, its display will not change until you change the layout. See To format a value list field on page 110 for a quick rundown. Also see Creating Layouts on page 143.
Figure 9.17. When you've finished defining your value lists, click OK to close the dialog box. 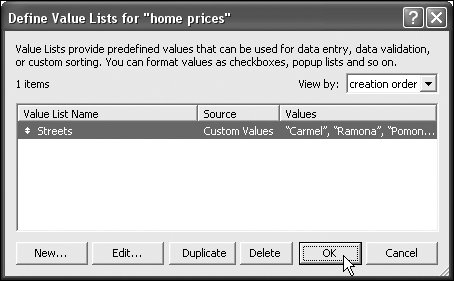
|
 Tip Tip
If you have a long list of entries for a value list, you can make it easier to read by typing in some hyphens, *, # (or whatever) on a line of their own, then pressing (Windows) or (Mac) to start a new line with a new value.
To define a value list using another field or database 1. | Choose File > Define > Value Lists.
| 2. | When the Define Value Lists dialog box appears, click New to create a new list or Edit if you want to change an existing value list.
| 3. | When the Edit Value List dialog box appears, select the first radio button, Use values from field (Figure 9.18).
Figure 9.18. When the Edit Value List dialog box appears, select the first radio button, Use values from field. 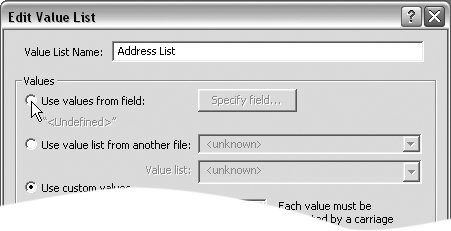
| 4. | When the Specify Fields for Value List dialog box appears, use the top-left drop-down menu to select the database you're already using and then pick a field in the list that appears below it (Figure 9.19).
Figure 9.19. In the Specify Fields for Value List dialog box, use the top-left drop-down menu to select the database you're already using and then pick a field in the list below. 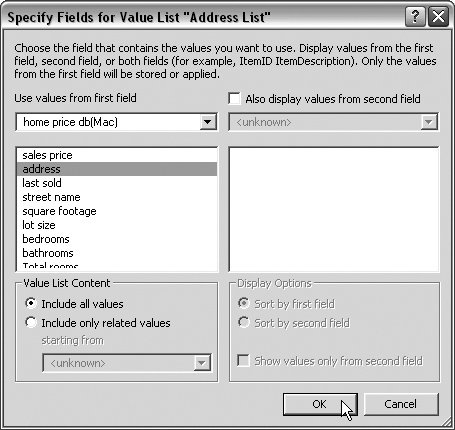
| 5. | If you like, you can add to the value list by checking Also display values from second field (Figure 9.20). Pick a field in the list that appears in the right list and, if you like, use the Display Options panel to set how the list will be sorted.
Figure 9.20. You can add to the value list by checking Also display values from second field. 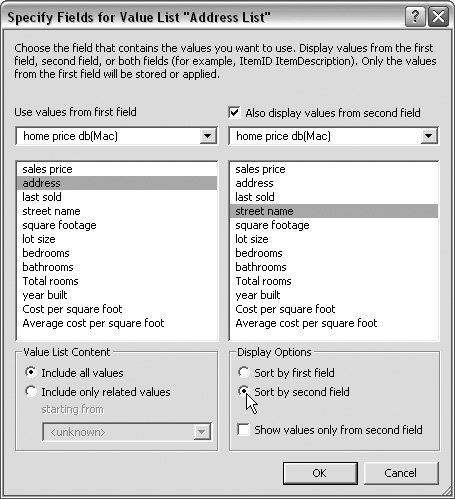
| 6. | Once you've made your choices, click OK to close the dialog box, then click OK a second time when the Edit Value List dialog box reappears.
|
Tips You also can create a value list based on another database. In step 3, select the second radio button, Use value list from another file, and then use the related drop-down menu to navigate your way to the file you want and open it. When a new dialog box appears listing all of that database's fields, select the ones you want to use and click OK. You'll need to switch to Layout mode to format how you want the value list to appear. See the following page, To format a value list field, for a quick rundown. See Creating Layouts on page 143.
To format a value list field 1. | If you haven't already defined your value list, see To define a custom value list on page 107. When you're ready to format a field, switch to Layout mode ( for Windows, for Windows,  on the Mac). Select the field you want to format by clicking on it. on the Mac). Select the field you want to format by clicking on it.
| 2. | Choose Format > Field/Control > Setup (Figure 9.21). The Field/Control Setup dialog box appears (Figure 9.22).
Figure 9.21. To format a field, switch to Layout mode, then choose Format > Field/Control > Setup. 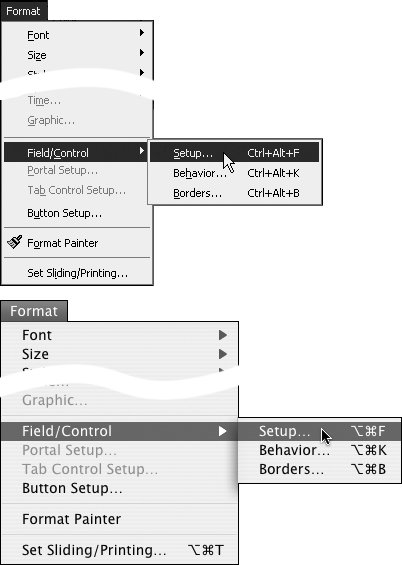
Figure 9.22. Use the Field/Control Setup dialog box to control the appearance of the value list. 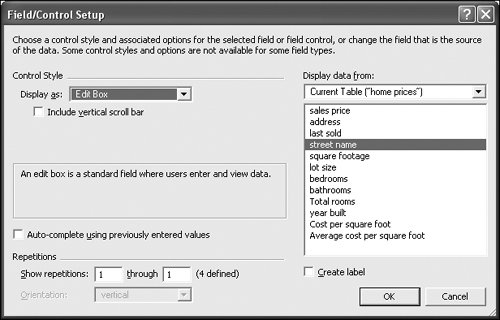
| 3. | Use the Display as drop-down menu to select which style you want for your value list: Drop-down List, Pop-up Menu, Checkbox Set, or Radio Button Set(Figure 9.23).
Figure 9.23. Use the Display as drop-down menu to select your value list's style. 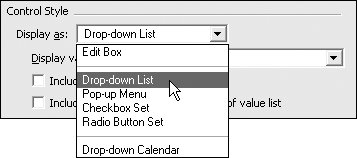
| 4. | Depending on your choice in step 3, the Control Style section of the Field/Control Setup dialog box may include two checkboxes to make your value list formatting more flexible for the user. Both options can work as double-edged swords so consider whether you want to give users that flexibility or whether you'd prefer to limit entries to what's in the value list.
Choose Include "Other..." item to allow entry of other values if you want to let users enter a value that's not in your value list. This formatting option can be added to every value list format except the pop-up menu. If the user picks the Other... choice, a dialog box opens, allowing the user to add another value.
Choose Include "Edit..." item to allow editing of value list if you want to let users change the choices in your value list. This choice can only be used for the pop-up menu format. If the user picks the "Edit..." choice, a dialog box opens allowing the user to change an existing value or add more values to the list.
| | | 5. | When you're done making your selections, click OK at the bottom of the Field/Control Setup dialog box. Switch to Browse mode ( for Windows, for Windows,  on the Mac) and your field appears with its new formatting. on the Mac) and your field appears with its new formatting.
|
Tip Which value list style best suits your needs? The pop-up menu option simply shows a blank fieldwith no clue that it holds multiple choicesunless the user clicks on it. That's handy if you don't have much screen space or want a clean, simple look. The checkbox and radio button options let the user immediately see all the choices for the field. Checkboxes allow multiple selections, while radio buttons only allow one selection at a time.
|