| One of the fundamental applications that make the Internet work is the Domain NameService (DNS). The tireless DNS servers translate human-readable hostnames (such as " www.peachpit.com") into the numerical IP addresses needed by applications (such as "63.240.93.140"), and back from IP addresses to hostnames. Under normal circumstances, a small network has no need for a DNS server. The ISP's DNS servers can handle requests for hosts in the outside world, and a simple "hosts" file can handle your LAN's hostnames. It can be quite useful to have a local caching DNS server, especially if you're unlucky enough to have an ISP with slow or unreliable DNS servers. If you've got several people sharing an Internet connection through your LAN, the cached DNS lookups will speed up access and can also reduce Internet traffic. We're going to use the de facto standard DNS server, Berkeley Internet Name Daemon (BIND). If it's good enough for most of the Internet's root name servers, it's probably good enough for a LAN. BIND is already installed with the base operating system on FreeBSD and Mac OS X. To install BIND (Fedora Core) Fedora Core's binary package archives include an up-to-date version of BIND. 1. | Log in as root, or use su to become root.
| 2. |
up2date --install bind  system-config-bind system-config-bind
Install BIND (Code Listing 12.1), which we'll refer to as named from now on (you'll see why in a minute), and the graphical configuration tool for DNS.
| 3. | chkconfig named on
Enable named during the boot process.
|
That's it for now; we won't actually start named until we've had a chance to configure it.  Tip Tip
Use the Domain Name Service application (Applications menu > System Settings > Server Settings > Domain Name System) if you want a graphical interface for configuring named. If you go this route, don't edit /etc/named.conf by hand, because the Domain Name Service application will overwrite this file when you apply your changes.
Code listing 12.1. Installing BIND on Fedora Core. [root@dhcppc1 ~]# up2date --install bind system-config-bind http://fedora.redhat.com/download/up2date-mirrors/fedora-core-3 using mirror: http://mirror.stanford.edu/fedora/linux/core/3/i386/os/ http://fedora.redhat.com/download/up2date-mirrors/updates-released-fc3 using mirror: http:// www.las.ic.unicamp.br/pub/fedora/linux/core/updates/3/i386 ... [root@dhcppc1 ~]# chkconfig named on
To install BIND (Cygwin) BIND isn't available as part of Cygwin, but you can find an official binary distribution on the Web site for the Internet Systems Consortium. 1. | Using your favorite Web browser, visit www.isc.org/index.pl?/sw/bind (the BIND homepage).
| 2. | Scroll down the page until you find the Downloads list (Figure 12.1).
Figure 12.1. The BIND page at ISC's Web site. 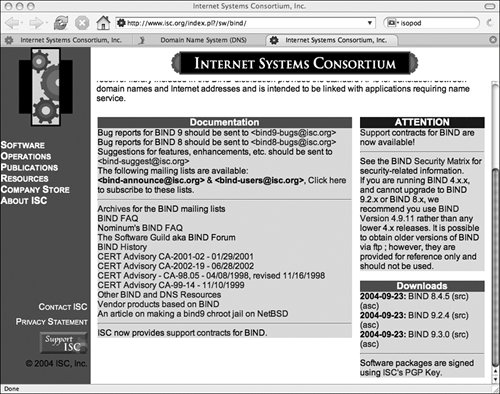
| 3. | Click the link for the latest BIND release (9.3.0 as of this writing); this takes you to the ISC BIND 9.3.0 page.
| 4. | Scroll down to find the "Windows NT 4.0 and Windows 2000 (binary)" link, "BIND9.3.0."
Note that this build will run on Windows NT 4.0, Windows 2000, Windows XP, and Windows Server 2003.
| 5. | Click the "BIND9.3.0" link, and save the archive (BIND9.3.0.zip) to your hard drive.
| 6. | Right-click the BIND9.3.0.zip file, then choose Extract All to unpack the archive.
If you're not using Windows XP, you can use any archive utility, such as Info-ZIP's free tools ( www.info-zip.org), to unpack the file.
| 7. | Run the BINDInstall program (Figure 12.2) to install BIND.
Figure 12.2. The BIND installer on Windows XP. 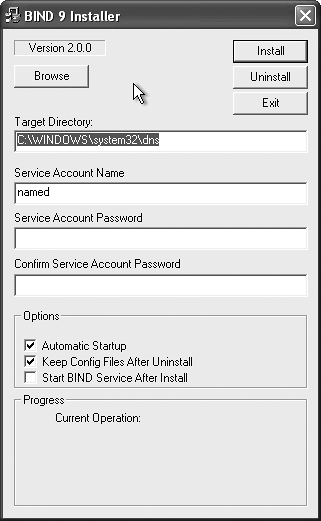
| 8. | Change the Target Directory to C:\cygwin \etc\named; this is the directory in which the BIND files will be installed.
Note that we'll refer to the DNS server as named from now on.
| 9. | The named needs to run as a very restricted user for security reasons; the installer creates a named user (unless you change the Service Account Name field) with the appropriate permissions and the password specified in the Service Account Password field.
Code listing 12.2. Creating the rndc.key file on Cygwin chrish@vm-taffer ~ $ cd /etc/named chrish@vm-taffer /etc/named $ ./bin/rndc-confgen -a wrote key file "C:\cygwin\etc\named\etc\rndc.key"
Enter the password again in the Confirm Service Account Password field to validate it.
The rest of the settings can be left at their default values.
| 10. | Click the Install button to install named and create the named user.
When prompted to create the Target Directory, click Yes.
| 11. | When the installation is complete, click the Exit button to close the BINDInstall program.
| 12. | Open a Cygwin window.
| 13. | cd /etc/named
Switch to the named installation directory (Code Listing 12.2).
| 14. | ./bin/rndc-confgen -a
Create the rndc.key file, required to allow DNS configuration (through the rndc command) from the local system.
|
To enable BIND (Mac OS X) Although BIND is already installed on Mac OS X, it's not turned on by default. 1. | sudo vi /etc/hostconfig
Use your favorite text editor to edit /etc/hostconfig; you need to do this as the super user.
| 2. | Find the DNSSERVER=-NO- line and change it to DNSSERVER=-YES-.
| 3. | Save the file and exit your text editor.
|
To configure rndc The rndc command lets you control the running named, but it needs to have a trust relationship set up (through the use of a shared key). Code listing 12.3. A basic rndc.conf file. /* rndc configuration file */ options { default-server localhost; default-key "rndckey"; }; server localhost { key "rndckey"; }; /* Change this directory to match your * named configuration directory. */ include "/etc/rndc.key";
1. | Log in as root, or use su to become root.
If you're using Cygwin, open a Cygwin window.
| 2. | cd /etc on Fedora Core or Mac OS X, or
cd /etc/namedb on FreeBSD, or
cd /etc/named/etc on Cygwin.
Switch to the named configuration file directory.
| 3. | rndc-confgen -a, or
/etc/named/bin/rndc-confgen -a on Cygwin.
Create the rndc.key file containing the shared key that lets rndc control named.
| 4. | Use your favorite text editor to edit (or create) the rndc.conf file (Code Listing 12.3).
The rndc.conf file in Code Listing 12.3 lets you control named from the local host only, as long as rndc and named agree on the same key.
Note that you'll have to replace the /etc directory in the include statement with the directory you used in step 2. For example, on FreeBSD you would use "/etc/namedb/rndc.key" instead.
| 5. | Save the rndc.conf file and exit your editor.
|
To configure named as a caching DNS server The named distributed in the BIND packages is configured through its named.conf file. Code listing 12.4. A basic named.conf file. // named configuration file options { directory "/path"; forwarders { 192.168.0.1; }; // Use this if you're behind a // firewall, otherwise named will use // random ports for its queries. query-source address * port 53; }; include "/etc/rndc.key"; // Zones for a caching name server: zone "." IN { type hint; // Change if you have an existing // root zone file under a different // name. file "named.root"; }; zone "localhost" IN { type master; // Change if you have an existing // localhost zone file under a // different name. file "localhost.zone"; allow-update { none; }; }; zone "0.0.127.in-addr.arpa" IN { type master; // Change if you have an existing // reverse-lookup localhost zone file // under a different name. file "localhost.rev "; allow-update { none; }; };
1. | Log in as root, or use su to become root.
| 2. | cd /etc on Fedora Core or Mac OS X, or
cd /etc/namedb on FreeBSD, or
cd /etc/named/etc on Cygwin.
Switch to the named configuration file directory.
| 3. | Use your favorite text editor to edit (or create) named.conf (Code Listing 12.4).
The settings in Code Listing 12.4 configure named as a caching name server.
| 4. | Change path to the named path:
/var/named, or
/etc/namedb on FreeBSD, or
C:/cygwin/etc/named/etc on Cygwin.
| 5. | Change 192.168.0.1 in the forwarders section to be your ISP's DNS server. This lets your server query their server, reducing Internet traffic by preventing requests to the root DNS servers.
| 6. | Change "/etc/rndc.key" in the include statement to the path to the rndc.key file you created in the "To configure rndc" section, above.
| 7. | If you have existing zone files (an existing named.conf file will list them already), change the file commands in the zone blocks to use these existing files.
Code listing 12.5. A basic local-host zone file. $TTL 86400 $ORIGIN localhost. @ 1D IN SOA @ root ( 42 ; serial (d. adams) 3H ; refresh 15M ; retry 1W ; expiry 1D ) ; minimum 1D IN NS @ 1D IN A 127.0.0.1
If you don't have an existing root zone file (named.root in Code Listing 12.4), download the named.root file from ftp://rs.internic.net/domain/named.root.
If you don't have an existing local-host zone file (localhost.zone in Code Listing 12.4), you can use the one in Code Listing 12.5.
If you don't have an existing reverse local-host zone file (localhost.rev in Code Listing 12.4), you can use the one in Code Listing 12.6.
Code listing 12.6. A basic reverse local-host zone file. $TTL 86400 @ IN SOA localhost. root.localhost. ( 1997022700 ; Serial 28800 ; Refresh 14400 ; Retry 3600000 ; Expire 86400 ) ; Minimum IN NS localhost. 1 IN PTR localhost.
| 8. | Save the named.conf file and exit your editor.
| 9. | named-checkconf
Use the named-checkconf command to check your named.conf changes. If all is well, it produces no output.
| 10. | service named start on Fedora Core, or
/etc/rc.d/named start on FreeBSD, or
net start named on Cygwin, or
sudo /System/Library/StartupItems/
BIND/BIND start on Mac OS X.
Start the name server.
|
Tips If you plan on using the graphical Domain Name Service configuration tool on Fedora Core, put the configuration options from Code Listing 12.4 in the named.custom file instead of named.conf. Otherwise, the configuration tool will overwrite them. On Fedora Core, you can also install the caching-nameserver package, which includes everything you need for a caching DNS server.
|