| iPhoto's basic slide shows are easy to create, but they have design limitations. Every photo appears on the screen for the same amount of time. All photos have the same transition between them. And you can't design your own Ken Burns pan-and-zoom moves. iPhoto provides a second type of slide show that shatters these limitations. Depending on whom you ask, it's called a saved slide show or a cinematic slide show. You'll call it cool. With a saved slide show, you can specify different durations for each shot. That opening view of the Parisian skyline? Five seconds. That montage of mouth-watering bakery shots? Just a couple of seconds apiece. A saved slide show also lets you mix and match transitions. For example, you might want a dissolve between most shots, but when you change major themes, spice things up with a page peel. With a saved slide show, you can also tell Ken Burns exactly what to do. Set up your own pans and zooms to highlight a photo's subject. Or simply zoom in to crop a photono need to change the original photo in your library. Similarly, you can apply black-and-white and sepia effects to the photos in a saved slide show without having to edit the original photos. When you've finished designing your slide show, you can view it on screen, export it as a QuickTime movie (page 200), or send it to iDVD (page 292). Creating a Saved Slide Show Step 1. | Select the photos you want to include in the slide show. To include an entire album, select its name in the Source list.
| Step 2. | Click the Slideshow button. 
iPhoto creates a saved slide show, adds it to your Source list, and displays the slide show editor.
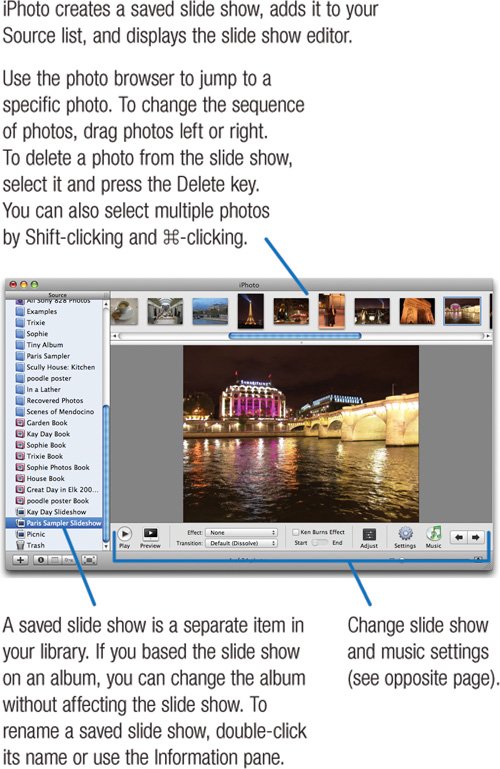 | | | Step 3. | Use the tools in the slide show editor to design your slide show.
Most of these tools operate on the currently selected photothe one that appears above the tools and is selected in the photo browser. But you can also apply some settings, such as transition, to several photos at once: select the photos' thumbnails in the photo browser, then make your settings.
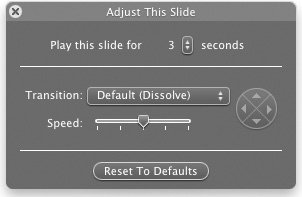 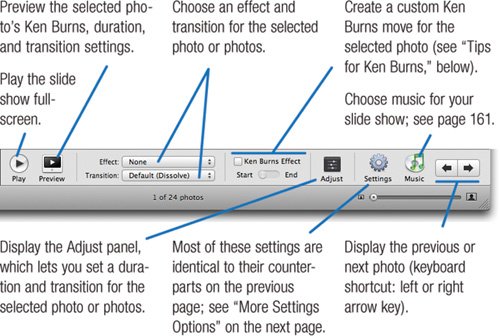 |
Tips for Ken Burns By creating your own Ken Burns moves, you can better showcase and crop your photos, and more. Creating a custom move. To create a Ken Burns move, check the Ken Burns Effect box. Then, use the size slider in the lower-right corner to specify the starting and ending zoom positions for the move. When you've zoomed in, you can specify which part of the photo you want to see by dragging within the photo. Zooming without moving. You want to show only part of a photo, but you don't want to crop it because that would change its appearance throughout your library. Solution: Check the Ken Burns Effect box, click the Start position, then zoom in. Now press the Option key and click the End position. Pressing Option tells iPhoto to copy the starting position to the ending position. I call this technique soft croppingit's a great way to improve a photo's composition in a slide show without having to actually crop the photo. Panning without zooming. This Option-key trick also lets you set up moves that pan across an image but don't zoom in or out. Set up the starting position, and drag within the photo to indicate which portion you want to see. Next, Option-click the End position and drag within the photo again. |
|