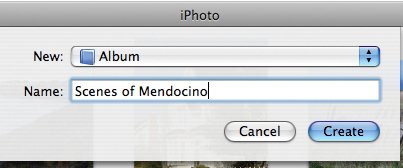
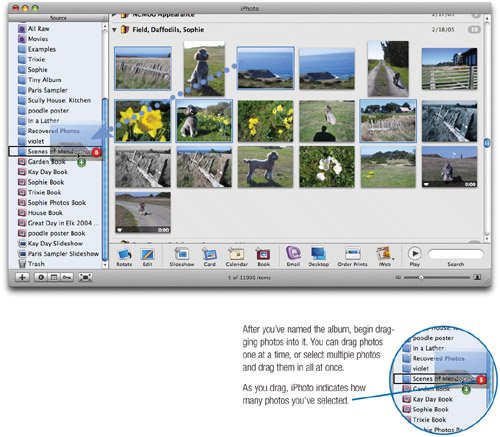
Creating Albums
| Getting photos back from a lab is always exciting, but what's really fun is creating a photo album that turns a collection of photos into a story. An iPhoto album contains a series of photographs sequenced in an order that helps tell a story or document an event. Creating an album is often the first step in sharing a set of photos. For example, before creating a slide show or book, you'll usually want to create an album containing the photos you want to use. Creating albums in iPhoto is a simple matter of dragging thumbnail images. You can add and remove photos to and from albums at any time, and you can sequence the photos in whatever order you like. You can even include the same photo in many different albums. The photos in an album might be from one roll, or from a dozen different rolls. Just as an iTunes playlist lets you create your own music compilations, an iPhoto album lets you create your own image compilations. And once you create albums, you can share them in a variety of ways.
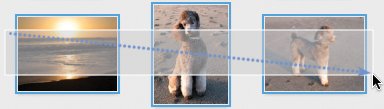
Organizing an Album The order of the photos in an album is important: when you create slide shows, books, or Web photo galleries, iPhoto presents the photos in the order in which they appear in the album. Once you've created an album, you may want to fine-tune the order of its photos. 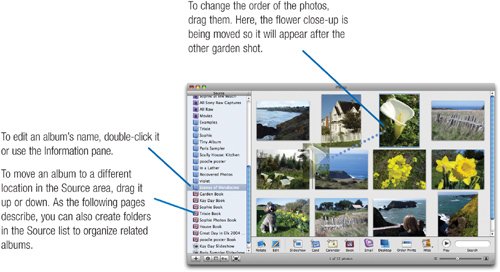 Removing a photo. Don't want a photo in an album after all? Select it and press the Delete key. This removes the photo from the album, but not from your hard drive or photo library. Tips for Selecting Photos Selecting photos is a common activity in iPhoto: you select photos in order to delete them, add them to an album, move them around within an album, and more. When working with multiple photos, remember the standard Mac OS selection shortcuts: To select a range of photos, click on the first one and Shift-click on the last one. To select multiple photos that aren't adjacent to each other, press As the screen below shows, you can also select a series of pictures by dragging a selection rectangle around them. |