| Using the flow-control and core XML tags of JSTL, you can transform XML documents into nicely formatted HTML documents. JSTL supports another standard that makes it even easier to format XML. Using XSLT, you can specify the exact format in which you would like your XML document to be formatted. A complete discussion of XSLT is beyond the scope of this book. If you are interested in learning XSLT, visit http://www.w3.org/TR/xslt. We also recommend Sams Teach Yourself XSLT in 21 Days (Sams, 2002, ISBN 0672323184). We limit our discussion of XSLT to how XSLT is integrated with JSTL. JSTL allows you to specify two input files and receive the output. The input files are an XML data file and an XSLT formatting file. You specify the output in the XSLT formatting file. A properly written XSLT format file can output data in nearly any text format. The two most common forms are HTML and XML. XSLT is often used to generate HTML output from XML data. In addition, XSLT is used to translate between two incompatible XML formats. The JSTL XML tags provide two tags that are used to work with XSLT files. The primary tag is the <x:transform> tag, which actually does the transformation. The second tag, <x:param>, allows you to specify parameters that will be passed to the XSLT script. These script parameters let you customize the operation of your XSLT script file. Listing 8.1 shows the XML file that we've used for all the examples in this chapter. Let's now see how to use XSLT with this sample file. To do this, we must use an XSLT file designed to work with the students.xml file. We've shown this XSLT file in Listing 8.7. Listing 8.7 A Sample XSLT File (transform.xsl)<?xml version="1.0"?> <xsl:stylesheet version="1.0" xmlns:xsl="http://www.w3.org/1999/XSL/Transform"> <xsl:template match="students"> <html> <head> <title>XSLT Transform</title> </head> <body> <table border="1"> <tr><th>First</th><th>Last</th><th>Points</th><th>Letter</th> </tr> <xsl:apply-templates/> </table> </body> </html> </xsl:template> <xsl:template match="student"> <tr> <td><xsl:value-of select="name/first"/></td> <td><xsl:value-of select="name/last"/></td> <td><xsl:value-of select="grade/points"/></td> <td><xsl:value-of select="grade/letter"/></td> </tr> </xsl:template> </xsl:stylesheet> Our XSLT file (in Listing 8.7) formats our XML file (shown in Listing 8.1) to look exactly like the HTML shown in Figure 8.4. Now, let's examine the basic structure of the XSLT file. This file is responsible for generating the entire HTML document everything from the beginning <html> tag to the ending </html> tag. To do this, we use templates to handle specific blocks of the XML document. The node that encloses the entire student file is named students. An XSL template is provided that encapsulates this node, and because the students node is the root node, this will be the first template executed. The root template is shown here: <xsl:template match="students"> As you can see, this template seeks a match on the value students. Since this is the root node, it will be the first template executed. Our template then goes on to set up the header information and begin the table: <html> <head> <title>XSLT Transform</title> </head> <body> <table border="1"> <tr><th>First</th><th>Last</th><th>Points</th><th>Letter</th> </tr> Now that we have reached the body of the table, we can use the XSLT tag <xsl:apply-templates> to process the child nodes of the current tag. In this case, all student records will be processed: <xsl:apply-templates/> </table> </body> </html> </xsl:template> For each student record encountered, our program seeks a matching student <xsl:template>: <xsl:template match="student"> <tr> To display each of the attributes for the student, our program uses the <xsl:value-of> tag. We provide this tag with relative XPath expressions that specify the element we want to display. The following code displays the attributes for each student: <td><xsl:value-of select="name/first"/></td> <td><xsl:value-of select="name/last"/></td> <td><xsl:value-of select="grade/points"/></td> <td><xsl:value-of select="grade/letter"/></td> </tr> Now that you know how to construct a basic XSLT document, we'll show you how to use this document with the JSTL XML tags to create HTML. Let's begin by examining the <x:transform> tag. Using the <x:transform> Tag You use the <x:transform> tag to transform XML data based on an XSLT script. There are three forms of the <x:transform> tag: // Syntax 1: No body content <x:transform xml="XMLDocument" xslt="XSLTStylesheet" [xmlSystem] [xsltSystem] [{var="varName" [scope="scopeName"]|result="resultObject"}] // Syntax 2: Transformation parameters specified using body <x:transform xml="XMLDocument" xslt="XSLTStylesheet" [xmlSystem] [xsltSystem] [{var="varName" [scope="scopeName"]|result="resultObject"}] <x:param> actions </x:transform> // Syntax 3: Using a body to specify both an XML document and transformation parameters <x:transform xslt="XSLTStylesheet" xmlSystem xsltSystem [{var="varName" [scope="scopeName"]|result="resultObject"}] XML document being processed optional <x:param> actions </x:parse> The first syntax format contains no body content; the XML document is specified using the xml attribute. The second syntax allows you to specify XSLT transformation parameters. The third syntax lets you specify both XSLT parameters and an XML document. The <x:transform> tag accepts the following attributes: | result | N | A scoped variable of type javax.xml.transform.Result that specifies how the result should be processed. | | scope | N | Specifies the scope of the scoped variable referenced by the var attribute. | | var | N | Specifies a scoped variable that will hold the transformed document. If none is specified, the results will be written to the page. | | xml | N | Specifies a string that holds the XML file to be used with the transformation. | | xslt | N | Specifies a string that holds the XSLT file to be used with the transformation. | | xmlSystemId | N | Specifies the URI of the XML document to be used. | | xsltSystemId | N | Specifies the URI of the XSLT document to be used. | You must provide XML to the <x:transform> tag. The two syntaxes give you different ways to do this. In the first syntax, the XML data is provided through the attributes of the <x:transform> tag. The second syntax specifies the input XML through the body data contained in the <x:transform> tag. The <x:transform> tag must be given a valid XML and XSLT document to work with. You can specify the XML document either by embedding it in the body of the tag or by referencing it in the xml attribute. You specify the XSLT document using the xslt attribute. By default, the results of the transformation are written to the page. If a var attribute is specified, the contents of the transformation are stored to that variable. This variable is of type org.w3c.dom.Document. The attribute scope allows you to set the scope for the variable referenced by the var attribute. You may also specify a Result object by using the result attribute. This value determines how the transformation will take place. The Result object is of type javax.xml.transform.Result and contains information that is needed to build a transformation result tree. A single property, systemID, is provided by the Result object. This object contains the system identifier, or URI, of the transformation. For more information, refer to the Java API documentation for the javax.xml.transform.Result class. You should also note that if the XSLT stylesheet is specified via the xslt attribute, the <x:transform> action may transparently cache transformer objects to improve performance. The <x:transform> tag is not required to fetch the contents of the xslt attribute each time the <x:transform> tag is used. Let's look at an example of how we can use the <x:transform> tag in a JSP page. This example, shown in Listing 8.8, is very short; nearly all the work is done in the XSLT file. The output from this program is exactly the same as for the <x:forEach> tag example shown in Figure 8.4. Listing 8.8 Using the <x:transform> Tag<%@ taglib uri="http://java.sun.com/jstl/core" prefix="c" %> <%@ taglib uri="http://java.sun.com/jstl/xml" prefix="x" %> <c:import var="xml" url="students.xml" /> <c:import var="xslt" url="transform.xsl" /> <x:transform xml="${xml}" xslt="${xslt}" /> As you can see in Listing 8.8, both the XML file and the XSL file are loaded into scoped variables. The <x:transform> tag is then used to format the XML using the XSL. The end result is that the student list is written to the page, as in Figure 8.4. This brings up an important point. We have seen that there are two ways you can format the XML file. The end result is the same; they both end up looking like Figure 8.4. On one hand, we can use the <x:forEach> tag and use JSTL to display the XML. On the other hand, we can use XSLT to transform the XML into the same HTML output. Which method is better? The answer is that it depends. There are no set rules. Often, it comes down to programmer preferences. However, you should keep a few things in mind. Formatting with XSL does not allow you to interact with other JSTL components, such as databases. If the XML to be displayed easily fits within an XSL template, then XSL is probably the better solution. However, if the display requires complex cross-referencing or other complex processing, using the other JSTL tags might be a better solution. Using the <x:param> Tag XSLT documents can accept parameters to modify their behavior. The <x:param> tag allows you to pass parameters to the XSLT to be used with the transformation. There is one form of the <x:param> tag: // Syntax 1: Parameter value specified in attribute value <x:param name="name" value="value"/> // Syntax 2: Parameter value specified in the body content <x:param name="name"> parameter value </x:param> The attributes accepted by the <x:transform> tag are as follows: | name | Y | Specifies the name of this parameter. | | value | N | Specifies the value of this parameter. | The two syntaxes allow you to specify how the value of the parameter is to be specified. The first syntax uses an attribute to specify the value of the parameter. The second syntax uses the body of the <x:param> tag to specify the value of the parameter. Let's look at an example of how to use XSLT parameters with JSTL. Our sample program displays the same student list. The only difference will be that this time we use an XSLT parameter to specify the background color of the table. The final output will look like Figure 8.6. 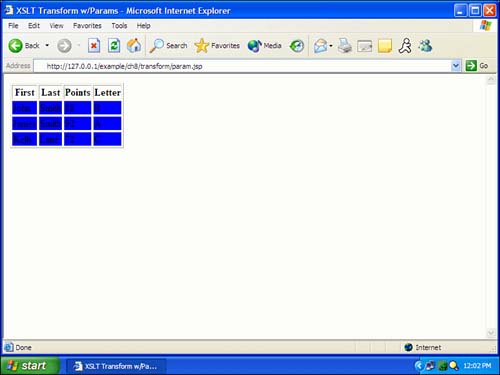
This program requires a special version of the XSLT file. We have to modify the file to include the parameters, as shown in Listing 8.9. Listing 8.9 XSLT with Parameters (transformparam.xsl)<?xml version="1.0"?> <xsl:stylesheet version="1.0" xmlns:xsl="http://www.w3.org/1999/XSL/Transform"> <xsl:param name="bgColor"/> <xsl:template match="students"> <html> <head> <title>XSLT Transform w/Params</title> </head> <body> <table border="1"> <tr><th>First</th><th>Last</th><th>Points</th><th>Letter</th> </tr> <xsl:apply-templates/> </table> </body> </html> </xsl:template> <xsl:template match="student"> <tr> <td bgcolor="{$bgColor}"><xsl:value-of select="name/first"/> </td> <td bgcolor="{$bgColor}"><xsl:value-of select="name/last"/> </td> <td bgcolor="{$bgColor}"><xsl:value-of select="grade/points"/> </td> <td bgcolor="{$bgColor}"><xsl:value-of select="grade/letter"/> </td> </tr> </xsl:template> </xsl:stylesheet> The format of this XSLT file is similar to the one in Listing 8.7. The primary difference is the built-in parameters. First, we have to declare the parameter. In this program, we use only one parameter, named bgColor: <xsl:param name="bgColor"/> Next, we declare the background color parameter. This parameter is used inside the <td> tags to set the background of the table: <td bgcolor="{$bgColor}"><xsl:value-of select="name/first"/> Finally, the background color must be specified by the calling JSTL. Listing 8.10 shows our program. Listing 8.10 Calling XSLT with Parameters<%@ taglib uri="http://java.sun.com/jstl/core" prefix="c" %> <%@ taglib uri="http://java.sun.com/jstl/xml" prefix="x" %> <c:import var="xml" url="students.xml" /> <c:import var="xslt" url="transformparam.xsl" /> <x:transform xml="${xml}" xslt="${xslt}"> <x:param name="bgColor" value="blue"/> </x:transform> As you can see in Listing 8.10, we specified the color blue for the background color. | 