Using the Windows Form Designer
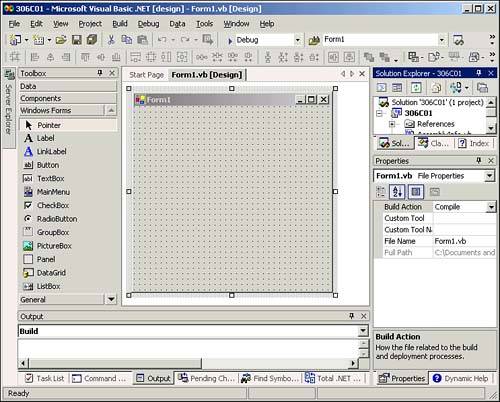
Using the Windows Form DesignerBecause the .NET Framework allows development across multiple languages, it provides a common development interface for the creation of objects such as a Windows form. As seen in Figure 1.2, the Windows Form Designer displays a graphical example of the form along with a detailed examination of its available properties. Forms and other objects in the IDE can be shown in several views. Figure 1.2 shows the graphical design view of this form. As you'll see later, there is also a view called code view that lets you work with the source code that creates this form (sometimes referred to as the form's module ). Figure 1.2. The Windows Form Designer showing the default creation of Form1. Creating a Blank FormIn order to create a new Windows form, first launch Visual Studio .NET and then perform the following steps:
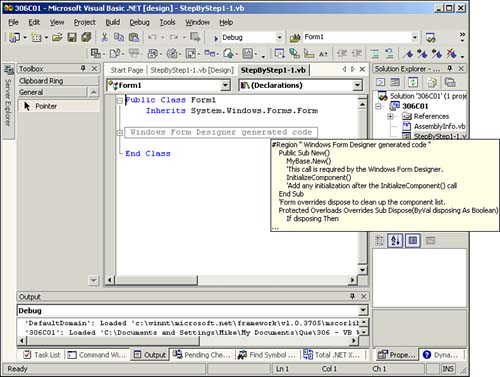
Modifying a Form's PropertiesThe Properties window within the design environment provides access to the properties of a selected form in the current project. Values may be edited here by clicking on the desired property, such as the Text property that specifies the text that will be displayed in a form's title bar. Displaying a FormIn order to see the results of your changes, you may select Debug, Start or select the F5 key. The form will be displayed in its complete form. Clicking the Close button on the form will stop the application and return you to the IDE. When you're in the IDE, you may right-click the form and select View Code in order to open a new window displaying the code corresponding to the Windows form (see Figure 1.3). Figure 1.3. The Windows Form Designer showing the code view of Form1.
Exploring the Code ViewWithin the code view of a form, you may expand the code block by clicking the plus sign (+), and you can collapse the block again by clicking the minus sign (-). As shown in Figure 1.3, hovering the cursor over the code block will display the first lines of the collapsed code. A code block may be specified by bracketing the code with # region and #end region . In code view, you can directly edit the code that creates the form. Changes here will be reflected on your form automatically. Expand the automatically generated code block to see the code that creates the form itself. One item to note is the creation of an instance of the System.Windows.Forms.Form class so that the new form instance automatically includes the inherited members necessary to allow it to contain other controls and inherit form- related methods . This is accomplished by the automatic code shown here: Public Class Form1 Inherits System.Windows.Forms.Form You will also notice the constructor for the class, which allows for the creation of a new instance of a class. The constructor is recognizable by the use of the keyword New , as shown here: Public Sub.New() MyBase.New() InitializeComponent() End Sub Additional initialization of the new instance of the Form class may be performed within the InitializeComponent() method of the class, including programmatic assignment of property values. In order to set the value of the Text property (which you previously edited in the Properties window), you may use the following code: Me.Text = "My First Form" Here, the use of the keyword Me indicates the code is acting on the object that contains the code (in this case, the form itself) and assigning the value "My First Form" to the Text property of the new instance of the Form object. The code also includes a default cleanup routinethe Dispose() method. The .NET Framework includes automatic garbage collection, but you may place any additional cleanup code you wish here.
When you edit code, you will find the Visual Studio .NET interface offers access to any methods and properties available to an object or class. This feature is called IntelliSense, and it helps in rapid development of your application. Compiling the FormWhen you run the form by selecting Start in the Debug menu or by pressing the F5 key, Visual Studio .NET will attempt to compile the form's code using a suitable language compiler (for Visual Basic .NET, this compiler is named vbc.exe ). Any errors will be displayed so that you may correct them and recompile again if necessary. If no errors are encountered , then Visual Studio .NET will create an executable (EXE) file with the project's name, located in the \bin folder within the location selected to contain the project's files. |
EAN: N/A
Pages: 188
- Using SQL Data Definition Language (DDL) to Create Data Tables and Other Database Objects
- Using Keys and Constraints to Maintain Database Integrity
- Performing Multiple-table Queries and Creating SQL Data Views
- Working with Comparison Predicates and Grouped Queries
- Exploiting MS-SQL Server Built-in Stored Procedures