| The security model within .NET development breaks down into two primary areas: -
Code-access security This area manages the security of the .NET runtime code itself, allowing the .NET Framework to verify permissions before allowing code to run or ensuring that all necessary permissions are available to access required resources on the system before execution. Code-access security can be based on requesting specific permissions or on asserting the identity of the user running the code. -
Role-based security This area manages the logon account's access rather than the application code itself, allowing control of application access based on user or group membership.  | The .NET Framework also includes additional security features such as public-key and private-key encryption, but these are not focus topics on the exam. |
Code-access security involves controlling access to resources. Within the .NET Framework, this involves the following: -
Permissions -
Code groups -
Permission sets Permissions Permissions specify whether code should have access to a resource, such as the ability to read or write information into the Windows Registry, which is specified through the RegistryPermission setting. Application code can work with permissions in four ways: -
Requesting the minimum permissions required to run -
Requesting optional permissions desired but not required -
Refusing permissions to ensure the code cannot access a particular set of resources -
Demanding permissions on behalf of the calling code The machine determines the maximum permissions possible, but application code can be configured to request or receive lesser permissions than the maximum. The .NET Framework groups permissions into three types: -
Code access Represents access to a protected resource or operation -
Identity Represents access based on credentials provided by the code -
Role based Represents access based on the logon account executing the code Permissions within the .NET Framework are derived from the System.Security.CodeAccessPermission class. Table 15.1 details some of the more useful permissions derived from this class. Table 15.1. Permissions in the .NET Framework | Permission | Type | Explanation | | DirectoryServicesPermission | Code access | Controls access to the System.DirectoryServices namespace. | | DnsPermission | Code access | Controls access to Domain Name Service (DNS) services. | | EnvironmentPermission | Code access | Controls access to environment variables . | | EventLogPermission | Code access | Controls access to the Windows Event Log. | | FileDialogPermission | Code access | Controls access to files selected from the Open dialog box. | | FileIoPermission | Code access | Controls access to reading and writing files and directories. | | IsolatedStorageFilePermission | Code access | Controls access to private virtual file systems. | | IsolatedStoragePermission | Code access | Controls access to isolated storage. | | MessageQueuePermission | Code access | Controls access to message queuing via Microsoft Message Queuing (MSMQ). | | OleDbPermission | Code access | Controls access to data via the System.Data.OleDb namespace. | | PerformanceCounterPermission | Code access | Controls access to performance counters. | | PrintingPermission | Code access | Controls access to printers. | | ReflectionPermission | Code access | Controls access to the .NET reflection features. | | RegistryPermission | Code access | Controls access to the Windows Registry. | | SecurityPermission | Code access | Controls access to unmanaged code. | | ServiceControllerPermission | Code access | Controls access to starting and stopping services. | | SocketPermission | Code access | Controls access to Windows sockets. | | SqlClientPermission | Code access | Controls access to data via the System.Data.SqlClient namespace. | | UiPermission | Code access | Controls access to the user interface. | | WebPermission | Code access | Controls access to making Web connections. | | PublisherIdentityPermission | Identity | The identity of the publisher, as determined by the code's digital signature. | | SiteIdentityPermission | Identity | The identity of the Web site from which the code was downloaded. | | StrongNameIdentityPermission | Identity | The identity established by the assembly's strong name. | | URLIdentityPermission | Identity | Establishes the identity permission of the Uniform Resource Locator (URL) where the code originated. | | ZoneIdentityPermission | Identity | Establishes the identity permission for the security zone where the code originated. (This is viewed on the Security tab of the Internet Explorer Options.) | | PrincipalPermission | Role based | The user's credentials. Allows checks against the active principal. | If the available permissions are inadequate for your needs, it is also possible to create custom permissions by deriving your own class from the System.Security.CodeAccessPermissions class. Requesting Minimum Permissions Application code should request the least permissions required to operate . Follow these steps to see an example of this: -
Open an instance of Visual Studio .NET and create a new .NET Windows Application project, including a form. -
Place a Label control, a TextBox control (txtFileName), a Button control (btnGetName), and an OpenFileDialog component (dlgOpen) on your form. Figure 15.4 shows a possible layout for this form. Figure 15.4. A form to demonstrate requesting permissions. 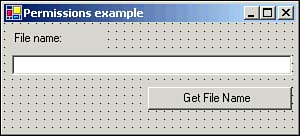 -
Open the form's code module and add the following code: Imports System.Security.Permissions <Assembly: FileDialogPermissionAttribute(_ SecurityAction.RequestMinimum, _ Unrestricted:=True)> Private Sub btnGetName_Click(ByVal sender As System.Object, _ ByVal e As System.EventArgs) Handles btnGetName.Click Try If dlgOpen.ShowDialog = DialogResult.OK Then txtFileName.Text = dlgOpen.FileName End If Catch ex As Exception MessageBox.Show("Exception: " & ex.Message) End Try End Sub -
After saving and compiling this project, you can launch the executable and ensure that access of the FileDialogPermission is accomplished through the FileDialogPermissionAttribute request. In this example, the SecurityAction.RequestMinimum flag establishes that we are determining whether the application code has been granted at least the minimum necessary permissions to operate. Later in the chapter, you'll see how to tell your computer to deny this permission. You should be familiar with the following four flags: -
RequestMinimum Determines whether the application code has at least the minimum permissions needed to run. -
RequestOptional Requests additional desired permissions that are not strictly required to run the application. This requires a TryCatch block to handle the exception if a permission is not available. -
RequestRefuse Limits the permissions granted to the application code (to restrict the harm that the code can cause). For example, your code might refuse Registry permissions so that the code can't possibly alter information in the Registry. -
Demand Requires all code that calls this application to have a particular permission. Code Groups A code group is a set of assemblies that share a security context. Every assembly in a code group shares the same permissions, but an assembly may also belong to more than one code group at the same time. The .NET Framework supports seven code group membership conditions: -
Application directory All code in the installation directory of the running application -
Cryptographic hash All code matching a specific cryptographic hash, creating a single-assembly code group -
Software publisher All code from a specific publisher. Publishers are identified by their Authenticode signature on the code. -
Site All code from a particular Internet domain -
Strong name All code with the specified assembly strong name -
URL All code from a specified URL -
Zone All code from a specified security zone (Internet, Local Intranet, Trusted Sites, My Computer, or Untrusted Sites) Permission Sets It is not possible to assign permissions directly within the .NET Framework. You must construct permission sets, which contain one or more permissions assigned as a unit. The .NET Framework includes seven default permission sets: -
Nothing Grants no permissions -
Execution Grants run but not access permissions -
Internet Grants limited permissions for code of unknown origin -
LocalIntranet Grants nearly unlimited permissions for code within an enterprise -
Everything Grants all permissions except the permission to skip security checks -
SkipVerification Grants the permission to skip security checks -
FullTrust Grants all permissions over all resources Granting or Denying Permissions The easiest way to specify permissions for an application is to use the .NET Framework Configuration tool (refer to Figure 15.2). In order to configure a specific set of permissions for the application created in the previous section of this chapter, follow these steps within this tool: -
Select Start, Programs, Administrative Tools, Microsoft .NET Framework Configuration. -
Expand the Runtime Security node, then the User node, and then the Permission Sets node to see the built-in .NET permission sets. -
Right-click the Everything permission set and select Duplicate to create a new permission set named Copy of Everything. -
Right-click the Copy of Everything permission set and select Rename. Rename the permission set No FileDialog . -
With the No FileDialog permission set selected, click the Change Permissions link in the right panel of the Configuration tool. In the Create Permission Set dialog box, select File Dialog and click Remove. Click Finish to save your changes. -
Expand the Code Groups node and click the default All Code code group. Click the Add a Child Code Group link in the right panel of the Configuration tool. -
In the Create Code Group dialog box, name the new group Chapter15 . Enter a description and click Next. -
Select the Hash condition. Click the Import button and browse to the executable file that you created in the previous example. Click Open to calculate the hash for this file. Click Next. -
Select the No FileDialog permission set and click Next. Click Finish to create the new code group. -
Right-click the Chapter15 code group and select Properties. Check the box to make this code group exclusive, as shown in Figure 15.5. Click OK. Figure 15.5. Setting properties for a code group.  -
Run the sample application by double-clicking it in Windows Explorer. You'll receive a policy exception error box indicating that the code cannot be run. Click No to dismiss the error.  | Requesting permissions through the use of attributes is known as declarative security . On the other hand, imperative security involves creating objects to represent the permissions your code requires. Imperative security is generally used only when security must be configured based on runtime conditions. |
Computing Code Access Permissions The Common Language Runtime follows a complex process to determine the permissions assigned to a piece of code. Consider the Enterprise level of permissions first. The CLR starts by examining the evidence (publisher, strong name, hash, and so on) that a particular piece of code presents to determine its membership in code groups at that level. In general, the CLR will examine all the code groups in the hierarchy to determine membership. However, any code group in the hierarchy can be marked as Exclusive (the effect of the check box you checked when creating the Chapter15 code group). The CLR stops checking for group membership if code is found to be a member of an Exclusive code group. The net result is that code will be determined to be a member of zero or more code groups at the Enterprise level as a first step. Next, the CLR retrieves the permission set for each code group that contains the code. If the code is a member of an Exclusive code group, only the permission set of that code group is taken into account. If the code is a member of more than one code group and none of them are an Exclusive code group, all the permission sets of those code groups are taken into account. The permission set for the code is the union (least restrictive combination) of the permission sets of all relevant code groups. That is, if code is a member of two code groups, and one code group grants FileDialog permission, but the other does not, the code will have FileDialog permission from this step. That accounts for the permissions at one level (the Enterprise level). But there are actually four levels of permissions: Enterprise, Machine, User, and Application Domain. Only the first three levels can be managed within the .NET Framework Configuration tool, but if you need specific security checking within an application domain ( roughly speaking, an application domain is a session in which code runs), you can do this in code. An application domain can reduce the permissions granted to code within that application domain, but it cannot expand them. The CLR determines which of these four levels are relevant by starting at the top (the Enterprise level) and working down. Any given code group can have the LevelFinal property, in which case the examination stops there. For example, if code is a member of a code group on the Machine level, and that group has the LevelFinal property, only the Enterprise and Machine levels are considered in assigning security. The CLR computes the permissions for each level separately and then assigns the code the intersection (least restrictive combination) of the permissions of all relevant levels. That is, if code is granted FileDialog permission on the Enterprise and Machine levels but is not granted FileDialog permission on the User level, the code will not have FileDialog permission. The final step of evaluating code access permissions is to perform a stack walk . In a stack walk, the CLR examines all code in the calling chain from the original application to the code being evaluated. The final permission set for the code is the intersection of the permission sets of all code in the calling chain. |