Form Modification Basics
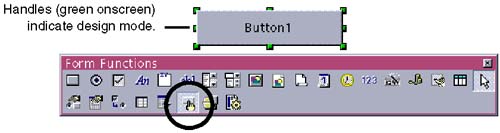
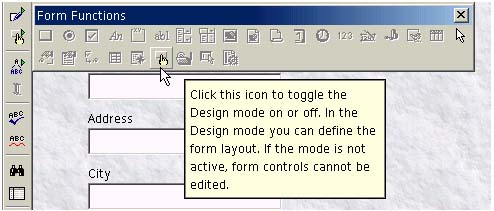
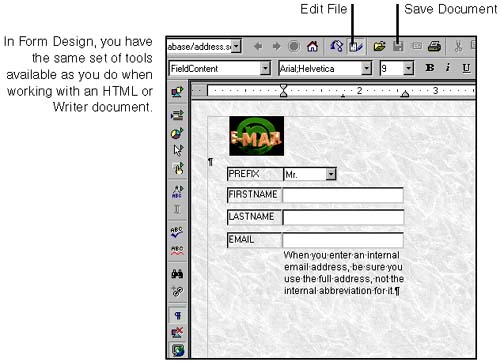
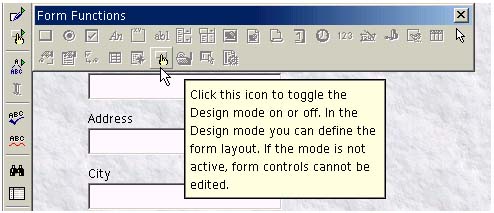
| After you've created a form with AutoPilot, you can rearrange, add, remove, and change the look of fields. You can also add text, graphics, and other elements to the form to make it more user friendly and attractive. Switching From Edit Mode to Design ModeYou can toggle between two modes: one in which you can edit the control (design mode), and one in which the control performs whatever actions you've assigned to it. The controls function only when design mode is off; you can edit the control only in design mode. To switch, use the Design Mode On/Off icon on the Form Functions tearoff menu or on the form functions object bar. If you distribute the file for use, keep in mind that others will open the file in design mode, by default. To use the controls, they'll need to switch off design mode with the icon in Figure 36-17, or switch off editing for the entire document using the Edit File icon in the function bar, shown at the right. Figure 36-17. Design mode on/off icon Basic Form Modification
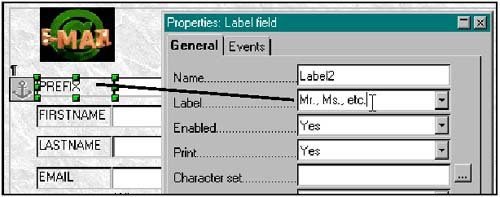
In the example in Figure 36-18, an animated GIF and an explanatory paragraph were added to the form. To make this happen, all the controls were grouped and anchored to the first paragraph, and wrapping for the grouped object was set to None. The animated GIF was inserted and anchored above the first paragraph. The ruler was added to the workspace (View > Ruler), and the second paragraph, containing the text beneath the EMAIL field, was indented to fit under the entry box for the field. To change the properties of the fields, select a field, right-click, and choose Group > Ungroup. This separates a field's label from the actual control where data is entered. Then select the field or label you want to modify, right-click, and choose the appropriate option. The Control option lets you change the look and behavior of the control. Note If you need help lining up elements on a form, use a grid. To do this, choose Tools > Options > Text Document > Grid, select the Visible Grid and/or Snap to Grid options, and change the grid Resolution (size of squares) and Subdivision (number of dots between intersections) to set the grid the way you want it. Changing a Field's LabelBy default, a field on a form uses the name of the data source field it's connected to. You can change the name of the label to make it more readable, especially if the name of the field in the data source is cryptic.
Setting the Tab Order in FormsMost people who do data entry don't like to take their hands off the keyboard. To move from field to field, they like to use the Tab key, which means the order in which the cursor jumps from field to field is important. This procedure shows you how to change the order in which the cursor jumps from field to field when you press the Tab key.
|
EAN: 2147483647
Pages: 407
- Using SQL Data Manipulation Language (DML) to Insert and Manipulate Data Within SQL Tables
- Working with Comparison Predicates and Grouped Queries
- Writing External Applications to Query and Manipulate Database Data
- Writing Advanced Queries and Subqueries
- Exploiting MS-SQL Server Built-in Stored Procedures