Creating Your Own Mail Merge Documents
| This section simply covers how to "roll your own" if the AutoPilot approach doesn't suit your needs. (For more information, see Chapter 35, Creating and Modifying Data Sources , on page 871.) Note If you have problems completing any of these procedures, see How to Make It Work. Note To switch data sources later, see Switching to a Different Data Source for a Mail Merge Document on page 376. How to Make It WorkOften, the document doesn't want to accept the fields you're dragging into itwhen your mouse moves over the document, the big black "Ghostbusters" symbol will appear and the field won't appear. To correct this, try one of the following before you drag in the fields: if one doesn't work, the other will. Approach A: Toggle the editability of the documentFollow these steps.
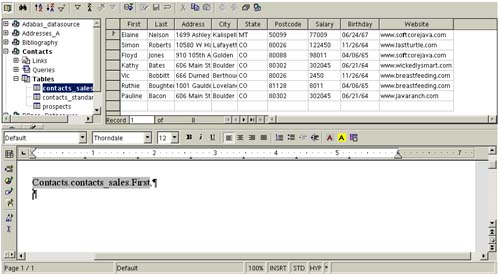
Approach B: Don't save the documentDrag the fields into a new empty document and don't save it until all the fields are in. Approach C: Save the document firstThis is the opposite of Approach B, yes. Try it anyway; if A and B haven't work, C might. Dragging Data Source Fields Into a DocumentDragging fields in is a really slick way to get the data you want. Just make sure you follow the guidelines in How to Make It Work or it won't.
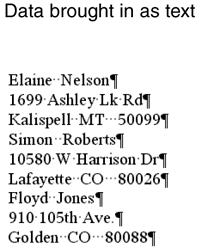
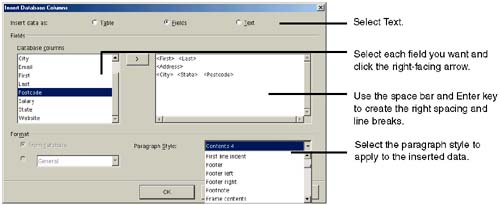
To print what you've created, see Printing on page 399. Inserting Data Source Information as Text Instead of as Fields Linked to the Data SourceLet's say you just want to send a friend your address book, and it's in a data source. Yo don't care if the document is linked back to the data source; you just want to send out the information. Here's how to do it. Inserting Data Sources as Plain TextIf all you want to do is get some information from data sources into a regular ol' Writer document, here's how.
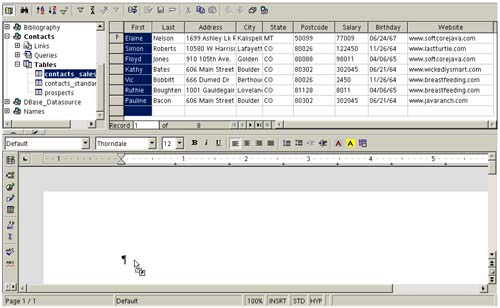
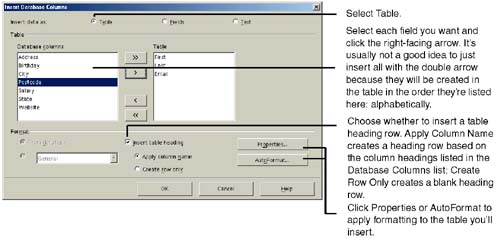
To print what you've created, just choose File > Print and print normally. Inserting Data Sources as Plain Text in a Table
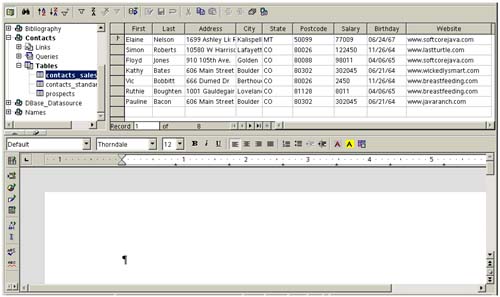
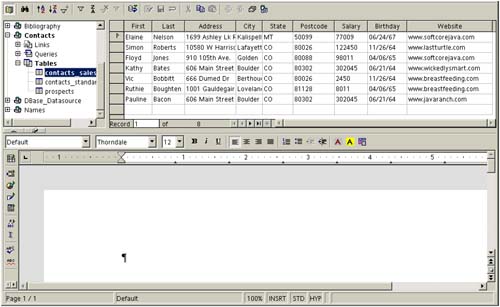
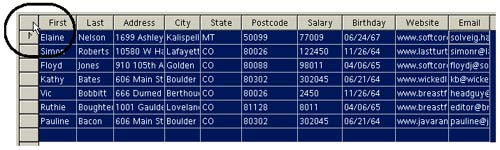
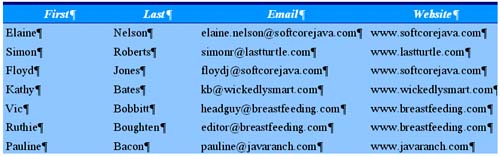
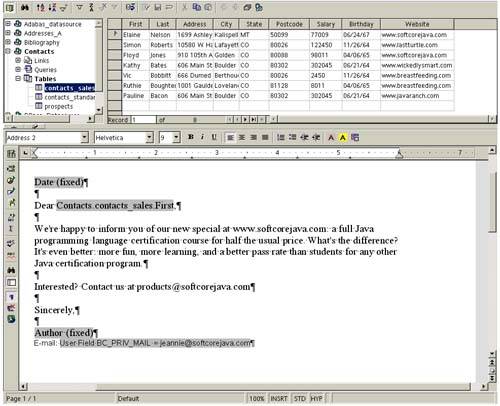
Figure 10-34 shows an inserted table; the AutoFormat button was used to apply the blue table format theme. Figure 10-34. A field created from inserting a data source You can print it directly without an extra step since the data is plain text, not fields. Figure 10-35. Finishing a document containing data source data To print, just choose File > Print and print normally. |
EAN: 2147483647
Pages: 407