Note See How to Make It Work on page 378 if you have problems dragging fields onto an envelope.
You can use the Insert > Envelope feature, or just make your own. Tips for Printing Envelopes Successful envelope printing is dependent, more than most things in OpenOffice.org, on your printer setup and whether your printer can handle envelopes without gacking on them. -
The orientation onscreen is always portrait for envelopes created with the AutoPilot, and they'll get screwed up if you switch the page orientation. Leave the page and printer orientation at Portrait and the envelopes will come out fine. -
Check your printer setup, using spadmin in UNIX or the operating system settings in Windows. Be sure the paper is set up for envelopes; it won't work if it's not. See Figure 10-36. Figure 10-36. Selecting a queue (the duplex-enabled printer) 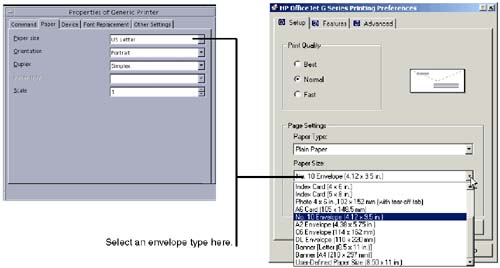 Creating an Envelope Using the Insert Menu AutoPilot -
Create a new empty text document. -
Choose Insert > Envelope. -
The envelope formatting window will appear. Enter the appropriate information in Figure 10-37 through Figure 10-39. Figure 10-37. Envelope AutoPilot, Envelope tab 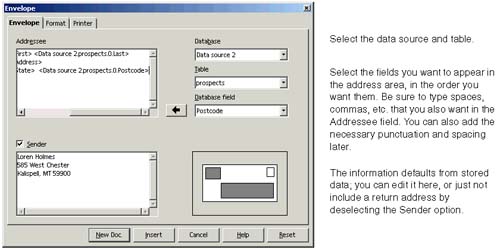 Figure 10-39. Envelope AutoPilot, Printer tab 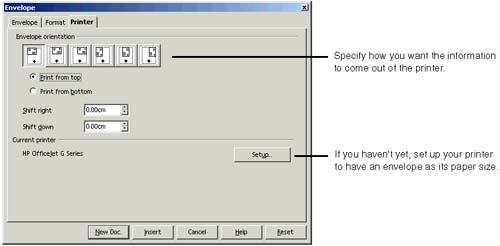 -
Click New Document. The envelope will appear as shown in Figure 10-40. The address frame is set as AutoHeight which means you can't change the size except by changing the font size of the address. However, you can select the address frame, right click and choose Frame, and modify it. Figure 10-40. Envelope AutoPilot, example of results 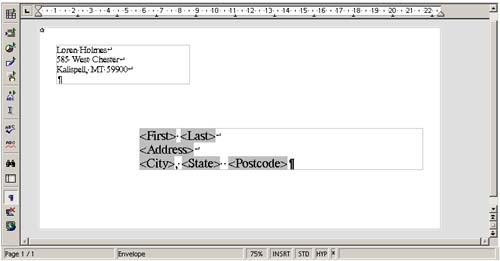 -
To print, choose File > Form Letter. Figure 10-38. Envelope AutoPilot, Format tab 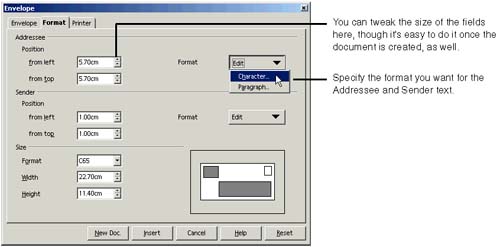 Creating Your Own Envelope Document or Template -
Create a new empty text document. Don't save it. Choose Format > Page and select the envelope dimension you want as shown in Figure 10-41 on page 388. Consult the online help for advice on picking one. Figure 10-41. Selecting a different layout for an envelope template 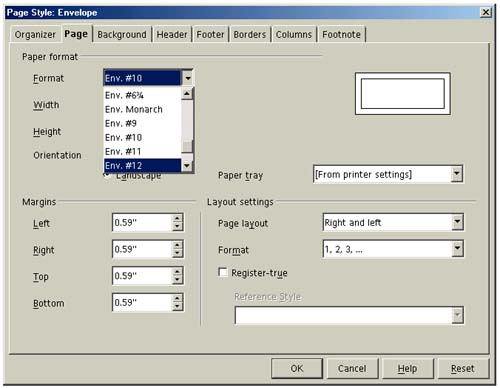 -
Select the landscape layout. This affects only how you see it onscreen, not how it prints. This just makes it possible to use normal text input for the addresses instead of using the sideways text tool. -
In the same menu, select Manual Feed. -
Type your return address in the upper left corner. -
Enter the address information for the recipient(s). -
For just one recipient, just type the information. -
For multiple recipients for a mail merge, choose View > Data Sources. Select the data source and table, and drag the appropriate fields in and format them, as shown in Figure 10-42. See Dragging Data Source Fields Into a Document on page 379 for more detail. Figure 10-42. Dragging data source fields into an envelope template 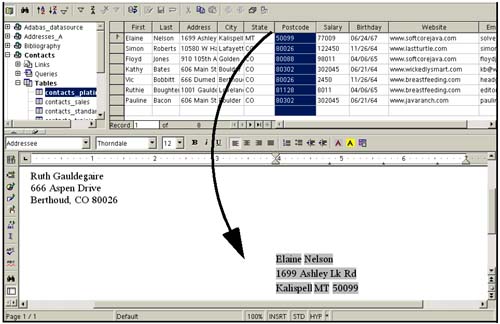 -
Print a test page on a standard sheet of paper to see how the document prints: what side up, left or right, whether it's the right size, etc. -
Insert the envelope correctly in the paper tray. -
Print the envelope(s). -
To print a letter to just one recipient whose address you've already typed in, simply choose File > Print. -
To print a mail merge to several recipients, choose File > Form Letter. Follow the instructions in Printing or Emailing Mail Merge Documents on page 399. Note It doesn't matter whether you choose portrait or landscape in the Print Options window; the envelope always prints as if it were landscape.
|