Hack97.Go Beyond Messaging with Windows Messenger
|
Hack 97. Go Beyond Messaging with Windows Messenger
Share a common whiteboard, where you can collaborate on work in real time over the Internet, and get alerts delivered to your desktop with Microsoft's instant messaging tool. Windows Messenger can do far more than merely let you chat with other people. Hidden inside it are powerful collaboration tools for working with others over the Internet, as well as the ability to get automated alerts delivered to your desktop.
10.11.1. Using .NET Alerts with MessengerOne of Windows Messenger's more useful features is its ability to deliver to you a variety of alerts called .NET alertsmessages, reports, or bulletins, such as weather reports, stock quotes, breaking news, and traffic reports. I'm a news junkie, and, where I live in New England, weather-watching is considered a contact sport. (If you don't believe me, try making your way through a February nor'easter with your body intact.) So, I use .NET alerts to stay on top of breaking events and to get the latest bad news about the weather. Here's how you can do it. First, sign up for alerts by clicking the Alerts tab (the one that looks like a bell). If for some reason Messenger doesn't show you any tabs, choose Tools Figure 10-15. Signing up for .NET alerts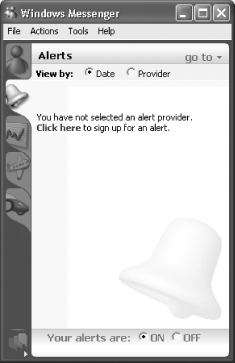 Next, you'll be sent to a web page where you can choose from a variety of alerts. Choose the alert you want, and fill out the form. The form for each alert is different and requires different information and different steps. In my instance, I signed up for MSNBC News to get its breaking news, and Weather.com alerts for the weather. I'm an eBay fan, so I signed up for alerts that will track auctions I'm interested in. And, like any long-suffering (but recently rewarded) Bostonian, I'm a Red Sox fan, so I also sign up for ESPN.com. When you're done adding alerts, use the navigation on the web page to go to your My Alerts page, shown in Figure 10-16. From here you can edit, manage, add, and delete alerts. Figure 10-16. Managing all your alerts from your My Alerts page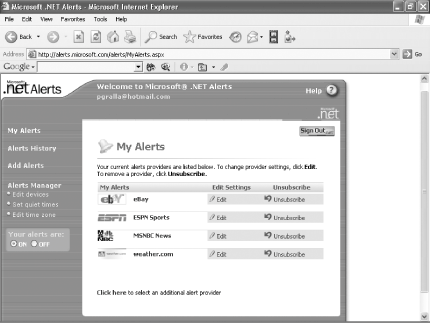 Alerts will now be delivered to you on the schedule you chose. They'll appear as a small window near the Notification area, as shown in Figure 10-17. As you can see, it's another lovely day in Cambridge, with a high reaching all the way up to a stratospheric reading of 30 degrees. To read the full alert, click it and you'll be sent to a web page with the full alert. Figure 10-17. Alerts appearing as small windows near the Notification area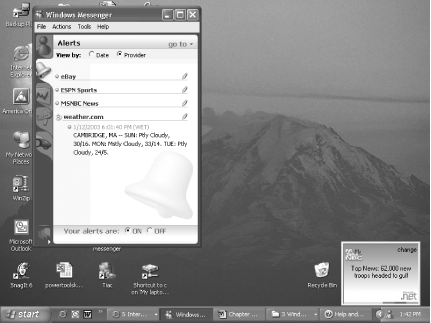 If you want to read all your recent alerts, click the Alerts tab. You'll be able to view them by date or alert provider. 10.11.2. Collaborate Long-Distance with the WhiteboardChat windows are fine for simple communication, but when you're working long-distance with others, you often need more collaboration than that. In particular, you might want to share drawings, images, and text. You can do that using the whiteboard: a tool that lets you collaborate in real time over the Internet or a network with other Windows Messenger users. It's a drawing program, similar to Microsoft Paint, which allows you to share drawings, diagrams, images, and text. The same whiteboard appears on the systems of both participants, and each person can draw, annotate, and mark up the whiteboard in any way they want. The other participant sees the markup, in real time, and can in turn mark it up as well. To start a whiteboard with someone, double-click the person's contact name and click the Start Whiteboard link on the right side of the Messenger conversation screen. An invitation goes out to the contact, and, if he agrees, a small Sharing Session window appears, as shown in Figure 10-18. Figure 10-18. Launching a whiteboard session Click the Whiteboard button, and the whiteboard appears. Now both of you can use the markup tools. They're largely self-explanatory and work like Windows Paint or similar graphics programs. You can see the whiteboard in action in Figure 10-19. Make sure, though, to use the remote pointer, a small hand you can drag around the screen that helps you better highlight what you're currently working on together. If you look closely at Figure 10-19, toward the middle of the screen, you can see it. Figure 10-19. The whiteboard in action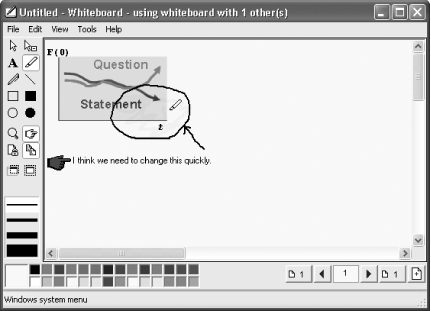 The buttons along the lower right of the screen let you create new pages and navigate among those pages. When you create a new page and navigate among pages, the other participant comes along with you to those pages. Additionally, there are four buttons in the left part of the whiteboard that serve special purposes:
When you're done using the whiteboard, click the Close button in the Sharing Session window. You'll be given the option of saving the whiteboard. If you save it, it will be saved in its own proprietary format (as a .nmw file). To view that whiteboard again, double-click it in Windows Explorer. 10.11.3. Share Applications with MessengerThe whiteboard is useful for basic collaboration, but an even more powerful tool is Messenger's application sharing. It allows two people to work in the same application on the same document. Whatever is on your screen appears on the other person's screen, and the two of you can work on the document together. I've found it to be ideal for collaborating on spreadsheets, it's easy to share "what-if" scenarios this way. To start a whiteboard with someone, double-click the contact name and click the Start Whiteboard link on the right side of the Messenger conversation screen. An invitation goes out to the contact, and, if he agrees, a small Sharing Session window appears, as shown previously in Figure 10-18. Once he agrees, click App Sharing, and you'll be able to choose which file and application to share, as shown in Figure 10-20. You can share only programs and files that are already open on your PC. Figure 10-20. Choosing an application or applications to share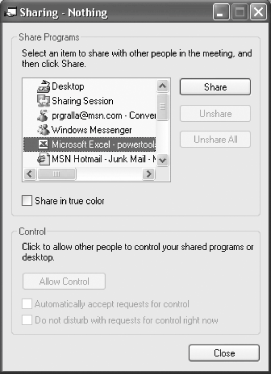 Click one or more programs and click Share; the applications open in a window on the other person's computer. You have full control over the application; they can only watch what you do. In that sense, it's not full collaboration. If you want the other person to also be able to control the document, click the Allow Control button; the other person will be able to work on the application and document after he requests your permission. Only one person at a time can control the document; you can pass control over it back and forth. |
|
EAN: 2147483647
Pages: 191

 Show Tabs