Printing Information Stored in Outlook Folders
Outlook lets you print the information stored in any of your Outlook folders. For example, you can print a message stored in the Inbox folder, a day or a range of days in the Calendar folder, or the information on one or more contacts in the Contacts folder. Outlook provides a variety of methods for printing. The following is a flexible, general procedure that you can use for printing any kind of Outlook information:
- Open the folder containing the information you want to print.
- If you want to print one or more specific items— for example, messages in the Inbox folder or days in the Calendar folder— select the item or items. To select an item, click it; to select additional items, press Ctrl while you click each one.
- Choose Print from the File menu or press Ctrl+P to open the Print dialog box, which is shown in Figure 26-8.
- In the Print Style list in the center of the dialog box, select a printing style to specify the general way the information will be organized on the printed copy and the level of detail to be shown.
- If you want to modify the selected printing style for the current print job, click the Page Setup button to open the Page Setup dialog box, which lets you modify the fonts, paper size, headers or footers, and other characteristics of the printed pages. If you want to permanently modify one of the default printing styles or create a custom style, click the Define Styles button.
- Change other print options in the Print dialog box, as necessary. The specific options available depend on the folder you opened and the items you selected prior to opening the dialog box. For example, if you opened the Contacts folder, you can choose whether to print all contacts or only the contact or contacts that you selected.
- To preview the appearance of the printed output, and to see the effect of all the options you have selected, click the Preview button. When you're done previewing, click the Print button in the Print Preview window to return to the Print dialog box.
- To begin printing, click the OK button in the Print dialog box.
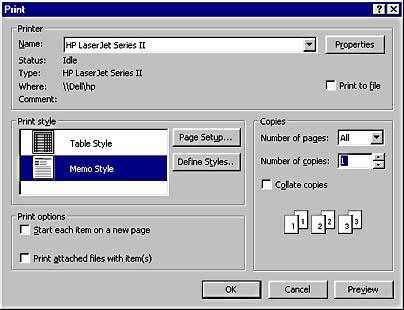
Figure 26-8. The Print dialog box. (In this example, we opened the Inbox and selected a message prior to opening the dialog box.)
Running Microsoft Office 2000
ISBN: 1572319585
EAN: 2147483647
EAN: 2147483647
Year: 2005
Pages: 228
Pages: 228
Authors: Michael Halvorson, Michael J. Young