Creating Blow Em Up
Creating Blow 'Em Up
Now that we can do timed movement as well as omnidirectional motion and rotation, it's time to demonstrate these concepts in a game. This game must be some kind of reflex game where things move quickly and have objects that rotate and move toward arbitrary points on the stage.
The Idea
When I was a young, I played my first game of Asteroids in a standup arcade. Ever since then, I've been captured by games where you fly a tiny ship around the screen blasting things. There have been countless takes on this style of game, and they range from very simple to extremely complex. Our version, Blow 'Em Up , is somewhere in the middle in terms of complexity.
As with most of the games in this book, I'll be designing in a way that allows you or me to go in later and implement new pieces and functionality to expand the game. If I implemented every detail I would like to, this book would probably only cover a couple of games. So instead, I'm going to build the game as if it were complex, but then stop building after the main game mechanics are in place.
Please note that this chapter's game, like every other game in the book, is contained on the CD in the appropriate chapter directory in two forms. The first format contains all the code and the second contains just the library setup with the code missing.
I would like to have a small ship like in Asteroids , but I don't want the movement to be the same. I've never liked the "float in space" style ship control some games have. I've always felt that when you give the player sloppy control, it detracts from the game. It's better to give the player precise control of his ship and let the bad guys be what the player worries about. In the original Asteroids game, after you thrusted forward, there was little chance you could put your ship back in the center of the screen motionless because once the ship was moving, it didn't slow down unless you spun around and then thrusted back the other direction.
We could implement thrust either way because we have the necessary skills, but I prefer to give my ship exact controls. When the player in Blow 'Em Up stops thrusting, his ship will come to an immediate stop.
| Note | During testing, a friend of mine said that this immediate stopping was " unrealistic ." Rather than explain to him that a game like this is not realistic in the first place, I took a different approach. I told him that in this game, the ship was controlled by a newly invented gravity inversion drive that caused the ship to move while maintaining 0 inertia. These new gravity inversion drives are the latest and greatest thing in fighter ship design. |
In this game, bad guys come in waves, like in Asteroids , but instead of breaking into smaller bad guys, one shot kills a bad guy in our game. In addition, the bad guys in Asteroids just sailed around randomly , hoping to bang into the player by blind luck. In Blow 'Em Up , the bad guys actively seek out the player to destroy him.
Finally, when bad guys die, they sometimes leave powerups behind. These powerups have different bonuses and restrictions that they place on the player. Some make the player stronger and some weaker. Powerups , if ungathered for a certain amount of time, should disappear.
When the player moves off the stage, he should be teleported to the opposite side with his rotation intact. This feature allows the player to move in one direction constantly and appear to fly across the screen repeatedly. This was a feature of Asteroids as well.
In Asteroids , the bad guys conformed to this teleport across the stage rule. But in Blow 'Em Up , bad guys are able to move off the stage, out of the player's sight, without teleporting to the other side. Because the bad guys are seeking the player out, they won't stay offstage for long.
| Tip | Again, I want to mention that you don't need to do your entire design up front. If you are working on a multimillion-dollar game with dozens of people, this is not the case, but when you're making a Flash game in a one-, two-, or three-man team, the full design is not required up front. I personally find that it's better to get a general idea at first and then leave some of the details to get worked out during implementation. Implementation lets you play parts of the game to test how different ideas would work. |
In fact, Asteroids teleported everything around the stage, including the player's bullets. In Blow 'Em Up , the player's bullets also teleport to the other side of the screen when they reach the edge. This combined with the fact that the bad guys can go off the stage without teleporting should make for an interesting gameplay. And, of course, if it doesn't work out well, we can change it during implementation when we can test the game.
The player should have shields as well, which is a replacement to the hyperspace that Asteroids had. The shield should absorb one enemy collision and then disappear. The player can manually turn on and off the shields. The total number of shields the player has is variable. When the player turns the shield off, this number does not decrease. The number only decreases when the player collides with a bad guy.
| Note | In Asteroids , hyperspace randomly teleported your ship when you pressed the button, but it never really worked out in Asteroids like it could have. Hyperspace was so disorienting and random to use that a player was better off trying to thrust out of trouble rather than risk the hyperspace jumps . |
If the player runs into a powerup with his shields on, the powerup should disappear and he should lose his shield. Only by toggling the shields off can the player pick up powerups.
At this point, I have a couple of pages of game ideas, and it's time to start looking at how we'll arrange our scripts.
The Art
As far as I can tell right now, there are only five game object types. There is the player's ship, the ship's bullets, the bad guys, the powerups, and the scoreboard. We need to set up our library with symbols for each.
The Ship Art
All the pieces of the ship are contained in the ship folder in the library, as shown in Figure 8.15.
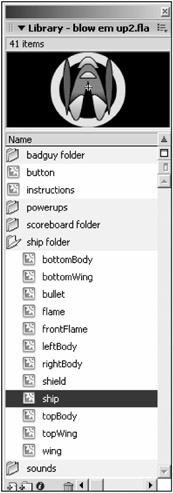
Figure 8.15: The library contains a ship folder that has all of the player's ship art assets.
As you can see by looking through the library, I have broken up the ship into several pieces. That's because when the player dies, I want his ship to break into pieces and for each piece to fly off the screen separately. The player's ship will be a compilation of several pieces that can break apart at destruction.
The player's bullet, the ship's flame, all the pieces of the ship, and the conglomerate ship are all kept in the ship folder, exported for ActionScript.
The Bad Guys Art
There is a badguy folder that contains three different bad guys, as shown in Figure 8.16. The main difference between these bad guys, other than their appearance, is the way they move toward the player. Some move directly at him and others move at him from different angles.
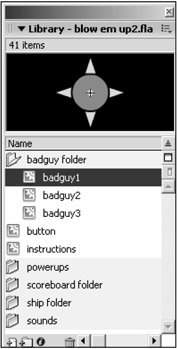
Figure 8.16: The badguy folder has three bad guys, but creating more bad guys would be trivial.
Although I'm creating only three types of bad guys, I want to develop the game so that adding more is as easy as possible. The process should be as simple as creating the new symbol and then adding a few lines of code. No logical programming should be required to add new bad guys other than the programming of the new bad guy's movement type.
The Powerups Art
Much like the bad guys, I'm creating only a limited number of powerups ”just four. But it should be extremely easy to add new ones. All the powerups look the same, but they are different colors and have a different letter. You can see all the powerups in Figure 8.17.

Figure 8.17: Each powerup is colored differently and has a different letter so that the player can tell them apart.
The powerups look similar, but they have different colors and different letters on them. Each powerup has a different effect on the ship. The four powerups I'm going to implement have the letters D, S, L, and F associated with them. The D powerup gives the player doubleshot, where he can shoot twice as many bullets. The S powerup gives the player an extra shield. The L powerup replenishes the life (hit points) of the ship. And the F powerup freezes the player in place. This last powerup is not a good thing; the player should try to avoid it.
The Scoreboard Art
The player needs instructions that are given in the instructions movie clip, which contains a text field and a button. The text field contains the text for the instructions when the game starts, shows the player his score, and waves when his game ends. The button starts or restarts the game.
The second piece of scoreboard art is the panel that appears while the player is playing the game. It contains a field with the player's score, the current wave, his current life (hit points), the number of shields he has, as well as his current frame rate.
This panel can be seen in Figure 8.18 along with the scoreboard folder and its symbols.
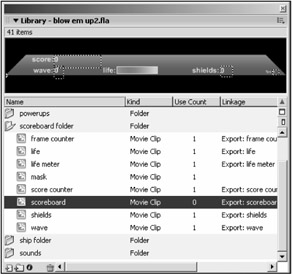
Figure 8.18: The scoreboard gives the player vital feedback about his game. The library contains a folder that has all the scoreboard pieces inside.
The life meter is of particular interest. When the game begins, the player's life is shown as a bar on the scoreboard. The left side of the bar is red, and it progresses to green as you go to the right. Each time the player takes damage, a piece of the life bar should disappear. When the player gets close to destruction, the life bar should be a small red sliver of what it used to be.
To implement the life meter, I used a mask. Masks in Flash are used to hide pieces of your art. You can right-click on a layer and change it to be a mask to get this effect. Anything that is masked will be displayed, but things that fall outside the mask will not be. By using a movie clip as a mask and naming it, I can display only as much of the life bar as I want to. For more information on using masks, consult the Flash Manual.
Another option would have been to scale down the life bar as the player takes damage, but then the colors of the life bar would scale with it. That is not the desired look. I want the life bar to appear to be eaten off or cut off as the player takes damage. For that, I need to mask out part of the life bar.
I finish the acquiring of library assets by importing some sound effects that I will add at the end of the implementation. All the sounds go inside a sound folder.
The Design
Now that our library is packed with symbols, we need to think about how we should organize the creation and control of those objects. The game's overall structure has four main parts:
-
The game's control functions, which do things like initialize, start, and reset the game
-
The ship's control functions, which handle things like player's input and the ship's reaction to it
-
The bad guy control functions, which handle the creation and control of the bad guys
-
The powerup control functions, which handle the creation and control of the powerups
Game Control
As usual, I'm starting everything off with a call to initGame , which is the function that is executed only once for the life of the game:
initGame(); function initGame(){ } We follow this with a function that is similar to initGame :
function startGame(){ } The startGame function is called when the game begins. It is only called once, like initGame . The only reason that startGame and initGame are not combined into one large function is because initGame creates the instruction page, and the game does not start until after the player has clicked the Start button, which calls startGame .
When the player dies, there is a call to a function named endGame :
function endGame(){ } This function pops up a screen showing the player his score and wave and presenting a Reset button. When the player clicks the Reset button, the resetGame function is called, starting a new game:
function resetGame(){ } Those four functions control the game. There is no playGame function this time because we attached that function to the onEnterFrame handler. This time we're using intervals to handle that kind of work, and there will be a unique function for each game object: the ship, the bad guys, the bullets, and the powerups.
The Ship Design
The ship is somewhat complex. Making it explode into pieces takes a fair bit of script. Combined with the ship control, gun firing, shields, and so on, the implementation of the ship is the largest part of the game. I want to introduce all the functions now and then implement them in the next section. I prefer this way of presenting the information to you because it gives you an idea of the overall code organization before you start to see the details of the implementation.
Keyboard Control
The keyboard controls the ship. That means we need to register the ship movie clip as a listener for the Key object. That allows us to trap onKeyUp and onKeyDown messages with the ship. To give those events functionality, I'm creating two functions: shipKeyUp and shipKeyDown . Later when we implement the initGame and startGame functions, these ship key handler functions will be attached to the ship's onKeyUp and onKeyDown handlers:
function shipKeyDown(){ } function shipKeyUp(){ } Ship Engine Function
As I said earlier in this chapter, we will assign functions to repeating intervals. Each function controls a specific logical unit of the game. The ship is one of these objects. Therefore, we must define a function to be called to update the ship every x milliseconds . I generally name these functions with the name of the object they control and the word Execute appended to that name. The following function uses this convention and will be used to update the ship's position:
function shipExecute(){ } Shields and Bullets
One function, toggleShield , controls the shields. This function turns off the shields if they are on and turns on the shields if they are off. The player must have at least one shield at his disposal:
function toggleShield(){ } The fireBullet function creates (fires) the bullets, declared as follows :
function fireBullet(){ } As bullets are created they are not attached to the ship. In fact, they are not part of the ship in any way. They are free-floating entities after they're fired . For that reason, I want to create a bulletExecute function that updates all the bullets on the stage at a given interval, just like shipExecute updates the ship:
function bulletsExecute(){ } Turning on the Flames
When the ship turns left, a flame shoots out of the right tailpipe. The same holds true when the ship turns right, with a flame in the left tailpipe. When the ship moves forward, both tailpipes have flames. And when the ship moves backward, the nose has flames coming out.
To handle making the correct flames visible, I have created a function called setFlame . This function checks the status of the control key and lights the appropriate flames:
function setFlame(){ } Controlling the Life Meter
The life meter that displays the current amount of ship life must have its mask changed. I've encapsulated this into a function called setLife . Each time the life of the ship changes, setLife is called to correctly size the life meter's mask:
function setLife(){ } When the Ship Collides
When a bad guy collides with the ship, the bad guy is destroyed and the ship takes damage. The call to damage the ship follows:
function hitShip(damage){ } This hitShip function is called when the ship has been hit already; it does not imply a hit test. The single argument, damage , is used to tell the function how much damage to inflict on the ship for this hit. After hitShip applies the damage, it checks to see if the ship is still alive . If the ship is dead, hitShip calls killShip :
function killShip(){ } Ship Explosion Functions
I need some helper functions to make the ship die and break into pieces. For one thing, I don't want to record the coordinates of the ship pieces myself . I would prefer to record the coordinates from the symbol when the game starts and then reassemble the ship when the game is reset from those recorded coordinates.
To make things easy, I've created a function to record the position of each piece of the ship for later use:
function setInitialValues(o){ } Now I need a function to move each piece randomly during the ship's explosion. When the ship dies, random values are assigned to each of the ships so that they can move away from the point of explosion moving and spinning randomly. The following function handles the updating of these pieces:
function moveObject(o,x,y,r){ } In the moveObject function, o is the object to move, x and y are the changes required to make in o 's position, and r is the amount of rotation to apply. This moveObject function takes the place of the shipExecute function and is put on an interval timer just like shipExecute and bulletsExecute are. In fact, the shipExecute interval is cleared so that the player cannot control his ship while it's dead.
After the player resets the game, we need to reassemble the ship from its initially recorded positions (gathered in setInitialValues ). The resetObject function does that for us; to start that process, let's stub the function now:
function resetObject(o){ } The Bad Guys Design
The bad guys are pretty simple from a design standpoint. We need an update function like shipExecute , we need to be able to create the bad guys in waves, and we need to be able to handle the bad guys' collisions.
Bad Guy Engine Function
To stick with the naming convention, I'm calling the function that updates the position of the bad guys on an interval badGuysExecute :
function badGuyExecute(){ } This function is called on an interval like shipExecute . This function does not update the bad guys; instead, it calls a method of each bad guy called move . When the bad guys are created, each is given a move method that is specific to that type of bad guy. When the bad guy execution function is called, it calls the move function on each bad guy individually.
This bad guy execution function is also responsible for testing to see if the player has killed all the bad guys. When that happens, a function must be called to increment the wave and create the next batch of bad guys.
Creating Bad Guys
When a new wave is required, the badGuysExecute function calls a function called spawnWave , which has the job of populating the stage with bad guys for the new wave:
function spawnWave(){ } This spawnWave function is the place where waves are preprogrammed. I want to be able to preset the quantity and type of bad guy created in any wave I want, but I don't want to have to program all possible combinations. Therefore, this function takes my wave order for bad guys and calls the function that actually creates the individual bad guys and gives them their move methods :
function createBadGuy(badGuyOrder){ } This set of functions might be confusing, particularly when I talk about preprogramming the waves. But don't worry ”when we get to the implementation of these functions, it will be clear what I'm talking about and why I'm dividing things up this way. For now, I just want to give you an overview of how things work.
When Bad Guys Collide
The bad guys need a way to hit test the ship again to see if they have found their mark yet. I have encapsulated this hit test into a function called hitTestShip :
function hitTestShip(bg){ } The single argument to this function, bg , is a reference to the bad guy to hit test against.
When the bad guy either runs into a bullet or runs into the ship, that object is destroyed. When this happens, the following function is called:
function hitBadGuy(bg, powerupPercentage){ } The first argument, bg , is the bad guy to be hit. The second argument, powerupPercentage , indicates the likelihood that the bad guy should drop a powerup for the player.
The Powerups Design
The powerups are extremely simple because they don't move and don't stay around very long. Only two functions are required to handle them.
The first function updates the powerups, checking to see if the ship has collided with the powerup:
function powerupExecute(){ } This works just like shipExecute and bulletsExecute in that it is called from an interval so that it works on a timer.
When a powerup needs to be created, the createPowerup function is called:
function createPowerup(bg){ } The single argument to createPowerup , bg , is needed because the powerup must be placed right under the newly destroyed bad guy. A reference to this bad guy is passed in so that its position properties can be pilfered by the powerup.
The Implementation
You should now have a general idea of how things are going to be organized. It's time to get into the gritty details of making all this happen. Most of the implementation is pretty standard, and you've seen much of it before. I won't comment much on the things you should understand well by now; that way I can focus on describing the new parts in detail.
Implementing the Game Control Functions
Remember that there are four game control functions. The initGame function is called to create the instructions. After the player reads the instructions and clicks Start, the game is set up for the first time with startGame . When the player dies, endGame is called. Finally, when the user resets the game using the Reset button, resetGame is called. Let's implement each of those now.
Implementing initGame
This function is pretty simple. All we need to do is attach the instructions panel and set up its text field and button. I also want to add a key to tell the player which powerups do what. I have created a symbol in the library called powerupKey that contains this information. Let's attach it to the instructions clip after it's been created.
Let's begin the implementation. First I want to set the stage's alignment and scaling mode so that nothing scales . If we are going to make the movie not scale, we should also set alignment to the top left so that we can use the Stage properties like we did in Chapter 6, "Objects: Critter Attack. " The following code goes inside the initGame function that we defined previously.
Stage.align=" TL" Stage. scaleMode = "noscale";
Now we can attach the instructions:
attachMovie("instructions"," instructions",0,{_x:Stage.width/2,  _y:Stage.height/2});
 We want to set up the text in the instruction's text field, which I named feedback in the instructions symbol. Because the instructions should be broken over multiple lines, we need to use the escaped character \n for the new line:
instructions.myText.text = "Arrow Keys to Move\nControl to Fire\nShift Toggles Shields\nTurn off shields to\ngather powerups\n
Alternate Move: (u,h,j,n)\nAlternate Fire: g";
Now let's set up the button that starts the game:
instructions.startButton.stop(); instructions.startButton.myText.text = "start"; instructions.startButton.onRelease = function(){ instructions.removeMovieClip(); startGame(); } Notice that I'm attaching an onRelease handler to the button, which removes the instructions movie clip and calls the startGame function.
Finally, we need to attach the powerupKey so that the user can see which powerups do what:
instructions.attachMovie("powerupKey"," powerupKey",1,{_x:50,_y:-100}); You can test to see that your instruction menu is working correctly, as shown in Figure 8.19.
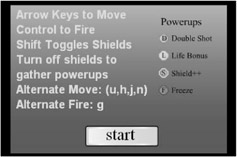
Figure 8.19: The instructions, Start button, and powerup key should be visible when you test your game.
Implementing startGame
After the user has read the instructions and clicked the Start button, startGame is called. startGame first needs to set all the depth constants that we need in this game. They follow:
bullet_depth = 10; badGuy_depth = 99; ship_depth = 100; powerup_depth = 101; scoreboard_depth = 2000; instructions_depth = 2001;
Next we need to set interval values for the execution functions that update our game objects. We can tweak these variables during testing so that the game plays well on slower platforms. The trick is to get the numbers as large as possible (as seldomly called as possible) but not so high that gameplay is affected:
playerTick=40; bulletTick=100; badGuyTick=100; powerupTick=120;
These tick values amount to the number of milliseconds between updates to their respective objects. As you can see, the player will update every 40 milliseconds, but the bullets and bad guys will iterate every 100 milliseconds. By allowing the bullets and bad guys to iterate so seldom (10 times a second), the CPU load is kept at a minimum.
Now we need to define some constants that are used for the speed things turn at, the speed things move, and so on:
ship_rotation_speed = 9; ship_speed = 8; bullet_speed = 25; bulletLifeSpan = 8; fireDelay = 250; doubleShot=false life=100; lifemax=100; initialShieldCount = 2; shieldCount = initialShieldCount; wave=0; score=0; badGuyCount=0; maxBadGuys = 16; powerupLifeSpan = 35; normalPowerupPercentage = 50;
Most of these should be self explanatory from their names , but let me mention a few that might not be. powerupLifeSpan is the number of powerup update iterations until the powerup disappears. maxBadGuys is the maximum number of bad guys that can be contained in a given wave. shieldCount is the number of shields the player currently has available. doubleShot indicates whether to fire one or two bullets at once.
Now let's create the ship. We can do this here because we only need to create one ship the entire game. The same ship will be reused each time the player begins a new game. First we attach the ship, and then we move it into position:
attachMovie("ship"," ship",ship_depth); ship._x = Stage.width/2; ship._y = Stage.height/2; Then we set the shield to be invisible because when the game starts, the shields should be off:
ship.shield._visible = false;
We need to assign the keyboard handlers to the ship so that they respond to keyboard controls:
ship.onKeyDown = shipKeyDown; ship.onKeyUp = shipKeyUp;
Now we can register the ship as a Key listener:
Key.addListener(ship);
We need to turn off the visibility of the flames. However, because we have a function for controlling this, let's just call it:
setFlame();
Now we need to set up the individual pieces of the ship so that it can explode when the player dies. I need to create two arrays to do this. In the first array, I keep a set of intervals that will be responsible for updating the ship's pieces during the explosion. The second array is used to hold reference to the individual pieces so that I can easily iterate through them. Let's create the arrays now and then fill the array of pieces:
ship.intervals = new Array(8); ship.pieces = new Array(8); ship.pieces.push(ship.leftTopBody); ship.pieces.push(ship.leftBottomBody); ship.pieces.push(ship.rightTopBody); ship.pieces.push(ship.rightBottomBody); ship.pieces.push(ship.leftTopWing); ship.pieces.push(ship.leftBottomWing); ship.pieces.push(ship.rightTopWing); ship.pieces.push(ship.rightBottomWing);
Now we have reference to each piece stuffed into the ship.pieces array. At this point, we can iterate through that array and set the initial values for each piece. Remember that when the game is reset, the pieces must come back to the ship and be reassembled for the next game. That requires us to record the initial coordinates of all the pieces before we explode. After the pieces are recorded, we can revert back to these initial coordinates whenever the game is reset:
for(var i=0;i<ship.pieces.length;++i) setInitialValues(ship.pieces[i]);
Finally, it's time to set up the interval that controls the ship's update. The following line does so:
shipInterval = setInterval(shipExecute, playerTick);
As you can see, the interval, named shipInterval , calls shipExecute every playerTick milliseconds. That concludes the creation of the ship. We can now create the other things we're going to need.
As in several games past, I'm organizing my bullets and bad guys into their own empty movie clips to avoid depth collisions. This has the added bonus of allowing me to iterate through all the bad guys or all the bullets without using an array. Let's create the empty container clips now:
createEmptyMovieClip("bullets",bullet_depth); createEmptyMovieClip("badGuys",badGuy_depth); createEmptyMovieClip("powerups", powerup_depth); Now we can go ahead and create the update intervals for each of those and store the interval IDs into their own variables:
bulletsInterval = setInterval(bulletsExecute, bulletTick); badGuyInterval = setInterval(badGuyExecute, badGuyTick); powerupsInterval = setInterval(powerupExecute, powerupTick);
As you can see, these interval creation calls are just like the shipExecute interval except they each uses its own interval name, function call, and millisecond timer.
Now we can create the scoreboard object that gives the player feedback about his score, life, shields, and so on:
attachMovie("scoreboard"," scoreboard",scoreboard_depth,{_y:Stage.height}); I will need to use a point later on, but I don't want to create new point objects every time. For that reason, let's create one here and then use it everywhere else:
p=new Object();
Finally, let's make the call to createSoundManager , which I will implement later:
createSoundManager();
That completes the startGame function. Before we end the game, I want to talk about a special kind of for loop that we've skipped over thus far.
Using a for in Loop
There is an alternative way to use a for loop. Instead of the index that we usually use, you can use what is called a for in loop. The loop has the following general form:
for( i in mc ){} When you do this, the for loop iterates once for every clip attached to mc . From there, you can reference back into the clip using array notation. For example, if you create a clip named myClip and then attach 50 different clips to it, you can easily iterate through any of those clips and, say, scale them down by 50 percent, with the following script:
for(mySubClip in myClip){ myClip[mySubClip]._xscale = 50; } This gives us an easy way to iterate over all subclips in a container clip without keeping track of their names or using an array. In the future, I will use this technique to iterate through container clips like the bad guys, bullets, and powerup containers.
Implementing endGame
When the player dies, the killPlayer function is called. That function is responsible for setting all of the player's pieces into motion. It is also responsible for setting up an interval called endGameInterval that waits a few seconds for the ship's pieces to scatter and then calls endgame , which has the responsibility of bringing up the End Game screen.
The first thing we need to do in endGame is remove the interval that called it. That's because when the player dies, we want to give Flash a few seconds to display the explosion before bringing up the End Game screen. We can use an interval in killShip to call endGame on an interval we name endGameInterval . Therefore, the first order of business is to remove that interval so that endGame is called only once:
clearInterval(endGameInterval);
Now we can attach the end game clip. Let's reuse the instructions clip for this, as in the following code:
attachMovie("instructions"," instructions",instructions_depth); instructions.myText.text=" You're dead\nscore = "+score+"\nwave = "+wave; instructions._x = Stage.width/2; instructions._y = Stage.height/2; We can set up the button on the Instructions panel to reset the game:
instructions.startButton.stop(); instructions.startButton.myText.text = "reset"; instructions.startButton.onRelease = resetGame;
When the player clicks the Reset button, the resetGame function is called.
Implementing resetGame
To reset the game, we need to remove the End Game panel that the user used to reset the game:
instructions.removeMovieClip();
Then we need to remove all the intervals that update the ship pieces. These are set up during the call to killShip :
for(var i=0;i<ship.intervals.length;++i){ clearInterval(ship.intervals[i]); resetObject(ship.pieces[i]); } Notice that we clear the interval and then call resetObject on the pieces of the ship (retrieved from the pieces array).
Now we want to remove all the bad guys in the bad guy container clip. The following line of script does that:
for(bg in badGuys)badGuys[bg].removeMovieClip();
Notice the user of a for in loop here. That way, bad guys can come and go as they please and we don't have to keep an array of references current and up to date.
We need to remove all the powerups as well, and we can do it in the same way as our bad guys, using a for in loop:
for(pu in powerups)powerups[pu].removeMovieClip();
Now that we've destroyed all the bad guys, we need to reset the bad guy count that is used to determine how many bad guys are still alive in the current wave:
badGuyCount=0;
We need to reset the ship's position and rotation to their original values:
ship._x = Stage.width/2; ship._y = Stage.height/2; ship._rotation = 0;
We need to reattach the ship key handlers. These were originally attached during startGame , but when the player dies, he is removed so that the player cannot control his ship while it explodes. The actual removal of the key handlers is done in the killShip function. Here in the resetGame function, we need to reattach those key handlers:
ship.onKeyDown = shipKeyDown; ship.onKeyUp = shipKeyUp;
We also need to start up the ship's update interval:
shipInterval = setInterval(shipExecute, playerTick);
We want to reset the player's life to its maximum value and then call setLife to display it correctly. Remember: When we change the life value, we must also call setLife to change the scoreboard's display:
life=lifemax; setLife();
We need to set the shield count back to its original value:
shieldCount = initialShieldCount;
We then need to reset the score and wave:
wave=0; score=0;
The double shot and frozen powerups set a variable to true when they are on. Because the new game is starting, we should turn them both to false to conclude the implementation of resetGame :
doubleShot=false; frozen=false;
Implementing the Ship
The ship is quite complex, and it has a number of functions associated with it. Much of its implementation should be familiar to you from past games.
Implementing shipKeyDown
We've already registered the ship as a Key listener in the startGame function. We've also attached the shipKeyDown handler to the ship 's onKeyDown handler. We're now ready to implement this function.
First we need to find out what key was pressed to trigger the onKeyDown event. This is done with the Key.getCode method, as described in Chapter 6.
k=Key.getCode();
Then we do one large conditional statement to see if the key is any of our control keys that would require us to draw the flames. I've created two sets of control keys in this game because some players prefer not to use the arrow keys. That means we need to trap for both sets of control keys:
if(k==Key.LEFTk==Key.RIGHTk==Key.UPk==Key.DOWN  k==85k==72k==74k==78){
 Inside this condition, if we trap each pair of control keys separately and if any control key is the key that was pressed, we set the ship's property for that key to true :
if(k==Key.DOWNk==78)ship.down=true; else if(k==Key.LEFTk==72)ship.left=true; else if(k==Key.RIGHTk==74)ship.right=true; else if(k==Key.UPk==85)ship.up=true;
Finally, we call setFlame before leaving the if statement:
setFlame(); }
The final line in the shipKeyDown function tests for the Shift key to toggle the shields before leaving the function:
else if(k==Key.SHIFT)toggleShield();
You might have noticed that we didn't test for the fire keys (Ctrl and G). That's because we can simplify the firing by doing a Key.isDown call inside the shipExecute function. That way, the player can leave the fire key pressed down, and the ship continues to fire. This could be done in the onKeyDown handler here with the rest, but it would require a bit more code. To keep things simple, I'm leaving that call in the shipExecute function.
Why Not Use Key.isDown for All Controls?
You might be wondering why I use ship.up and ship.down to keep track of which keys are being pressed instead of using Key.isDown calls. My reasoning is threefold.
First, sometimes the control of the player is quite complex. You might want certain key combinations to have specific behavior. Sometimes it's easier to use your own variable to hold key pressed information because you can easily change the state of a key yourself. You can't make Key.isDown() false when the user is pressing the key, but you can certainly change ship.down to false if you need to, even if the player is pressing the key.
Second, you might need to make multiple checks because of nested conditional statements. That would require multiple calls to Key.isDown for the same key. In a situation like that, you would probably call isDown once and store the value for multiple uses. However, if you are going to temporarily store the value anyway, why not just set these values during onKepUp and onKeyDown handlers and avoid Key.isDown altogether? There is no good reason not to do so.
Third and most importantly, when we create algorithms to control opponent behavior, it is often convenient to use the same control functions for both the player and the computer opponent. By keeping the key presses as variables, we can later develop an opponent algorithm that decides what it wants to do and then sets the keys down to do it. From there, a generic control handler makes object move. That way, the same control handler can be used for the player, who has keyboard control, and the computer opponent, who just pretends to press keys. If the handler functioned on a Key.isDown call, this would not be possible and two handlers would be needed: one for the player and one for his opponent.
Implementing shipKeyUp
We need to do the reverse of shipKeyDown in this function, shipKeyUp . In fact, the implementation of shipKeyUp is nearly identical to shipKeyDown , so I'm not going to explain it piece by piece. I'll simply dump the entire function now and then comment on it:
k=Key.getCode(); if(k==Key.LEFTk==Key.RIGHTk==Key.UPk==Key.DOWNk==85k==72k==74k==78){ if(k==Key.DOWNk==78)ship.down=false; else if(k==Key.LEFTk==72)ship.left=false; else if(k==Key.RIGHTk==74)ship.right=false; else if(k==Key.UPk==85)ship.up=false; setFlame(); } As you can see, we have the same large if statement to test against all the control keys. Inside, we trap for each one individually and then call setFlame . There is no test for Shift because the player does not hold down Shift to enable shields. Instead, pressing the Shift key toggles the shields on and off, and only on the pressing of Shift, not the release.
Implementing shipExecute
As you know, the shipExecute function is called by an interval to update the ship's position and orientation. When I was creating this function, I had a decision to make regarding the way the player's ship would be disabled when the freeze powerup was captured. The idea was that the player's ship would not be able to move or fire for a few seconds after touching the freeze powerup. My initial thought was to remove the shipExecute interval for a few seconds and then replace it to restore control. Then I decided to place an if statement inside the shipExecute that would check for a frozen ship. This method is cleaner and simpler, so I'm going with it. Our shipExecute function begins with a check for frozen:
if(!frozen){ Now we need to set the ship's rotation. We actually don't need any trig or algebra for this. I've set a ship_rotation_speed variable in the startGame function. If the player is pressing the left arrow, we subtract this rotation speed to the ship's rotation. Likewise, we add the rotation speed to the ship's rotation when the player presses the right arrow.
if(ship.left) ship._rotation-=ship_rotation_speed; if(ship.right) ship._rotation+=ship_rotation_speed;
If you close the if(!frozen) statement and test now, you can see the ship rotating correctly based on the pressing of the arrow keys.
Now it's time to check for forward and backward control. Like the rotation, we need to test that one is true and the other is false so that we know the user isn't pressing both forward and backward at the same time.
To find the changes to the ship's X and Y, we need to use some trigonometry. We have the rotation (angle) and we know the hypotenuse length (speed or distance to travel), so we need to break that into its X and Y coordinates so that we can update our ship's position. Remember that sine represents the X value and cosine represents the Y value:
if(!ship.down && ship.up){ ship._x += ship_speed * Math.sin(d2r(ship._rotation)); ship._y -= ship_speed * Math.cos(d2r(ship._rotation)); } With everything you've learned, the preceding script should make sense now. The one oddity is the subtracting of cosine from the ship's Y coordinate. We subtract because in Flash, the Y axis is flipped so that it points down. By negating the update to Y, we fix this inconsistency with our previous Cartesian plane examples and trigonometry equations.
Now we can do the same thing for moving in reverse. The only difference is that now we subtract from the ship's X coordinate and add to the ship's Y coordinate, which effectively reverses the movement of the ship. We also want to divide the speed by 4 so that movement in reverse is much slower than movement forward:
else if(ship.down && !ship.up){ ship._x -= (ship_speed/4) * Math.sin(d2r(ship._rotation)); ship._y += (ship_speed/4) * Math.cos(d2r(ship._rotation)); } Now I want to test the fire keys to see if the user is pressing them. Remember that in shipKeyDown , I said I would differ the check of the fire keys until shipExecute ? Well, now it's time to add that. If either of the fire keys is down, I need to call fireBullet :
if(Key.isDown(Key.CONTROL)Key.isDown(71))fireBullet();
Now that everything has been updated on the ship, I'm ready to test to see if the ship is off the stage, and if so, move it to the other side. This wraparound is done on the ship as well as the bullets, and perhaps even some of the bad guys, so I want to encapsulate it so that I can perform this wraparound logic on any clip on the stage. Let's call this function adjustPosition . It needs to take a movie clip reference as its argument. I show the implementation of this function in the next section, so for now, let's just call it inside the shipExecute function with the ship as the single argument:
adjustPosition(ship);
We can now close the if(!frozen) block:
}
Implementing adjustPosition
We've just called the adjustPosition function on the ship; now it's time to implement it. Remember that adjustPosition takes one argument ”a reference to the object to move:
function adjustPosition(o){ Now we need to test to see if the player has gone past the bottom of the stage:
if(o._y<0)o._y=Stage.height-scoreboard._height;
We match that if with an else to see if the player went off the top of the stage:
else if(o._y>Stage.height-scoreboard._height)o._y=0;
Then we do the same thing for width, concluding by closing the adjustPosition function:
if(o._x<0)o._x=Stage.width; else if(o._x>Stage.width)o._x=0; }
If you test your game, you should be able to fly the ship around the stage and view the scoreboard, as shown in Figure 8.20.
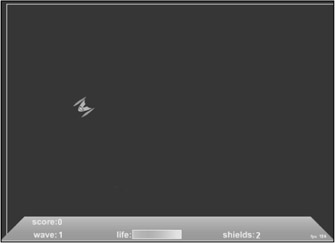
Figure 8.20: The ship can now fly around the stage, even off it. However, the flames don't work yet because we haven't implemented setFlame .
Implementing toggleShield
This function is easy enough. If shields are off and the player has at least one shield in his supply, we turn shields on and make the shield clip visible:
if(shieldCount && !shield){ shield=true; ship.shield._visible=true; } If shields are on, we turn them off and make them invisible:
else{ shield=false; ship.shield._visible=false; } You should now be able to toggle your shields with the Shift key during testing, as shown in Figure 8.21.
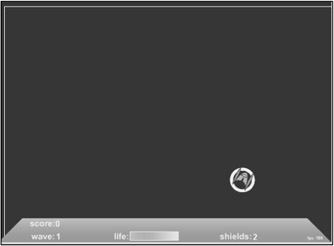
Figure 8.21: The shields are now controlled by the Shift key.
Implementing fireBullet
To implement the fire bullet, we need to make some intervals. That's because we need a delay between shots. If we let the player fire a new bullet every time the shipExecute function is called, the bullets will come out in a stream, far too many for good gameplay. To fix this, I'm creating a lock on the gun in the form of a variable called fired . This variable, when true , keeps the entire fireBullet function from executing. When the gun fires, an interval is set to change fired to false after a number of milliseconds. I set up this millisecond delay in the startGame function as a variable called fireDelay .
We begin the fireBullet function with a check for the fired variable that locks our gun between shots:
if(!fired){ If fired is false , we step into the if block and immediately set fired to true because we're about to fire a bullet:
fired=true;
Now we need to set up that interval that changes fired back to false :
fireInterval = setInterval(function(){fired=false;  clearInterval(fireInterval);},fireDelay);
 Then we need to create the bullet and put it into motion. I want the bullets to shoot from the blue wings on the sides of the ship. The first shot should come out of one wing; then the next time the player shoots, the shot should come out of the second wing. When the player has the doubleshot powerup, we need to fire two bullets instead of just one ”one from each wing.
To implement this double shot, I've done the bullet firing in a for loop that loops either once (for a single shot) or twice (for a double shot). Notice that although doubleShot is a boolean, it is converted to a number for the mathematical operation:
for(var i=0;i<doubleShot+1;++i){ Now we need to find out where to place the bullet. The best way to do this is to dig inside the ship clip, into the wing clip, and get its coordinates. Then we can call localToGlobal to get the actual stage coordinates. We use these stage coordinates to set the new bullet's position. This is all done with the object p that we use as our temporary point for the localToGlobal call. (For more information on localToGlobal , see Chapter 6.)
p.x = 0; p.y = 0; if(wingtipToggle) ship.leftTopWing.localToGlobal(p); else ship.rightTopWing.localToGlobal(p); wingtipToggle=!wingtipToggle;
The only thing odd about the preceding script is the wingtipToggle variable. This variable is used to move the bullets from the left wing to the right wing, alternating each shot. By flipping this boolean variable back and forth, we get the bullets coming out of the wings alternated between wings each shot.
Now it's time to attach the bullet and position it:
var tempb = bullets.attachMovie("bullet", "bullet"+  bullets.getNextHighestDepth(), bullets.getNextHighestDepth()); tempb._x= p.x; tempb._y = p.y;
 Finally, we need to give the bullet its direction. After a bullet is fired, it never changes its flight path . For that reason, we can calculate ahead of time the change in X and the change in Y that is needed in each iteration of the bullet. After this value is calculated, we can just increment the bullet's position by these change variables every iteration. Again, I'm using trigonometry to determine the changes to X and Y based on the rotation:
tempb.cx = bullet_speed * Math.sin(d2r(ship._rotation)); tempb.cy = -bullet_speed * Math.cos(d2r(ship._rotation));
Notice that I'm using the ship's rotation in the trigonometry calls. That's because the bullet hasn't been rotated, and because it's a dot, it doesn't need to be rotated . Calculating the change in X and Y for the bullet is a matter of finding the component parts based on the ship's current rotation.
We close the for loop that gives us a double shot and then close the (if!fired) block.
} }
Implementing bulletsExecute
We've already set up the interval that calls bulletsExecute in our startGame function. To implement bulletsExecute , we need to grab a couple of temporary variables to be used in the process of iterating over all the bullets to update each one. The tb variable is a temporary bullet reference, and the tbg variable is a temporary bad guy reference. (We need to refer to bad guys in this function because the bullets must do hit tests against the bad guys.)
var tb; var tbg;
Now we can use another for in loop to iterate over every bullet in our bullet container named bullets . For each bullet, we increment its position by adding its cx and cy properties that we initialized in the fireBullet function. Then we call adjustPosition on the bullet to get it to flip over the stage when it reaches the end:
for(b in bullets){ tb=bullets[b]; tb._x+=tb.cx; tb._y+=tb.cy; adjustPosition(tb); Now we need to check the bullet's lifespan to see if it's ready to disappear. (Bullets disappear after they have been fired and flying in space for a while.) This is done by incrementing a property of each bullet called time . If a bullet's time property ever exceeds bulletLifeSpan (which was initialized in startGame ), the bullet is removed:
if(tb.time++ > bulletLifeSpan) tb.removeMovieClip();
Finally, we need to do a hit test against all the bad guys. We use another for in loop to get a reference to each bad guy:
for(bg in badGuys){ tbg=badGuys[bg]; The hit test must be conditioned by the bad guy's dead property. This dead property is set to true when the bad guy is shot and stays true until it is removed from the stage. (The bad guys slowly fade out when they're killed.)
if(!tbg.dead && tbg.hitTest(tb._x,tb._y)){ hitBadGuy(tbg, normalPowerupPercentage); tb.removeMovieClip(); } As you can see, we first test the dead property. If the dead property is false , we do a standard hit test using the bullet's position. If the hit test is true , we call hitBadGuy to deal with fading out the bad guys, and we remove the bullet move clip. We don't remove the bad guy; hitBadGuy handles that.
Finally, we close the for in loop that iterates for each bad guy and then close the for in loop that iterates for each bullet:
} }
If you test now, you should be able to shoot bullets around the stage, as shown in Figure 8.22.
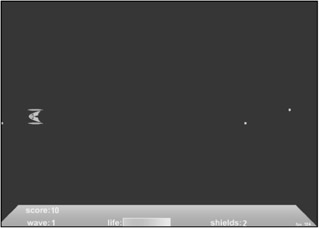
Figure 8.22: The bullets should now be working properly. Notice how the bullets move off the stage and onto the other side of the stage, like the ship.
Implementing hitShip
When a bad guy hits the ship, hitShip is called. This function takes one argument called damage that indicates how many health points to take off the ship. hitShip is a function with one major branch: a test for shields. If shields are on, we toggle them (turn them off) and decrement the shieldCount , which contains the number of shields the player has left:
if(shield){ shieldCount; toggleShield(); } If shields are not on, we turn off double shot, reduce the player's life by the amount passed into the function, and call setLife so that the life meter on the scoreboard is displayed correctly.
else{ doubleShot=false; life-=damage; setLife(); if(life<=0) killShip(); } Notice that we concluded the else block with a check to see if life is 0 or less; if it is, we call killShip .
Implementing killShip
As you know, killShip is called when the player dies. But we want to let the player's ship explode for a few seconds before bringing up the End Game panel.
To create the explosion effect, we need to set up the intervals that cause our ship pieces to explode around the screen. We do this in a loop that iterates over the ship.pieces array we created in startGame . For each piece, we create an interval and place it in the ship.intervals array:
for(var i=0;i<ship.pieces.length;++i) ship.intervals[i] = setInterval(moveObject,40,ship.pieces[i],  getRandom(-10,10),getRandom(-10,10),getRandom(-10,10));
 Arguments to be passed to the function called by the interval are entered after the time amount for the interval. Now that the ship pieces have their intervals, it's time to set up the interval that brings up the End Game panel after a few seconds:
endGameInterval = setInterval(endGame,2500);
We also want to disable the ship's key handlers and set the pressing of the buttons to false before a call to setFlame that subsequently turns off all the flames:
ship.onKeyUp = ship.onKeyDown = null; ship.left=ship.right=ship.up=ship.down=false; setFlame();
If the shield is on, we need to turn it off:
if(shield)toggleShield();
The next four lines remove the intervals that run the ship, bullets, bad guys, and powerups, effectively freezing the game:
clearInterval(shipInterval); clearInterval(bulletsInterval); clearInterval(badGuyInterval); clearInterval(powerupsInterval);
When the game is reset, we want to make sure that all the bullets from the previous game were removed so that they don't start up when a new bulletsInterval is created:
for(var b in bullets) bullets[b].removeMovieClip()
Implementing setFlame
We've been calling setFlame for a while now, and it's time we put an implementation behind it. All it amounts to are some tests of the direction properties we set in the KeyUp and KeyDown handlers for the ship. We make the _visible property of the flame clips true or false depending on which keys the player is pressing:
if(ship.up){ship.leftFlame._visible=ship.rightFlame._visible=true;} else if(ship.left && !ship.right) {ship.leftFlame._visible=false;ship.rightFlame._visible=true;} else if(!ship.left && ship.right) {ship.leftFlame._visible=true;ship.rightFlame._visible=false;} else {ship.leftFlame._visible=ship.rightFlame._visible=false;} if(ship.down)ship.frontFlame._visible=true; else ship.frontFlame._visible=false; If you test now, you should see something like Figure 8.23. The ship's flame works now.

Figure 8.23: The ship's flames now work based on which keys the user is pressing.
Implementing setLife
Recall that setLife is called when the player's life changes. Its job is to change the size of the mask used to hide the life bar when the player is hit. The object assigned as a mask in the lifemeter symbol is named mask so that we can use a path through the scoreboard clip, into the life clip, into the lifemeter clip, and to the mask clip. Once there, we adjust the mask's scale to the ratio between life and lifemax :
function setLife(){ scoreboard.life.lifemeter.mask._xscale = 100*life/lifemax; } The ratio between life and lifemax is multiplied by 100 so that it is a percentage instead of a number between 0 and 1.
Implementing the Ship Explosion Functions
We have three helper functions that we use to set up and handle the pieces of the ship moving about the stage at explosion. The first is setInitialValues , which copies the coordinates of each piece of the ship:
function setInitialValues(o){ o.ix=o._x;o.iy=o._y;o.ir=o._rotation; } The next helper function is called moveObject , and it takes four arguments. The first argument is a reference to the object to move, the next two are the changes to X and Y, and the fourth and final argument is the rotation to apply to the object:
function moveObject(o,x,y,r){ o._x+=x;o._y+=y;o._rotation+=r; } Finally, the last helper function is called resetObject and its job is to return the ship pieces to their initial position to begin a new game:
function resetObject(o){ o._x=o.ix;o._y=o.iy;o._rotation=o.ir; } At this point, the ship is complete, but we don't have an easy way to test the ship exploding. To fix this, I added a line to shipKeyDown that trapped for the spacebar. When the spacebar is pressed, I call hitShip with 10 damage. When the spacebar is pressed 10 times, the ship dies and I can watch the explosion. Add this line temporarily to the end of the shipKeyDown function to test this:
if(Key.isDown(Key.SPACE))hitShip(10);
Your ship should now explode as shown in Figure 8.24.
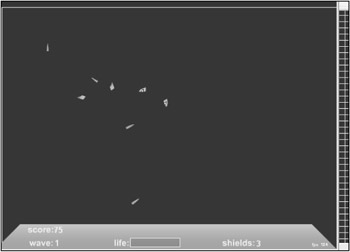
Figure 8.24: The ship explodes when its life drops to 0 or below.
That completes the implementation of the ship. Now it's time to give the player something to shoot at.
Implementing the Bad Guys
Implementing the bad guys is pretty standard for much of the implementation, but there is one key area I want to focus on. The way I create waves of bad guys needs to be easily edited and expanded, so I must keep that in mind while developing the spawnWave and createBadGuy functions. First, however, I want to take care of the update function for the bad guys: badGuyExecute .
Implementing badGuyExecute
This short function tests to see if a new wave is needed. A new wave is required when the bad guy count reaches 0:
if(badGuyCount==0) spawnWave();
Now we iterate over every bad guy using a for in loop. For each bad guy, we call its move method. This method is attached to each bad guy when we create him. The update function ( badGuyExecute ) only calls that move method:
for(bg in badGuys){ badGuys[bg].move(); } Implementing spawnWave
When no bad guys remain , the badGuyExecute function calls spawnWave . The first thing we need to do to spawn a new wave is increment the wave variable:
++wave;
Now comes the important part. I want to develop a way to easily create a full wave of bad guys with one line of script. I want to be able to specify what types of bad guys to create, how many, and what size for each individual wave, but I don't want to be required to specify the details of every wave. In other words, I want to be able to easily hand-program a wave's contents, but I also want to be able to leave some out and have Flash automatically generate a random wave. Let's define waves 1 through 10 and then leave the default case to handle all higher waves.
I do this with a switch statement that switches on the wave variable. If the wave is one that I want to hand-program, I add a case statement for that wave number. If I omit a particular wave number in my case list, the default case should pick it up. Therefore, I want the default case to randomly generate a wave for me, but each of the normal case statements will be a hand-crafted wave.
Before I lay out that switch statement, we need to develop the interface to createBadGuy , which takes our bad guy request (our order, if you will) and actually creates the bad guys. We don't have to implement this function now, but we need to decide on how it should be called. The following is the general form I have decided upon:
void createBadGuy( badGuyOrder );
The idea is that the badGuyOrder is an array of bad guy requests . Each element of the array is a request for a certain type of bad guy, at a certain size, in a certain quantity. The badGuyOrder can be any length. Each element in the bad guy order is an array containing two or three elements. The first element is the bad guy type, and the second element is the quantity. The third (optional) element is the scale factor. If this third element is omitted, 100 is assumed.
To create a set of bad guys, we might use a bad guy order array as follows:
[[2,3],[2,3,125]]
This would place two orders for bad guys. The first would create three of the bad guy type 2 with no third argument ( implying 100 scale). The second order would create three more type 2 bad guys, but these three would be scaled up to 125 percent. Therefore, only two batches of bad guys would be created in this example, but as I said, there should be no limit to the number of batches that can be given in a bad guy order. Figure 8.25 shows a visual representation of a bad guy order. After you decide on the order, you can translate it into an array as shown earlier.
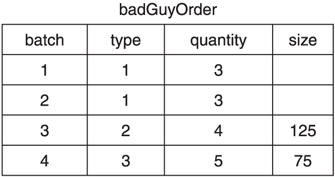
Figure 8.25: The badGuyArray is used to place an order for multiple batches of bad guys.
Now that we know how to create a batch of bad guys (or at least how to call the createBadGuy function), we can look at the switch statement that allows us to program the different waves. I have programmed the first 10 by hand and given a default case to make a random wave:
switch(wave){ case 1: createBadGuy([[1,6]]);break; case 2: createBadGuy([[1,4],[2,2]]);break; case 3: createBadGuy([[1,2],[1,2,125],[2,2]]);break; case 4: createBadGuy([[1,4,125],[2,4]]);break; case 5: createBadGuy([[2,3],[2,3,125]]);break; case 6: createBadGuy([[3,4]]);break; case 7: createBadGuy([[1,2],[2,4],[3,2]]);break; case 8: createBadGuy([[2,4,150],[3,2,125]]);break; case 9: createBadGuy([[1,2],[2,4],[3,2]]);break; case 10: createBadGuy([[1,3],[2,4],[3,3]]);break; default: var a = new Array(); for(var i=0;i<3;++i){ var q = getRandom(3,5); var s = getRandom(70,150); a[i]=[i+1,q,s]; } createBadGuy(a); break; } As you can see, the first 10 case statements make preprogrammed calls to createBadGuy , but the default case uses random numbers to generate a wave.
You could, of course, go into that switch statement and program, say, wave 15, by using a case statement for wave 15 and then giving an order to createBadGuy in it. The default case would be called for any waves that are not programmed with their own case statement. Notice how easy it is to program a given wave.
| Tip | Programming the various waves is an example of adding content to your game. As a game developer, you should always strive to make the addition of content to your game as simple as possible. The mechanics of the game should be hidden from the content generation as much as possible. That allows you and others to add content to your game easily without the potential of altering your game engine. |
Implementing createBadGuy
We've already placed the orders for the bad guys, and we've decided how the bad guy order will be broken up. Remember that the argument to createBadGuy is named badGuyOrder , and it contains at least one array with a batch order in it. The first thing to do is set up a loop to iterate for each batch in the bad guy order:
for(var i=0;i<badGuyOrder.length;++i){ Now we extract the bad guy type from the first element of the current batch (current iterate of the previous for loop):
badGuyNumber = badGuyOrder[i][0];
Then we extract the scale from the order:
scale = badGuyOrder[i][2];
Finally, we create a temporary variable to hold the bad guys we are about to create and then develop a for loop to iterate for the quantity of this batch of bad guys:
var bg; for(var j=0;j<badGuyOrder[i][1];++j){ Inside this loop, we need to increment the badGuyCount , create the bad guy, and scale him (for starters):
badGuyCount++; bg=badGuys.attachMovie("badGuy"+badGuyNumber,  " bg"+badGuys.getNextHighestDepth(), badGuys.getNextHighestDepth()); bg._xscale=bg._yscale=scale;
 We need to scale the bad guy. In some waves (levels), we might have no third argument, meaning that no scale was predefined. In this case, if we tried to call on the third argument, it would return undefined . We could write a check for cases in which there is a third argument and only set the scale then but, in reality, passing undefined to the scale properties does not affect the scale in any way. Therefore, although the condition would be good style, it is completely unneeded.
We need to initialize a score property on the bad guy so that when he dies, we know how much to increment the player's score. Let's use the bad guy's type number multiplied by a scale factor:
bg.score = badGuyNumber*10
Now we need to position our bad guy. We don't want him to be generated on top of the ship, so we create random coordinates inside a loop that hit tests for the ship. If the new bad guy collides with the ship, we need to keep the loop going until the random coordinates place it at a safe distance:
do{ bg._x=getRandom(0,Stage.width); bg._y=getRandom(0,Stage.height); }while(ship.hitTest(bg._x,bg._y)); | Note | You need to add the getRandom method that we created earlier in the book for this code to work. Here's the code for the function: function getRandom(minimum, maximum){ return Math.floor(Math.random() * (maximum - minimum +1) + minimum); } |
So far, everything we've done is the same regardless of the bad guy type we're creating (other than the actual attachMovie call). Now it's time to give the new bad guy a custom behavior based on his type. To do this, I use a switch statement to switch on the type of bad guy in this batch:
switch(badGuyNumber){ The first bad guy, type 1, is handled first:
case 1:
Let's set its speed , damage , and radius2 , which we use for the bounding circle hit test with the ship:
bg.speed = 1.5 + wave*.25; bg.damage = 25; bg.radius2 = (bg._width/2)*(bg._width/2);
| Note | We're using the property radius2 , which is the radius squared and not radius . Also notice that we're squaring the radius. That's because I want to use the shortcut distance formula dist2 . |
Now it's time to give bad guy 1 his move method. I want this bad guy to turn to face the player at all times and make a direct beeline for him:
bg.move=function(){ this._rotation = r2d(  Math.atan2(_root.ship._y-this._y,_root.ship._x-this._x)); this._x += this.speed*Math.sin(d2r(this._rotation+90)); this._y -= this.speed*Math.cos(d2r(this._rotation+90)); hitTestShip(this); } break;
 As you can see, I'm using trigonometry to find both the rotation and change to X and Y. That is not necessarily required. I could have set up things using the scaling trick I demonstrated early in this chapter, but the other bad guys swing toward the player using trigonometry. Therefore, I left this bad guy (who goes straight for the player) using trigonometry for consistency. Now it's time to create bad guy 2. We do the same thing by setting the speed , damage , and radius2 .
case 2: bg.speed = 3.0 + wave*.35; bg.damage = 20; bg.radius2 = (bg._width/2)*(bg._width/2);
This bad guy swings toward the player instead of moving straight. I want him to be able to swing either direction, so let's create a property called dir that is set to some offset that gives the swing its functionality. You can see dir do its job when we create the move method for this bad guy in a moment:
if(getRandom(0,1))bg.dir=45; else bg.dir=135;
Notice that we're making dir either 45 or 135. That is the amount of swing the bad guy takes going toward the player. 45 represents a left swing, and 135 represents a right swing. The actual direction toward the player is 90 degrees. This will all make sense when we implement the move function for this bad guy, given next:
bg.move=function(){ this._rotation = r2d(  Math.atan2(_root.ship._y-this._y,_root.ship._x- this._x)); this._x += this.speed*
  Math.sin(d2r(this._rotation+this.dir)); this._y -= this.speed*
  Math.cos(d2r(this._rotation+this.dir)); hitTestShip(this); } break;
 Notice the way we are updating the X and Y coordinates of the bad guy. We're adding dir to the rotation before we plug it into the trigonometry function. That results in a swing type motion.
Let's finish it off with the third bad guy. This one is nearly identical to the second bad guy except that it has a higher speed and lower damage and its swing variation is a bit larger (55 and 145 instead of 45 and 135):
case 3: bg.speed = 3.5 + wave*.45; bg.damage = 15; bg.radius2 = (bg._width/2)*(bg._width/2); if(getRandom(0,1))bg.dir=45; else bg.dir=135; bg.move=function(){ this._rotation = r2d(Math.atan2(_root.ship._y-  this._y,_root.ship._x-this._x)); this._x += this.speed*
  Math.sin(d2r(this._rotation+this.dir)); this._y -= this.speed*
  Math.cos(d2r(this._rotation+this.dir)); hitTestShip(this); } break;
 | Tip | At this point, it might be a good idea to add a default case that makes bad guy type 1. That way if the guy programming waves asks for a bad guy number that isn't implemented, the default type will be created. |
Now we close the switch statement because all three bad guy types are defined:
}
We close the loop that iterates for each bad guy in the batch:
}
Finally, we close the loop that iterates for each batch of bad guys in the order:
}
Notice how easy it would be to add a new bad guy type. All we would have to do is create the symbol, add a new case statement for the bad guy type, preprogram some waves to use it, and change the default wave creation algorithm to take advantage of it as well. Keeping things extensible in a game like this is important. Interesting bad guys and interesting powerups are what make the game fun to play. Adding tons of different kinds is a good way to keep the player interested.
At this point, you can test each bad guy by setting up your own custom waves.
Implementing hitTestShip
Notice that the move methods for each bad guy had a call to hitTestShip with a reference to that bad guy's movie clip ( bg) as the functions argument as their last line. Let's use the bounding circle we set up with radius2 when we created the bad guy. That means a distance check. If the check is true, we call hitShip with the bad guy's damage. We also call hitBadGuy :
if(dist2(bg,ship) < bg.radius2){ hitShip(bg.damage); hitBadGuy(bg, 0); } Notice that hitBadGuy takes two arguments. The first is a reference to the bad guy that was hit, and the second is the percentage of a powerup being dropped. Because this test is being done inside hitTestShip , it only happens when the player runs into the bad guys. I don't want powerups being dropped when the player runs into the enemy, only when he kills the enemy with bullets. For that reason, I'm sending in a powerup percentage of 0.
Implementing hitBadGuy
To implement a bad guy getting hit, we first need to recall that the two arguments to hitBadGuy were bg (a bad guy reference) and powerupPercentage (change of a powerup being dropped).
We then decrement the bad guy count and increment the score:
badGuyCount; score+= bg.score*wave;
Now we want the bad guy to stay around for a little while so that we can fade him out. But we don't want him moving after the player anymore. The easy way to break his movement functionality is to remove his move function and replace it with null . That way when badGuysExecute is called, the bad guy's move function (now set to null ) does nothing:
bg.move = null;
We set the bad guy's dead property to true . This is necessary for the bullet hit testing; we don't want bullets hitting bad guys who are already dead (see the bulletsExecute function):
bg.dead = true;
Now we need to set up the bad guy fadeout. I've chosen to do this on an enterFrame event because the fade is not tied to gameplay; it's tied to rendering rate. Inside the onEnterFrame handler, I want to reduce the bad guy's alpha by 4 and then see if it's 0 or less. When the alpha has reached 0 or less, I remove the bad guy clip:
bg.onEnterFrame = function(){ if((this._alpha -=4) <= 0) this.removeMovieClip(); } Finally, I want to check to see if a powerup should be dropped. I do this by creating a random number between 0 and 100 and comparing it to the powerupPercentage . When the random number is less than the powerupPercentage given as an argument to hitBadGuy , I call createPowerup :
if(getRandom(0,100) < powerupPercentage)createPowerup(bg);
If you test now, almost everything should be working. You should be able to destroy the bad guys, play through multiple waves, and be destroyed by the bad guys, as shown in Figure 8.26.
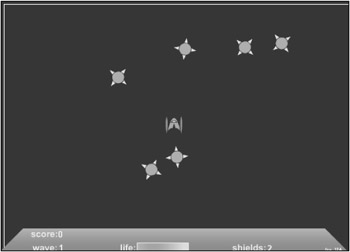
Figure 8.26: The bad guys are working now; everything looks great except that there are no powerups yet.
Implementing the Powerups
The powerups are pretty simple. They just sit there on the stage waiting for the player to fly over them. When activated, powerups usually set some variable to true and the rest of the game engine deals with it. This is true of things like the freeze powerup and the double shot powerup. Both set a variable to true , and you've already seen the way these variables do things like freeze the execution of the shipExecute function when the player is frozen and shoot two shots instead of one in the fireBullet function.
The first thing to implement is the creation of the powerups.
Implementing createPowerup
The function createPowerup takes one argument, bg , which is a reference to the bad guy that is in the position where the powerup will be placed. To create a powerup, we need to randomly pick one from the total number of powerup types available to us:
var pn = getRandom(1,4);
If we later add new powerups to our game, that random number call must change to reflect the new powerup type.
Now that we know which powerup to make, we can attach it:
var p = powerups.attachMovie("powerup"+pn,  powerups.getNextHighestDepth(), powerups.getNextHighestDepth());
 We need to record the powerup type for later, when the player runs over it:
p.powerType = pn;
We position the powerup where the bad guy was sitting. Recall that the argument to createPowerup was a reference to the bad guy who just died:
p._x = bg._x; p._y = bg._y;
We now set a property of the powerup named time , which we use to remove the powerup after it's been sitting too long on the stage:
p.time = powerupLifeSpan;
Finally, I want the powerup to give the player a bit of a score bonus when it's captured:
p.score = 5*pn;
Implementing powerupExecute
Now that we can create powerups, we should implement their update function, which was attached to an interval back in startGame . The powerupExecute function needs to iterate over every powerup in the game. I do this with the usual for in loop:
for(pu in powerups){ var p = powerups[pu]; We need to reduce the time for this powerup, bringing it one step closer to going away. We also need to check to see if it's time for this powerup to go away:
p.time; if(p.time<=0) p.removeMovieClip();
Finally, we want to hit test against the ship to see if this powerup has been run over:
if(ship.hitTest(p._x, p._y)){ If the hit test is true , we need to check the shields. Remember that the powerup is not captured if the player has his shields on. Instead, both the shield and the powerup are destroyed. We start out by checking whether the shield is on:
if(shield){ If the shield is on, we toggle the shield and reduce the shield count:
toggleShield(); shieldCount; }
If the shields are not on, we increment the score and then switch on the powerup type to give the correct behavior:
else{ score+=p.score; switch(p.powerType){ The first powerup type, powerup 1, indicates a double shot:
case 1: doubleShot = true;break;
The second powerup type, powerup 2, indicates additional life:
case 2: if(life<lifemax)life+=10; setLife();break;
The third powerup type, powerup 3, indicates an additional shield:
case 3: shieldCount++;break;
The fourth and final powerup type freezes the player. To freeze property, we need to set frozen to true , but we also need to set up an interval to take it off:
case 4: frozen=true;frozenInterval=setInterval(function(){frozen=false;
clearInterval(frozenInterval);},2000);break;
Because there are only four powerup types right now and we've implemented the behavior for all four, we can close the switch statement:
}
We can close the else statement that executed when shields were off:
}
At this point, we can remove the powerup because it will be disposed of regardless of the condition of the shields:
p.removeMovieClip();
Finally, we can close the hit test block and the iteration over all the powerups ( for in loop):
} }
That concludes the implementation of the powerups and the implementation of the entire game, excluding the sound effects. You can test your game now. You should see everything working perfectly , minus sound. Your game should look like Figure 8.27 with powerups being left by some dead bad guys.
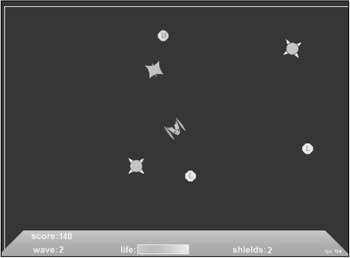
Figure 8.27: Powerups are now working. They are dropped from bad guys sometimes, and each does something different to the player.
Sound
As usual, I've left this largely trivial task until last. The sound manager is identical to previous chapters and shouldn't present problems for you. Because the sound manager is so similar to the way I do sounds in all the games, I'm not going to give you the code here. The sound manager code can be seen in the complete code listing in a few more sections. As usual, it's simply a function called createSoundManager that sets up the various sounds and gets everything ready to play.
There are six sounds in Blow 'Em Up , as listed next:
-
badGuyHit . Played when a bad guy is shot by a bullet or collides with the ship. This sound event is started in the hitBadGuy function.
-
fireBullet . Played when a bullet is fired. This sound event is started in the fireBullet function.
-
playerHit . Played when a bad guy collides with the ship and the shields are not up. This sound event is started in the hitShip function.
-
playerKilled . Played when the player dies. This sound event is started in the killShip function.
-
powerup . Played when the ship gathers a powerup, but only if the shields are off. This sound event is started in the powerupExecute function.
-
shieldHit . Played when the shield is lost, either through running into a powerup or into a bad guy. This sound event is started in both the powerupExecute and hitShip functions.
Because the starting of these events is trivial and you've seen it done a number of times now, I'm going to forgo the details. However, each mySound.start method is listed properly in the complete code listing at the end of this chapter.
Testing
Oddly enough, I can't seem to find any real bugs in the game. However, this is a good time to tune the game constants like speeds and damages of things, as well as add in new bad guys and powerups. Feel free to add to the game's code and implement your own ideas for bad guys and powerups.
Complete Code Listing
What follows is a complete listing of the game's code. It is comprehensive with a few exceptions. I have added a stop call to the button symbol's timeline so that I don't have to do it in script, even though I still do sometimes out of habit. I've also omitted code from the frame counter, which was described in Chapter 7.
initGame(); function initGame(){ Stage.align=" TL" Stage.align = "noscale"; attachMovie("instructions"," instructions",0,{_x:Stage.width/2,_y:Stage.height/2}); instructions.myText.text = "Arrow Keys to Move\nControl to Fire\n  Shift Toggles Shields\nTurn off shields to\ngather powerups\n
  Alternate Move: (u,h,j,n)\nAlternate Fire: g"; instructions.startButton.stop(); instructions.startButton.myText.text = "start"; instructions.startButton.onRelease = function(){ instructions.removeMovieClip(); startGame(); } instructions.attachMovie("powerupKey"," powerupKey",1,{_x:50,_y:-100}); } function startGame(){ bullet_depth = 10; badGuy_depth = 99; ship_depth = 100; powerup_depth = 101; scoreboard_depth = 2000; instructions_depth = 2001; playerTick=40; bulletTick=100; badGuyTick=100; powerupTick=120; ship_rotation_speed = 9; ship_speed = 8; bullet_speed = 25; bulletLifeSpan = 8; fireDelay = 250; doubleShot=false life=100; lifemax=100; initialShieldCount = 2; shieldCount = initialShieldCount; wave=0; score=0; badGuyCount=0; maxBadGuys = 16; powerupLifeSpan = 35; normalPowerupPercentage = 50; attachMovie("ship"," ship",ship_depth); ship._x = Stage.width/2; ship._y = Stage.height/2; ship.shield._visible = false; ship.onKeyDown = shipKeyDown; ship.onKeyUp = shipKeyUp; Key.addListener(ship); setFlame(); ship.intervals = new Array(8); ship.pieces = new Array(8); ship.pieces.push(ship.leftTopBody); ship.pieces.push(ship.leftBottomBody); ship.pieces.push(ship.rightTopBody); ship.pieces.push(ship.rightBottomBody); ship.pieces.push(ship.leftTopWing); ship.pieces.push(ship.leftBottomWing); ship.pieces.push(ship.rightTopWing); ship.pieces.push(ship.rightBottomWing); for(var i=0;i<ship.pieces.length;++i) setInitialValues(ship.pieces[i]); shipInterval = setInterval(shipExecute, playerTick); createEmptyMovieClip("bullets",bullet_depth); createEmptyMovieClip("badGuys",badGuy_depth); createEmptyMovieClip("powerups", powerup_depth); bulletsInterval = setInterval(bulletsExecute, bulletTick); badGuyInterval = setInterval(badGuyExecute, badGuyTick); powerupsInterval = setInterval(powerupExecute, powerupTick); attachMovie("scoreboard"," scoreboard",scoreboard_depth,{_y:Stage.height});
  p=new Object(); createSoundManager(); } function resetGame(){ instructions.removeMovieClip(); for(var i=0;i<ship.intervals.length;++i){ clearInterval(ship.intervals[i]); resetObject(ship.pieces[i]); } for(bg in badGuys)badGuys[bg].removeMovieClip(); for(pu in powerups)powerups[pu].removeMovieClip(); badGuyCount=0; ship._x = Stage.width/2; ship._y = Stage.height/2; ship._rotation = 0; ship.onKeyDown = shipKeyDown; ship.onKeyUp = shipKeyUp; shipInterval = setInterval(shipExecute, playerTick); life=lifemax; setLife(); shieldCount = initialShieldCount; wave=0; score=0; doubleShot=false; frozen=false; bulletsInterval = setInterval(bulletsExecute, bulletTick); badGuyInterval = setInterval(badGuyExecute, badGuyTick); powerupsInterval = setInterval(powerupExecute, powerupTick); } function endGame(){ clearInterval(endGameInterval); attachMovie("instructions"," instructions",instructions_depth); instructions.myText.text=" You're dead\nscore = "+score+"\nwave = "+wave; instructions._x = Stage.width/2; instructions._y = Stage.height/2; instructions.startButton.stop(); instructions.startButton.myText.text = "reset"; instructions.startButton.onRelease = resetGame; } function badGuyExecute(){ if(badGuyCount==0) spawnWave(); for(bg in badGuys){ badGuys[bg].move(); } } function spawnWave(){ ++wave; switch(wave){ case 1: createBadGuy([[1,6]]);break; case 2: createBadGuy([[1,4],[2,2]]);break; case 3: createBadGuy([[1,2],[1,2,125],[2,2]]);break; case 4: createBadGuy([[1,4,125],[2,4]]);break; case 5: createBadGuy([[2,3],[2,3,125]]);break; case 6: createBadGuy([[3,4]]);break; case 7: createBadGuy([[1,2],[2,4],[3,2]]);break; case 8: createBadGuy([[2,4,150],[3,2,125]]);break; case 9: createBadGuy([[1,2],[2,4],[3,2]]);break; case 10: createBadGuy([[1,3],[2,4],[3,3]]);break; default: var a = new Array(); for(var i=0;i<3;++i){ var q = getRandom(3,5); var s = getRandom(70,150); a[i]=[i+1,q,s]; } createBadGuy(a); break; } } //////////////////////////////////// //create a wave of bad guys. badGuyOrder is a 2d array //each element of badGuyOrder is an array with 2 or 3 integers //first integer is the bad guy number, second is the quantity, third (optional)
  is the scale //if scale is left out, 100 is assumed. function createBadGuy(badGuyOrder){ for(var i=0;i<badGuyOrder.length;++i){ badGuyNumber = badGuyOrder[i][0]; scale = badGuyOrder[i][2]; var bg; for(var j=0;j<badGuyOrder[i][1];++j){ badGuyCount++; bg=badGuys.attachMovie("badGuy"+badGuyNumber,
  " bg"+badGuys.getNextHighestDepth(),badGuys.getNextHighestDepth()); bg._xscale = bg._yscale = scale; bg.score = badGuyNumber*10; do{ bg._x=getRandom(0,Stage.width); bg._y=getRandom(0,Stage.height); }while(ship.hitTest(bg._x,bg._y)); switch(badGuyNumber){ case 1: bg.speed = 1.5 + wave*.25; bg.damage = 25; bg.radius2 = (bg._width/2)*(bg._width/2); bg.move=function(){ this._rotation = r2d(Math.atan2(_root.ship._y-this._y,
  _root.ship._x-this._x)); this._x += this.speed*Math.sin(d2r(this._rotation+90)); this._y -= this.speed*Math.cos(d2r(this._rotation+90)); hitTestShip(this); } break; case 2: bg.speed = 3.0 + wave*.35; bg.damage = 20; bg.radius2 = (bg._width/2)*(bg._width/2); if(getRandom(0,1))bg.dir=45; else bg.dir=135; bg.move=function(){ this._rotation = r2d(Math.atan2(_root.ship._y-this._y,
  _root.ship._x-this._x)); this._x += this.speed*Math.sin(d2r(this._rotation+this.dir)); this._y -= this.speed*Math.cos(d2r(this._rotation+this.dir)); hitTestShip(this); } break; case 3: bg.speed = 3.5 + wave*.45; bg.damage = 15; bg.radius2 = (bg._width/2)*(bg._width/2); if(getRandom(0,1))bg.dir=55; else bg.dir=145; bg.move=function(){ this._rotation = r2d(Math.atan2(_root.ship._y-this._y,
  _root.ship._x-this._x)); this._x += this.speed*Math.sin(d2r(this._rotation+this.dir)); this._y -= this.speed*Math.cos(d2r(this._rotation+this.dir)); hitTestShip(this); } break; } } } } function hitTestShip(bg){ if(dist2(bg,ship) < bg.radius2){ hitShip(bg.damage); hitBadGuy(bg, 0); } } function hitBadGuy(bg, powerupPercentage){ badGuyCount; score+= bg.score*wave; bg.move = null; bg.dead = true; bg.onEnterFrame = function(){ if((this._alpha -=4) <= 0) this.removeMovieClip(); } if(getRandom(0,100) < powerupPercentage)createPowerup(bg); soundManager.badGuyHit.mySound.start(); } function powerupExecute(){ for(pu in powerups){ var p = powerups[pu]; p.time; if(p.time<=0) p.removeMovieClip(); if(ship.hitTest(p._x, p._y)){ if(shield){ toggleShield(); shieldCount; soundManager.shieldHit.mySound.start(); } else{ soundManager.powerup.mySound.start(); score+=p.score; switch(p.powerType){ case 1: doubleShot = true;break; case 2: if(life<lifemax)life+=10; setLife();break; case 3: shieldCount++;break; case 4: frozen=true;
  frozenInterval=setInterval(function(){frozen=false;
  clearInterval(frozenInterval);},2000);break; } } p.removeMovieClip(); } } } function createPowerup(bg){ var pn = getRandom(1,4); var p = powerups.attachMovie("powerup"+pn, powerups.getNextHighestDepth(),
  powerups.getNextHighestDepth()); p.powerType = pn; p._x = bg._x; p._y = bg._y; p.time = powerupLifeSpan; p.score = 5*pn; } function shipKeyDown(){ k=Key.getCode(); if(k==Key.LEFTk==Key.RIGHTk==Key.UPk==Key.DOWNk==85k==72k==74k==78){ if(k==Key.DOWNk==78)ship.down=true; else if(k==Key.LEFTk==72)ship.left=true; else if(k==Key.RIGHTk==74)ship.right=true; else if(k==Key.UPk==85)ship.up=true; setFlame(); } else if(k==Key.SHIFT)toggleShield(); } function shipKeyUp(){ k=Key.getCode(); if(k==Key.LEFTk==Key.RIGHTk==Key.UPk==Key.DOWNk==85k==72k==74k==78){ if(k==Key.DOWNk==78)ship.down=false; else if(k==Key.LEFTk==72)ship.left=false; else if(k==Key.RIGHTk==74)ship.right=false; else if(k==Key.UPk==85)ship.up=false; setFlame(); } else if(k==Key.SHIFT)shieldOff(); } function shipExecute(){ if(!frozen){ if(ship.left) ship._rotation-=ship_rotation_speed; if(ship.right) ship._rotation+=ship_rotation_speed; if(!ship.down && ship.up){ ship._x += ship_speed * Math.sin(d2r(ship._rotation)); ship._y -= ship_speed * Math.cos(d2r(ship._rotation)); } else if(ship.down && !ship.up){ ship._x -= (ship_speed/4) * Math.sin(d2r(ship._rotation)); ship._y += (ship_speed/4) * Math.cos(d2r(ship._rotation)); } if(Key.isDown(Key.CONTROL)Key.isDown(71))fireBullet(); adjustPosition(ship); } } function toggleShield(){ if(shieldCount && !shield){ shield=true; ship.shield._visible=true; } else{ shield=false; ship.shield._visible=false; } } function fireBullet(){ if(!fired){ soundManager.fireBullet.mySound.start(); fired=true; fireInterval = setInterval(function(){fired=false;
  clearInterval(fireInterval);},fireDelay); for(var i=0;i<doubleShot+1;++i){ p.x = 0; p.y = 0; if(wingtipToggle) ship.leftTopWing.localToGlobal(p); else ship.rightTopWing.localToGlobal(p); wingtipToggle=!wingtipToggle; var tempb = bullets.attachMovie("bullet",
  " bullet"+bullets.getNextHighestDepth(),bullets.getNextHighestDepth()); tempb._x= p.x; tempb._y = p.y; tempb.cx = bullet_speed * Math.sin(d2r(ship._rotation)); tempb.cy = -bullet_speed * Math.cos(d2r(ship._rotation)); tempb.time=0 } } } function bulletsExecute(){ var tb; var tbg; for(b in bullets){ tb=bullets[b]; tb._x+=tb.cx; tb._y+=tb.cy; adjustPosition(tb); if(tb.time++ > bulletLifeSpan) tb.removeMovieClip(); for(bg in badGuys){ tbg=badGuys[bg]; if(!tbg.dead && tbg.hitTest(tb._x,tb._y)){ hitBadGuy(tbg, normalPowerupPercentage); tb.removeMovieClip(); } } } } function hitShip(damage){ if(shield){ shieldCount; toggleShield(); soundManager.shieldHit.mySound.start(); } else{ doubleShot=false; life-=damage; setLife(); if(life<=0) killShip(); soundManager.playerHit.mySound.start(); } } function killShip(){ for(var i=0;i<ship.pieces.length;++i) ship.intervals[i] = setInterval(moveObject,40,ship.pieces[i],
  getRandom(-10,10),getRandom(-10,10),getRandom(-10,10)); endGameInterval = setInterval(endGame,2500); ship.onKeyUp = ship.onKeyDown = null; ship.left=ship.right=ship.up=ship.down=false; setFlame(); if(shield)toggleShield(); clearInterval(shipInterval); clearInterval(bulletsInterval); clearInterval(badGuyInterval); clearInterval(powerupsInterval); for(var b in bullets) bullets[b].removeMovieClip() soundManager.playerKilled.mySound.start(); } function setFlame(){ if(ship.up){ship.leftFlame._visible=ship.rightFlame._visible=true;} else if(ship.left && !ship.right){ship.leftFlame._visible=false;
  ship.rightFlame._visible=true;} else if(!ship.left && ship.right){ship.leftFlame._visible=true;
  ship.rightFlame._visible=false;} else {ship.leftFlame._visible=ship.rightFlame._visible=false;} if(ship.down)ship.frontFlame._visible=true; else ship.frontFlame._visible=false; } function setLife(){ scoreboard.life.lifemeter.mask._xscale = 100*life/lifemax; } function setInitialValues(o){ o.ix=o._x;o.iy=o._y;o.ir=o._rotation; } function moveObject(o,x,y,r){ o._x+=x;o._y+=y;o._rotation+=r; } function resetObject(o){ o._x=o.ix;o._y=o.iy;o._rotation=o.ir; } function adjustPosition(o){ if(o._y<0)o._y=Stage.height-scoreboard._height; else if(o._y>Stage.height-scoreboard._height)o._y=0; if(o._x<0)o._x=Stage.width; else if(o._x>Stage.width)o._x=0; } function d2r(d){ return d*Math.PI/180; } function r2d(r){ return 180*r/Math.PI; } function getRandom(minimum, maximum){ return Math.floor(Math.random() * (maximum - minimum +1) + minimum); } function dist2(o1,o2){ return Math.pow(o1._x-o2._x, 2) + Math.pow(o1._y-o2._y, 2) } function dist(o1,o2){ return Math.sqrt(dist2(o1,o2)); } function createSoundManager(){ var sound_depth = 1; createEmptyMovieClip("soundManager",soundManager_depth); soundManager.createEmptyMovieClip("badGuyHit", sound_depth++); soundManager.badGuyHit.mySound = new Sound(soundManager.badGuyHit); soundManager.badGuyHit.mySound.attachSound("badGuyHit.wav"); soundManager.badGuyHit.mySound.setVolume(50); soundManager.createEmptyMovieClip("fireBullet", sound_depth++); soundManager.fireBullet.mySound = new Sound(soundManager.fireBullet); soundManager.fireBullet.mySound.attachSound("fireBullet.wav"); soundManager.createEmptyMovieClip("playerHit", sound_depth++); soundManager.playerHit.mySound = new Sound(soundManager.playerHit); soundManager.playerHit.mySound.attachSound("playerHit.wav"); soundManager.createEmptyMovieClip("playerKilled", sound_depth++); soundManager.playerKilled.mySound = new Sound(soundManager.playerKilled); soundManager.playerKilled.mySound.attachSound("playerKilled.wav"); soundManager.createEmptyMovieClip("powerup", sound_depth++); soundManager.powerup.mySound = new Sound(soundManager.powerup); soundManager.powerup.mySound.attachSound("powerup.wav"); soundManager.createEmptyMovieClip("shieldHit", sound_depth++); soundManager.shieldHit.mySound = new Sound(soundManager.shieldHit); soundManager.shieldHit.mySound.attachSound("shieldHit.wav"); }
 EAN: 2147483647
Pages: 161