Exploring Useful Classes
|
|
Useful java.lang Classes
| Note | Remember that java.lang is imported by default and therefore does not need to be imported by your classes. However, note that it does not do any harm to import it anyway. |
Primitive Data Type Wrappers
We learned in Chapter 2 that Java has many primitive data types, such as int, float, double, etc. In the java.lang package, there are wrapper classes for each of the primitive data types that include important functionality support, such as allowing them to be manipulated and converted to other formats easily.
The wrapper classes are named as follows:
| Primitive Data Type | Wrapper Class |
|---|---|
| byte | Byte |
| short | Short |
| int | Integer |
| long | Long |
| float | Float |
| double | Double |
| boolean | Boolean |
| character | Character |
These wrapper classes all contain a very useful method called parseX, where X is relative to the wrapper class. Here is a table showing the parse methods of each of the wrapper classes.
| Wrapper Class | Parse Method |
|---|---|
| Byte | Byte.parseByte(String s) |
| Short | Short.parseShort(String s) |
| Integer | Integer.parseInteger(String s) |
| Long | Long.parseLong(String s) |
| Float | Float.parseFloat(String s) |
| Double | Double.parseDouble(String s) |
| Boolean | Boolean.getBoolean(String s) |
| Character | Character.toString(String s) |
The parse method takes a string as a parameter and attempts to convert the string into the appropriate format. For example, let's say we have a string declared as follows:
String myString = "34.5";
If we then created a double variable and use the parseDouble method of the Double class, we could get the value as follows:
double myDouble = Double.parseDouble(myString);
The value of the myDouble variable would then be the floating-point value 34.5.
A special case, however, is the Boolean class, which has the getBoolean method that looks for the string true or false and then assigns it appropriately to the Boolean variable (i.e., the method returns a Boolean value).
Note that if the conversion is illegal from, say, the string notation to the primitive data type, then an exception will be thrown (e.g., NumberFormatException). We will discuss exceptions in detail toward the end of this chapter.
The Math Class
The Math class contains excellent static methods for performing useful mathematical functions. Here is a table of some of the most useful methods in the Math class, although you can find a complete overview within the Java 1.4 documentation.
| Method Name | Use |
|---|---|
| abs(float), abs(double), abs(int), abs(long) | Finds the absolute value of a number (i.e., the positive representation) |
| ceil(double) | Rounds the number up to the nearest integer |
| floor(double) | Rounds the number down to the nearest integer |
| min(float, float), min(double, double), min(int, int), min(long, long) | Finds the smaller of two specified values |
| max(float, float), max(double, double), max(int, int), max(long, long) | Finds the larger of two specified values |
| pow(double, double) | Returns the value of the first parameter raised to the power of the second parameter |
| sin(double), cos(double), tan(double) | Finds the trigonometric sine, cosine, and tangent of the specified angle. (Note that the angle is in radians.) |
| asin(double), acos(double), atan(double) | Finds the arc tangent (sine, cosine, and tangent, respectively) |
| toDegrees(double) | Converts radians to degrees |
| toRadians(double) | Converts degrees to radians |
| random() | Returns a positive random double within the range of 0.0 (inclusive) to 1.0 (exclusive) |
| sqrt(double) | Returns the square root of the specified number |
The System Class
The main use for the System class is data output and input from the console window (shown in Chapter 6, "Stream I/O"). It also contains a useful method for getting the current system time called System.currentTimeMillis, which returns the current system time in milliseconds and can be used to limit the frame rate of your application/applet. Note that we will discuss timing in Chapter 12 in much more detail.
Useful java.util Classes
The java.util package contains many excellent classes for storing data in a variety of different formats—such as linked lists and array lists. Let's look at the most useful of these classes now.
The ArrayList Class
The ArrayList class is used to store object references and is not dissimilar to an array. However, there are many advantages to using an ArrayList class over an array, depending on the situation of course.
The main advantage of using an ArrayList is that it is dynamic, whereas arrays are of a fixed length. This is useful in many circumstances for listing data where you do not know the exact size of the list and especially where the size of the list changes at run time.
An ArrayList manages its capacity automatically (i.e., if you add more object references than the ArrayList can hold, it will automatically double its size to accommodate the new reference(s)). It is also easy to cycle (iterate) through the list of object references by means of an iterator, which we will look at soon. Finally, it is also very easy to add, find, and remove objects within an ArrayList.
Let's see how we can use an ArrayList to store a list of names in this small example program. Here is the complete code listing.
Code Listing 5-8: ArrayListExample.java
import java.util.*; public class ArrayListExample { public static void main(String args[]) { // Create an ArrayList... ArrayList myArrayList = new ArrayList(); // Add three 'String' objects to the ArrayList... myArrayList.add("Bob"); myArrayList.add("Harry"); myArrayList.add("Fred"); // Print two blank lines... System.out.println("\n"); // Iterate through the ArrayList to print its contents... Iterator i = myArrayList.iterator(); while(i.hasNext()) { String currentObject = (String) i.next(); System.out.println(currentObject); } } } When we run this example, we can expect the following output in the console window:
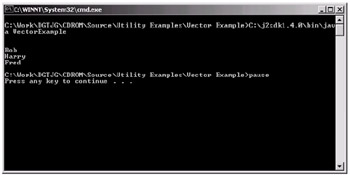
Figure 5-4: Using the ArrayList class
In the example, we first create an ArrayList object with the following line of code:
ArrayList myArrayList = new ArrayList();
Note as well that you can specify a parameter to state how many items you wish the ArrayList to initially be able to hold (remember that it will automatically increase to accommodate more objects though). Here is how we would have declared it to initially hold 25 object references.
ArrayList myArrayList = new ArrayList(25);
The advantage of preallocating required memory is that it is done first, and then no more memory needs allocating, provided you stay under the allocated limit, as allocating memory is relatively expensive and should be limited as much as possible when the game is in its playing stage.
Next, call the add method, which adds object references to the ArrayList. As all classes within Java are inherited from the Object class, it is safe to cast up to the Object class, so in this case the casting is done implicitly. Here is the add method where we add the string "Bob" to the ArrayList object:
myArrayList.add("Bob"); Now we want to print out all of the names from the list, so we need to create an Iterator object, which allows us to cycle through the ArrayList efficiently. Create the Iterator object and obtain the iterator from our instance of the ArrayList class by calling the iterator() method. This can be seen in the following line of code:
Iterator i = myArrayList.iterator();
Next, create a while loop, which checks for the condition of the iterator having more references in it. This is done by calling the hasNext method of our Iterator object and can be seen in the following line of code:
while(i.hasNext())
So if there are references still available in the ArrayList, we need to get the next one and cast it to the appropriate type (remember all references within an ArrayList are of type Object). To get the next reference, call the next() method of the iterator and simply typecast it to a string. This can be seen in the following line of code:
String currentObject = (String) i.next();
Then from there, we can simply output the String object to the console using the following line of code:
System.out.println(currentObject);
Note that using an iterator at run time during a game involves creating an Iterator object each time that you wish to traverse a list in this way. The creation of many objects during the running of a game in Java can cause many problems involving garbage collection, notably pauses when the garbage collector takes processor time to handle memory that can cause pauses in other processing threads (e.g., your main loop). We will discuss garbage collection in detail in Chapter 12. Instead of using an iterator to traverse a list, the alternative is to use the get method of the ArrayList class (though this is not as efficient as using an iterator for traversal, but it does not require the creation of Iterator objects—say, for example, per frame in the main game loop). The get method takes one parameter of type int, specifying the index (position in the list) of the object that you are requesting, which is returned of type Object ready for you to cast down to whatever object you know it is. In the case of the current example, type "String".
So instead of using the iterator technique, we can traverse the list with the get method as follows.
for(int i=0; i<myArrayList.size(); i++) { String currentObject = (String)myArrayList.get(i); System.out.println(currentObject); } Note the use of the size method of the ArrayList class that simply returns the number of elements that it contains. If you try to access an index that is negative or greater than or equal to the size of the list, an ArrayIndexOutOfBoundsException exception will be thrown. Exceptions are discussed toward the end of this chapter.
Searching and Removing from an ArrayList
As well as adding and cycling through the references contained within an ArrayList, it is also possible to search for an object and remove objects. Let's now look at an extended version of the previous example where we search for a name and then remove it. Here is the complete code listing for this example.
Code Listing 5-9: ArrayListSearchRemove.java
import java.util.*; public class ArrayListSearchRemove { public static void main(String args[]) { // Create a ArrayList... ArrayList myArrayList = new ArrayList(); // Add three 'String' objects to the ArrayList... myArrayList.add("Bob"); myArrayList.add("Harry"); myArrayList.add("Fred"); // Find the position of the 'Harry' object.. int position = myArrayList.indexOf("Harry"); System.out.println("Harry was found at position "+position); // Now remove the object at that position... myArrayList.remove(position); // Print two blank lines... System.out.println("\n"); // Iterate through the ArrayList to print its contents... Iterator i = myArrayList.iterator(); while(i.hasNext()) { String currentObject = (String) i.next(); System.out.println(currentObject); } } } So when we run the example this time, we can expect the following output in the console window.
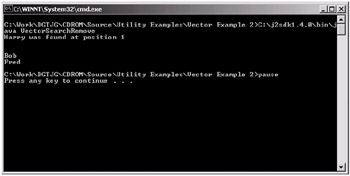
Figure 5-5: Finding and removing from an ArrayList
So in this example, we created the ArrayList and added the string, as in the previous example, but this time we searched the ArrayList to find the "Harry" string. We did this by calling the indexOf method to find the position of the object within the ArrayList. This can be seen in the following line of code:
int position = my ArrayList.indexOf("Harry"); The indexOf method looks through the ArrayList using the specified objects equals method to make a comparison to each element in the ArrayList. You will note that the equals method is defined in the Object method and is therefore inherited by all classes (all classes being derived from the Object class). Therefore, in this example you can see that we have actually created two different Harry string objects. The reason that our code works, even though these are effectively two different String objects (one being the testing "Harry" string and the other the original "Harry" string that we passed to the ArrayList), is because the String class contains its own version of the equals method, overriding what would have been inherited from the Object class. Now, the equals method of the String class tests whether the string character representation of one string is equal to another object, thus our example still found a match, matching the data instead of whether they were the same object. We felt that the structure of this example may have been a bit misleading to begin with but decided to leave it in to illustrate this fact. If we were testing the equality of an actual object (that is, if the actual object parameter is the same as the one stored in the list and not its data values), we would need to both pass in the same object and provide a reference to it in the indexOf method also. For example, the following code shows us adding a Person object to the ArrayList and then searching for it.
Person peterWalsh = new Person(); myArrayList.add(peterWalsh); int position = myArrayList.indexOf(peterWalsh);
Here we add and retrieve the same object, whereas before they were different. So as a final note, you should realize that the equality test is based on how the equals method of the parameter object is defined. For example, in the java.awt package there is a class named Point that simply represents an x and y coordinate. This method also overrides the equals method and defines that it will return true if the argument object is of type Point and also contains the same values for its x and y coordinates.
When it finds the object, it returns the index of the object that you may then pass to the get method for retrieving the object. Note that if the object could not be found, the method will return –1.
In our example, once we have the position of the object, we can then pass this position into the remove method of the ArrayList object, and the reference will be removed from the ArrayList. Also note that the remove method returns a reference to the object as well as removing it from the list. This method can be seen in the following line of code:
myArrayList.remove(position);
Note as well that we could have also just specified the object in the remove method that takes an Object parameter for the same effect:
myArrayList.remove("Harry"); | Note | There is also a very similar class to ArrayList called Vector. It has the same functionality as the ArrayList class. However, all of its methods are synchronized—see Chapter 7, "Threads" for a good explanation of synchronization. If synchronization is not an issue for your code, the best choice is the ArrayList, basically because it has faster access times. |
The LinkedList Class
The LinkedList class is very valuable to us. You will especially like this class if you are familiar with the C programming language, as it makes linked lists very easy to implement and they are highly useful.
The LinkedList class is in fact very similar to the ArrayList class; however, it gives us optimized methods for adding elements to the beginning and end of the list. Let's look at a simple code example where we add the numbers 1 through 5 to a linked list and display them to the console using an iterator. We will define the integer values by creating instances of the integer wrapper class to store the values as an object so that they can be added to the linked list, as a primitive data type alone cannot be.
Code Listing 5-10: LinkedListExample.java
import java.util.*; public class LinkedListExample { public static void main(String args[]) { // Create a LinkedList... LinkedList myLinkedList = new LinkedList(); // Add five 'Integer' objects to the LinkedList... Integer tempInt = new Integer(3); myLinkedList.add(tempInt); tempInt = new Integer(2); myLinkedList.addFirst(tempInt); tempInt = new Integer(1); myLinkedList.addFirst(tempInt); tempInt = new Integer(4); myLinkedList.addLast(tempInt); tempInt = new Integer(5); myLinkedList.addLast(tempInt); // Print two blank lines... System.out.println("\n"); // Iterate through the LinkedList to print its contents... Iterator i = myLinkedList.iterator(); while(i.hasNext()) { Integer currentObject = (Integer) i.next(); System.out.println(currentObject); } } } When you compile and execute the example, you should see the following output in the console:
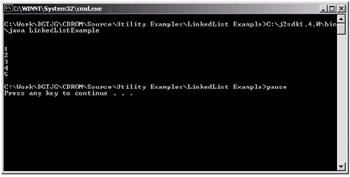
Figure 5-6: Using the LinkedList class
As you can see, using the LinkedList class is very similar to using the ArrayList class. The point of the example was to show how you can add elements to both the beginning and end of the list using the addFirst and addLast methods. In the example we do not add the numbers in order. However, by using the addFirst and addLast methods, we have added them to the list so they are in order in the list.
As well as addFirst and addLast, there is also removeFirst and removeLast to remove the first and last elements from the linked list.
The Stack Class
The Stack class allows you to maintain a stack (pile) of references, where the last reference to be added is taken off first by a technique called pushing and popping. Object references are "pushed" onto the top of the stack. Then you can "pop" the top reference off the top of the stack and regain the reference. Let's look at an example of this in action.
Code Listing 5-11: StackExample.java
import java.util.*; public class StackExample { public static void main(String args[]) { // Create a Stack.. Stack myStack = new Stack(); // Push three strings onto the stack... myStack.push("First"); myStack.push("Second"); myStack.push("Third"); // Print two blank lines... System.out.println("\n"); while(myStack.empty() == false) { String currentObject = (String) myStack.pop(); System.out.println(currentObject); } } } When you run the stack example, the following should be visible in the console:
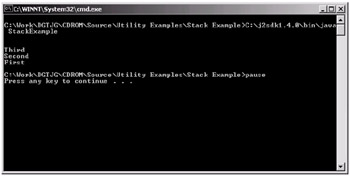
Figure 5-7: Using the Stack class
We "push" them onto the First, Second, and Third, and they are "popped" off in the reverse order of Third, Second, then finally First.
Okay, so we first create the Stack object called myStack using the following line of code:
Stack myStack = new Stack();
Then we call the push method of the Stack class to add three String objects. This can be seen here:
myStack.push("First"); myStack.push("Second"); myStack.push("Third"); Next, we create a while loop with the condition that the stack is not empty simply by calling the empty method of the Stack class, which returns true if the stack is empty and false otherwise. Here is the line of code that this can be seen in:
while(myStack.empty() == false)
Then within the while loop, we call the pop method of the Stack class, which returns the top reference from the stack and then removes it. As with the ArrayList and LinkedList classes, they store references of type Object, so we need to cast the reference back to begin a string. This can be seen in the following line of code:
String currentObject = (String) myStack.pop();
As well as pushing into and popping from the stack, it is possible to use the peek method, which allows you to examine the top reference on the stack without actually popping it off the stack.
The Random Class
Although the Random class does not help with data storage, it provides a very useful means of generating random numbers (this class is far more flexible than the random method in the Math class). Let's look at a table of some of the useful methods that this class contains. (Note that the methods are not static, so you need to create an object from the class to use them.)
| Method Name | Description |
|---|---|
| nextInt() | This method returns a random integer within the full range of the integer data type (negative and positive). |
| nextInt(int) | This method returns a random integer in the range of zero (inclusive) to a maximum of the integer parameter specified (exclusive). |
| nextLong() | This method returns a long value within the complete range of the long data type (positive and negative). |
| nextFloat() | This method returns a floating-point value within the range of 0.0 (inclusive) and 1.0 (exclusive). |
| nextDouble() | This method is the same as nextFloat, but with more accuracy due to being a double instead of a float. |
| nextBoolean() | This method returns either true or false randomly. |
| setSeed(long) | This method allows you to "seed" the random number. See below for an explanation of seeding. |
Seeding Random Numbers
To generate a truly random sequence, a good idea is to seed a random number with the current system time, which you can get by calling the currentTimeMillis static method of the System class in Java, for example. However, there may be a time when you want to seed a random number to replicate random sequences of numbers. A good example of this is using a client-server system where you may have, for example, two clients and a server. If the server were to select a random seed, it could then send this seed to both clients to which they can then create the same random number sequence to perform calculations themselves, giving the same results yet still based on the initial random seed, provided you want to calculate the same random results on both clients, the result being that you reduce the server's workload.
|
|
EAN: 2147483647
Pages: 237