Black-and-White and Beyond
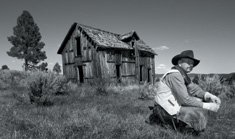
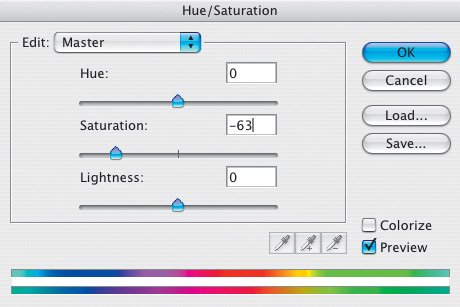
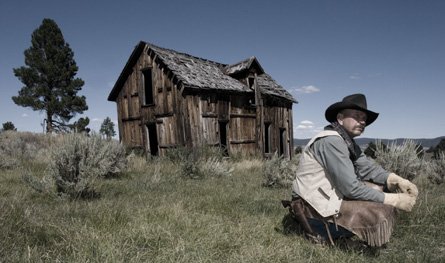
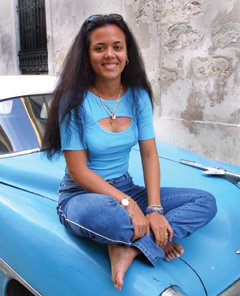
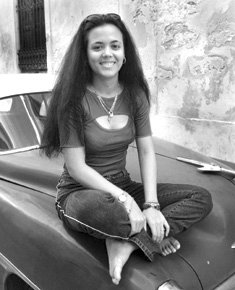
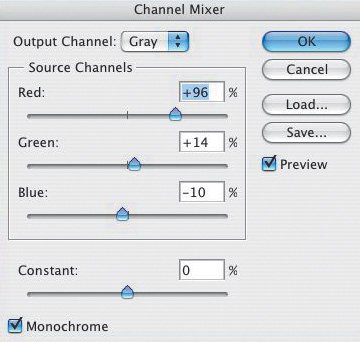
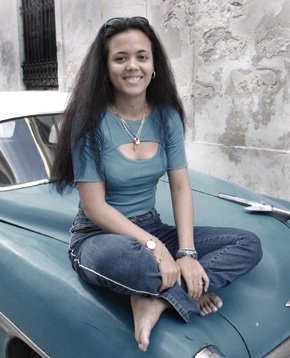
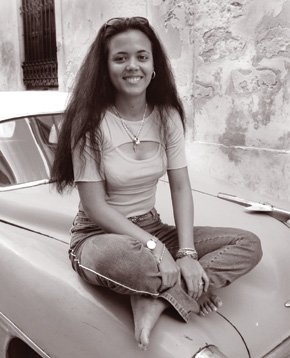
| First-time Photoshop CS2 users often create black-and-white images from their color files by converting them to grayscale images (Image > Mode > Grayscale). That technique is quick and easy, and it can produce OK images, especially when Levels, Curves, and/or Contrast adjustments are applied to the converted file. The accompanying color and grayscale images illustrate that technique (Figures 4.30 and 4.31). Figure 4.30.Tech info: Canon EOS 1Ds Mark II, 17-40mm lens @ 17mm. Exposure: 1/125 sec. @ f/16. ISO 100. Figure 4.31. Photoshop CS2 offers several other methods for creating a range of black-and-white image conversionsmore dramatic images with a greater tonal range. Let's look at a few of these options and then explore how to go beyond producing simple grayscale images. Another easy (but more creative) way to create a black-and-white image is to use Camera Raw (Figures 4.32, 4.33, and 4.34). In the Adjust tab, remove all the color using the Saturation slider. Then play around with the other controls, beginning with Contrast in this tab (uncheck the Auto box first). For more creative control, go to the Curve tab and fine-tune the picture to your liking. Figure 4.32.Tech info: Canon EOS 1Ds Mark II, 17-40mm lens @ 17mm. Exposure: 1/125 sec. @ f/16. ISO 100. Figure 4.33.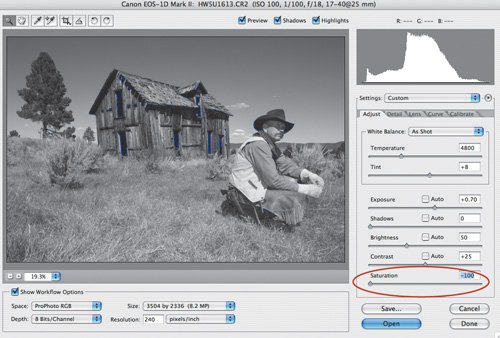 Figure 4.34. Before I started this lesson, I promised myself I'd stick to the straight enhancements. Well, I didn't get far. My cowboy picture begged for a tried-and-proven enhancement (useful for either a black-and-white or a color image): darkening the grass with the Burn tool to draw more attention to the main subjects (Figure 4.35). I'll stick to my guns from here on in, partner, even though I'd normally make additional enhancements (burning, dodging, selectively applying Levels, Curves, and so on) to the following images. Figure 4.35. Getting back to desaturating an image, you can remove all of the color, or just some of it, by using the Saturation slider in Hue/Saturation (Image > Adjustments > Hue/Saturation) (Figure 4.36). Figure 4.36. Note how this less-saturated version of my cowboy picture has a softer feel than the full-color image (Figure 4.37). Figure 4.37. I photographed this woman in Old Havana, Cuba, in 2000 with my Canon D30 and Canon 16-35mm lens (Figure 4.38). I love the way the color of the blue Chevy and the woman's clothes complement each other. Figure 4.38.Tech info: Canon EOS D30, 16-35mm lens @ 35mm. Exposure: 1/125 sec. @ f/8. ISO 400. Compare these two photographs (Figures 4.39 and 4.40). One is a grayscale image (Image > Mode > Grayscale). I created the other using Channel Mixer (Image > Adjustments > Channel Mixer). Which do you feel looks more dramatic? That's rightnot the grayscale image. Figure 4.39. Figure 4.40. When you select Channel Mixer (as an Adjustment Layer, Layer > New Adjustment Layer > Channel Mixer) and check the Monochrome box, you can control the Red, Green, and Blue Source Channels to fine-tune the image to your creative vision. Here are the Channel Mixer settings I used on my color picture (Figure 4.41):
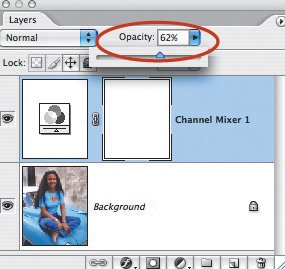
Figure 4.41. Combine my settings, and you get 100%. That's no accident. All three channels together shouldn't exceed 100%if you go over 100%, you overexpose the image; and if you go under 100%, you underexpose the image. That said, who's to say you can't tweak an image for a desired effect? I don't use the Constant control in the Channel Mixer dialog box because it can make the image look flat. But if you want, you can move the Constant slider to the left to darken the image or to the right to lighten the image. Negative values add more black, and positive values add more white. Play around with Channel Mixer once, and you'll never make a grayscale conversion again. For additional creativity after using Channel Mixer, try the Curves or Levels commands. If you use the Channel Mixer Adjustment Layer, try fading the layer's Opacity. Here, I reduced the Opacity to 62% (Figure 4.42). Figure 4.42. This is the result (Figure 4.43). The once-vibrant colors are now more subdued, and the picture looks more creative. Figure 4.43. At first, this may look like a black-and-white picture (Figure 4.44). Actually, it's a duotone (I chose Image > Mode > Grayscale and then Image > Mode > Duotone). Figure 4.44. A true duotone is a black-and-white image to which another color is added. Duotone images are often used in magazines and books when a four-color page isn't available, as well as for creating pictures with a different look. Duotones are also used for posters and in fine-art exhibits. Several of Ansel Adams' posters are duotones. For the duotone image of my Cuban friend, I clicked the Load button and selected Pantone 478 CVC from the Duotones folder. You can find this folder and lots more like it in the Presets folder inside the Photoshop folder. After applying that color, I clicked the small Curve window to the left of the Ink color window. Doing so brought up the Duotone Curve window, where I made my adjustments (Figure 4.45). Figure 4.45.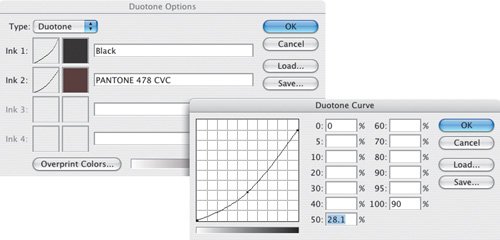 Photoshop groups Duotones along with Tritones (three ink colors) and Quadtones (that's right, four ink colors) in the Duotone Options dialog box. The color of the ink is displayed, so it's relatively easy to visualize how the color will affect the image (Figure 4.46). Figure 4.46.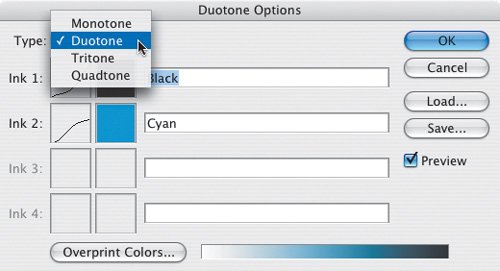 Tip To see all the Duotone options, you need to load the other inks. To do so, click the Load button in the Duotone Options dialog box. In the resulting Load dialog box, you can load additional colors.
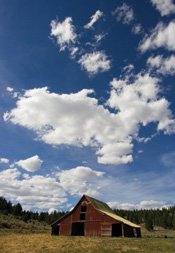
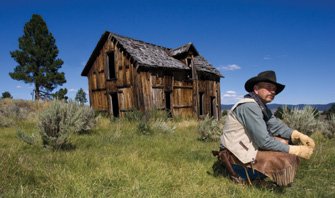
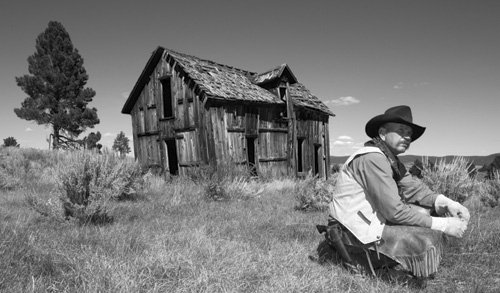
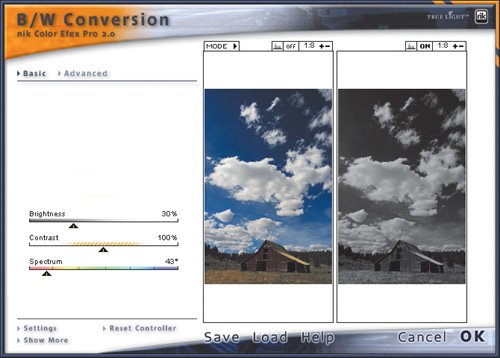
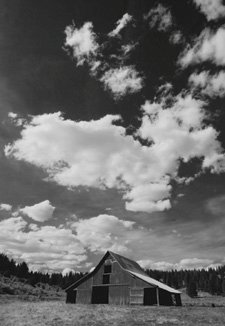
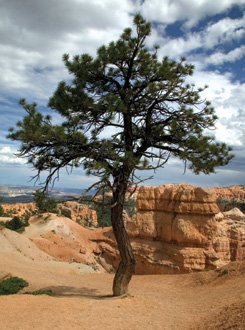
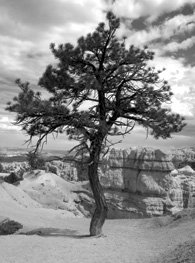
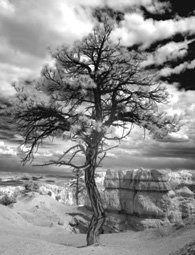
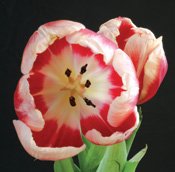
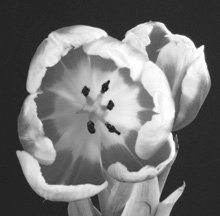
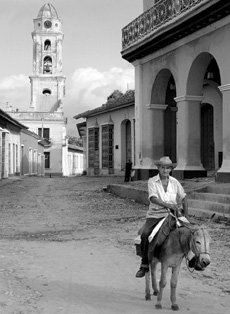
Go Beyond the Visible Light SpectrumCompare the color image in this series to the other two (Figures 4.49, 4.50, and 4.51). One is a grayscale image. The much more dramatic picture is an infrared (IR) image. Figure 4.49.Tech info: Canon EOS 1Ds Mark II, 17-40mm lens @ 20mm. Exposure: 1/125 sec. @ f/16. ISO 100. Figure 4.50. Figure 4.51.Tech info: Canon EOS D60 converted to IR-only camera, 17-40mm lens @ 17mm. Exposure: 1/30 sec. @ f/22. ISO 50. Some digital cameras offer IR capabilities when a Hoya R72 filter is placed over the lens, and several Photoshop plug-ins offer an IR filter, including Nik's Color Efex Pro. Personally, the most realistic IR images I've seen have been produced by cameras that have been converted to shoot only infrared (see www.irdigital.net). I took my converted D60 on a trip out West (this picture was taken in Bryce Canyon, Utah) and after viewing the pictures on my laptop each night, I started to "see" the landscapes in infrared. Straight out of an IR-converted camera, the pictures have a purple tint (Figure 4.52). To get the IR effect, you need to desaturate the image and adjust Levels to your liking. To maximize image quality, you must shoot in raw and use 16-bit depth. Figure 4.52.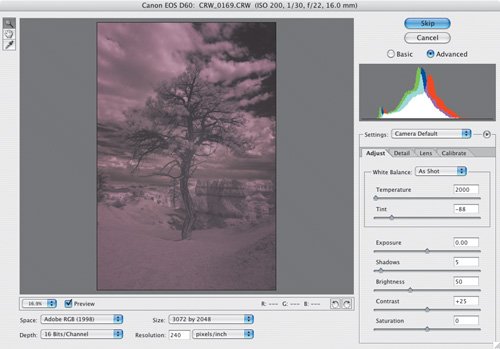 Another technique for going beyond black-and-white is to simulate a black-and-white infrared picture. To do so in this case, I converted a color file to a grayscale image (Image > Mode > Grayscale) and then applied the Diffuse Glow filter (Filter > Distort > Diffuse Glow) to the image (Figures 4.53 and 4.54). If the effect is too intense, you can fade the effect, as you can fade any filter, by choosing Edit > Fade Diffuse Glow (Figure 4.55). Figure 4.53.Tech info: Canon EOS 1Ds Mark II, 50mm Macro lens. Exposure: 1/15 sec. @ f/22. ISO 100. Figure 4.54.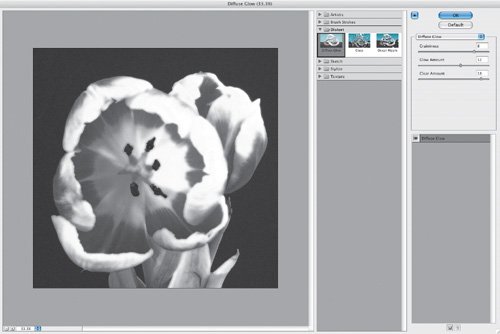 Figure 4.55. Enough tech talk. Let's chat for a moment about why we like black-and-white photography. Perhaps a black-and-white picture, such as this street scene from Trinidad, Cuba, on the next page, looks more creative than a color picture (Figure 4.56). By removing the color from the scene and therefore removing some of the scene's reality, perhaps you're able to use your imagination more. Because the picture can't use color to draw you into the scene, perhaps the subject must be more interesting. Perhaps it just looks cool. Whatever the reason, I think you'll have fun exploring the creative options of black-and-white photography. Figure 4.56.Tech info: Canon EOS D30, 16-35mm lens @ 20mm. Exposure: 1/125 sec. @ f/5.6. ISO 400. |


EAN: 2147483647
Pages: 72