Art History Brush 101
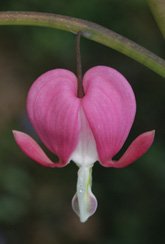
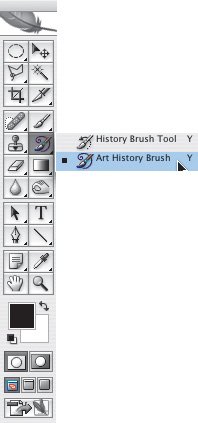
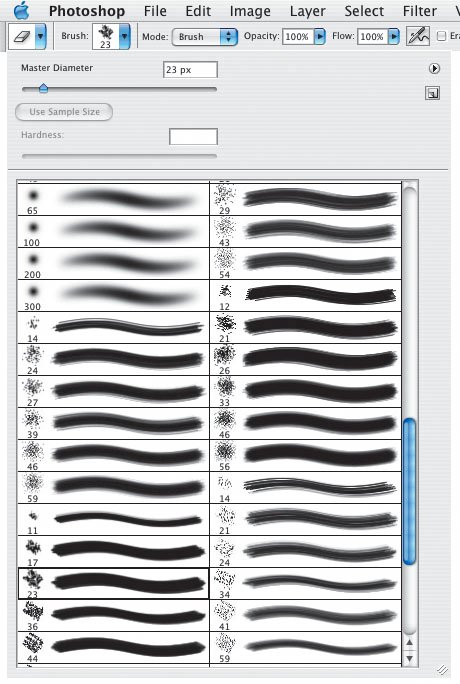
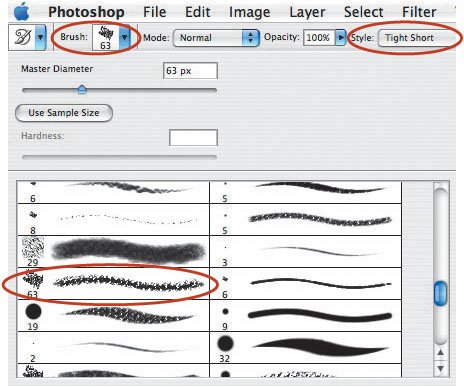
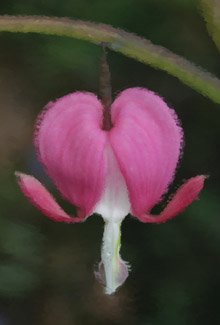
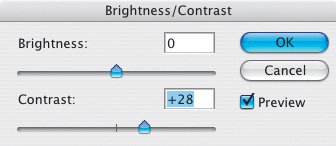
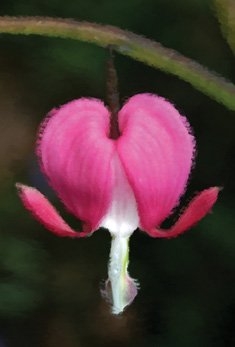
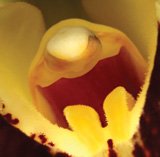
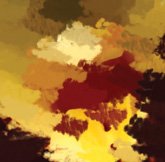
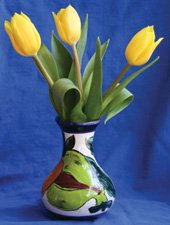
| The Art History Brush gives you the creativity to "hand paint" an image in a unique and original way, because you can choose from dozens of brushes, brush styles, and brush sizes. What's more, the speed at which you paint, fast or slow, affects the painterly result. So, unlike a Photoshop filter, which applies an effect to the entire image, the Art History Brush lets you apply an effect to select areas of a picture. Let's begin with a picture I took of a bleeding heart blossomone of Mother Nature's artistic creations (Figure 4.9). The Art History Brush is nested in the Tool Bar with the History Brush (Figure 4.10). After I selected the Art History Brush, it was time to select a brush. The style you select is very important: You want to select a brush that simulates a brush an artist would use. To begin, I clicked the blue pop-down menu next to the Brush window on the Menu Bar at the top of the monitor (Figure 4.11). Doing so opened the Brushes palette. Then, I used the scroll bar to scroll down until I found a brush I liked. For a choice of truly artistic brushes, click the little fly-out arrow in the Brushes palette; doing so reveals a long menu of creative brushes. In this case, I clicked Dry Media Brushes. Figure 4.9.Tech info: Canon EOS 1Ds Mark II, 50mm Macro lens. Exposure: 1/30 sec. @ f/8. ISO 200. Figure 4.10. Figure 4.11. Note Before I could use the new brushes, I had to load them. When I clicked the new brushes, a window opened, asking whether I wanted to Append (add to) the existing brushes, Replace the current brushes, or Cancel. I recommend clicking Append; that way, your existing brushes (default or other loaded brushes) remain untouched, and the new brushes are added below the existing brushes for easy access. Here's a partial view of my Brushes window, showing the newly added brushes (Figure 4.12). What a choice! Again, you can use the scroll bar to see other brushes. Figure 4.12. More creative options await you. On the Menu Bar, you can choose a style. Play around with the different styles to see which ones fit your artistic needs. Here you see my choices for using the Art History Brush on my bleeding heart blossom image: Dry Media Brush 63 and Tight Short (Figure 4.13). Figure 4.13. After I spent about five minutes painting my picture with the Art History Brush, my image was transformed into a more artistic picture (Figure 4.14). Figure 4.14. But wait! The picture looked a little flat. So, I boosted the contrast just a bit by going to Image > Adjustments > Brightness/Contrast (Figure 4.15). Then, I darkened the picture by going to Image > Adjustments > Curves and pulling down the curve line (Figure 4.16). Figure 4.15. Figure 4.16. After making the additional Contrast and Curves adjustments, I was pleased with my image (Figure 4.17). Figure 4.17. As I mentioned, it helps to start your Art History Brush creation with an artistic image (Figure 4.18). Here's one more example of how you can transform a photograph using this creative tool (Figure 4.19). Figure 4.18.Tech info: Canon EOS 1Ds Mark II, 50mm Macro lens. Exposure: 1/125 sec. @ f/8. ISO 100. Figure 4.19. I hate to leave you with a poor example of using the Art History Brush, but I want to make an important point. When you're applying a brush, select one that's very small. If you select a large brush, your image will be blurred, and it will be difficult to recognize the original subject (Figure 4.20). However, all art is subjective, and there may be someone out there who likes this result. (By the way, if you turn this page upside down and look at the image in a dark room illuminated only by a candle, you'll find the answer to why Paul McCartney isn't wearing shoes on the cover of The Beatles' Abbey Road album.) Figure 4.20. I changed my mind about using a poor illustration for the last image in this lesson. Here's a nice set of images that illustrates the creative power of the Art History Brush (Figures 4.21 and 4.22). Figure 4.21.Tech info: Canon EOS 1D Mark II, Canon 50mm Macro lens. Exposure: 1/60 sec. @ f/16. ISO 100. Figure 4.22.Tech info: Canon EOS 1D Mark II, Canon 50mm Macro lens. Exposure: 1/60 sec. @ f/16. ISO 100. Put on your painter's capand your thinking capand start painting with the Art History Brush. |


EAN: 2147483647
Pages: 72