Listing Data
|
| < Day Day Up > |
|
To create a detailed listing report, select Reports → List Data...
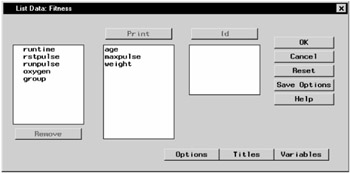
Figure 6.1: List Data Dialog
You can use the List Data dialog to print your data in a listing report. You can specify the variables to be included in the report and some details about the report format.
Select variables from the candidate list and click on the Print button to include the variables in the listing.
Select variables from the candidate list and click on the Id button to designate the variables as Id variables in the listing. These Id variables are used instead of observation numbers to identify the observations in the listing.
List Data Options
Click on the Options button in the List Data dialog to specify options that control aspects of the report format and whether or not to print a sum for numeric columns.
General
The General tab enables you to choose to use column names or column labels as column headings.
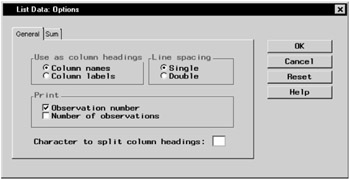
Figure 6.2: General Tab
Spacing between lines of the report can be single or double.
By default, you can print the number of each observation at the left as an identifier. If you have selected an Id variable, you cannot print the observation number.
You can also select to print the total number of observations in the data table at the end of the report.
To precisely control column headings in the report, you can specify a special character for variable labels that determines where the label is split as it forms a column heading. You can alter variable labels by selecting Column Properties...from the Data menu.
Sum
The Sum tab enables you to generate a total for each selected numeric column.
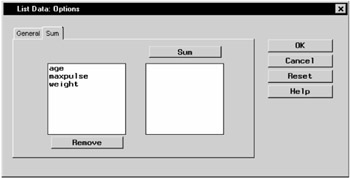
Figure 6.3: Sum Tab
The numeric columns that are selected to be printed are listed in the candidate list. Select a column and click on the Sum button, or double-click on the column name to add it to the list of columns to be totalled.
List Data Titles
Click on the Titles button to display the Titles dialog.

Figure 6.4: Titles Dialog, List Data Tab
In the Global tab, you can specify titles that are displayed on all output. These titles are saved across all Analyst sessions.
In the List Data tab, you can specify titles for the report. Select the box next to Override global titles to exclude the global titles from the report results.
In the Settings tab, you can specify whether or not to include the date, the page numbers, and a filter description.
List Data Variables
Click on the Variables button to display the List Data: Variables dialog.
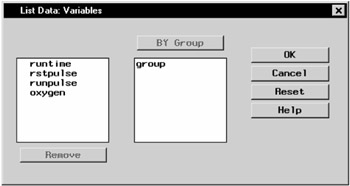
Figure 6.5: List Data— Variables Dialog
BY group variables separate the data set into groups of observations. Separate reports are produced for each group. For example, you could use a BY group variable to produce separate reports for females and males. Specify BY group variables by selecting them in the candidate list and clicking on the BY Group button.
Example: Create a Listing Report
Open the Fitness Data Set
In this example, you use the Fitness data set as the basis of your listing report. To open the Fitness data set, follow these steps:
-
Select Tools → Sample Data...
-
Select Fitness.
-
Click OK to create the sample data set in your Sasuser directory.
-
Select File → Open By SAS Name...
-
Select Sasuser from the list of Libraries.
-
Select Fitness from the list of members.
-
Click OK to bring the Fitness data set into the data table.
Specify Report Columns
To list maximum pulse, resting pulse, and average running pulse for each age, follow these steps:
-
Select Reports → List Data...
-
Select maxpulse, rstpulse, and runpulse and click on the Print button to include these variables in the report.
-
Select age and click on the Id button to make age the Id variable.
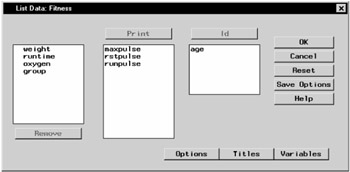
Figure 6.6: Columns in Report
Specify Report Options
To designate options such as column headings, follow these steps:
-
Click on the Options button in the List Data dialog.
-
In the General tab, select Column labels under Use as column headings.
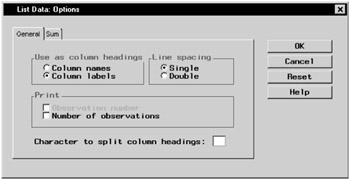
Figure 6.7: Use Column Labels as Column Headings -
Click OK to save your changes.
Specify Report Titles
To specify the titles to be displayed in your report, follow these steps:
-
In the List Data dialog, click on the Titles button to specify your report titles.
-
In the List Data tab, type Heart Rates According to Age in the first field.
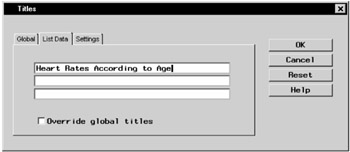
Figure 6.8: List Data Title -
If you have not already done so, type Fitness Report in the first field in the Global tab.
-
Click on the Settings tab. Deselect Include date and Include page numbers so that the current date and page number are not printed on your report.
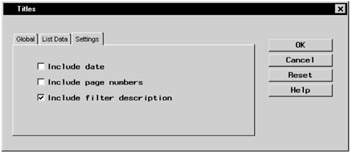
Figure 6.9: Exclude Date and Page Number -
Click OK to save your title changes.
Generate a Data Listing
To generate a data listing of the columns that you have chosen, click OK in the List Data dialog.
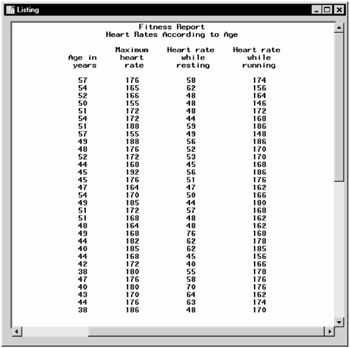
Figure 6.10: Data Listing
|
| < Day Day Up > |
|
EAN: 2147483647
Pages: 116