Adjusting Frameset Attributes
| Framesets, like frames, also have properties you can customize. Properties such as borders, border widths, border colors, row heights, and column widths can all be customized from the frameset-based Properties Inspector. Here's a complete list of the frameset properties in the frameset-based Properties Inspector:
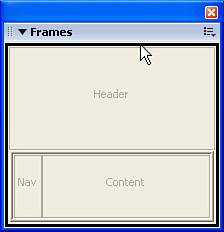
To access the frameset-based Properties Inspector, select the frameset from either the Frames panel or the Tag Selector. To select the frameset from the Frames panel, simply click the outer border of the frame in the panel. For instance, I'll select the Fixed Top frameset by clicking the outer border of the frame, shown by the cursor placement in Figure 8.10. Figure 8.10. Select the frameset by clicking the outer frame border in the Frames panel.
If you do it right, the Properties Inspector becomes a frameset-based Properties Inspector. Alternatively, you can select the frameset by selecting a frame in the Frames panel; the Tag Selector shows the hierarchy of tags including the <frameset> tag. Simply choose the <frameset> tag from the Tag Selector, as shown in Figure 8.11, to select the frameset and have the Properties Inspector change to a frameset-based Properties Inspector. Figure 8.11. Select the <frameset> tag from the Tag Selector to select the frameset.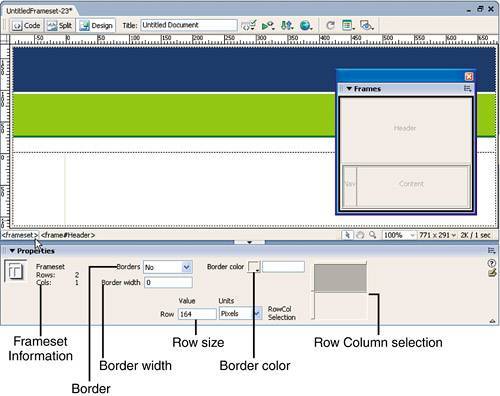 Either method you choose enables the frameset-based Properties Inspector for the particular frameset. Remember that the Fixed Top, Nested Left frameset is really a frameset within a frameset (it's really four frames split into two framesets). What this means is that you'll have to access and modify two framesets instead of one. After you've selected the frameset, the properties exposed by the frameset-based Properties Inspector are visible. These properties are also highlighted by the callouts in Figure 8.12. Each of these properties is discussed in the following sections. Figure 8.12. Add the header.gif image to the Header frame.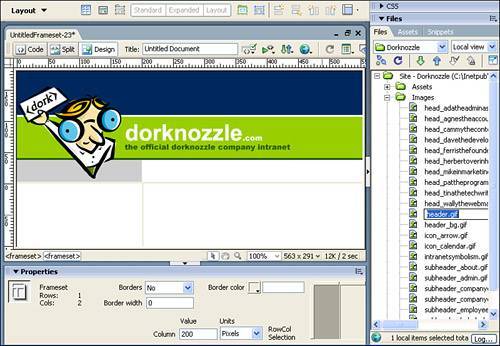 Borders, Border Width, and Border ColorAs was the case with frames, framesets also support the modification of border, border width, and border color properties. Represented by the Borders menu, the Border Width text box, and the Border color picker, you can set these properties to control how the frameset treats borders. Because the frameset is technically considered the parent of the frames it contains, properties set here propagate down to the frames contained within the frameset. For instance, if you choose Yes for Borders, a border width of 5, and a color of green, those changes are automatically set for the frames within the frameset. As long as you set the Borders property to Default in the frameset-based Properties Inspector, changes in the frames-based Properties Inspector relating to borders can be left alone. For our project, we'll leave the values for the frameset as they are, that is, the value No for Borders, 0 for Border width, and no color option in the Border color picker. Row Height and Column WidthDepending on the frameset you're working with in the Frames panel, the frameset-based Properties Inspector tailors itself to support changing the row height or the column width. For instance, selecting the outer edge of the frameset in the Frames panel exposes the Row Height property in the Properties Inspector; selecting the inner frameset exposes the Column Width property in the Properties Inspector. NOTE Our frameset (which appears to be one page split into three frames) is actually one frameset (two frames) nested within a second frameset. The nested frameset contains two columns while the outer frameset is split into two rows. For this reason, selecting the outer frameset exposes the Row Height property in the Properties Inspector while selecting the inner frameset exposes the Column Width property in the Properties Inspector. You can use these properties to accurately change the sizes of the columns or rows that ultimately govern the size of the frames in the frameset. When making size modifications to frames, it's important to understand how they are sized. Generally, frames either have an absolute pixel size or a relative size. For example, if you had a frameset that consisted of a top and bottom frame, you could set the top frame to a specified pixel size. The bottom frame size would be relative to the size of the browser window or, to be more specific, 1. To see this in action, we need only point to our frameset: You can see that switching between the top and bottom frames in the shaded frameset icon (Row Column selection) in the Properties Inspector gives you the two different sizes for the two frames in the outer frameset. The top frame is set to a pixel value, and the bottom frame is set to a relative value of 1. The same holds true for the nested frameset: In this case, the left frame has a pixel value and the right frame has a relative value of 1. This arrangement allows the user to expand and contract the browser window without collapsing the sizes of the frames in their corresponding framesets. Now that you understand this concept, let's resize our frames. The easiest way to change the size of a frame is to mouse over the border until your cursor changes to a two-way arrow, and then click and drag. The only problem with resizing frames like this is that both rows and columns are automatically converted into absolute sizes. To avoid setting frames to absolute sizes by accident, you can resize them by using the Row Height or Column Width text boxes in the Properties Inspector. To set the sizes for our project, follow these steps:
Now that you understand how the attributes can be set for frames and framesets in the Properties Inspector, let's move onto adding content to the frames. |
EAN: 2147483647
Pages: 237