| One of the basic premises behind working with the web is that we can create pages that link between each other. This concept, known as hyperlinking, is the foundation behind the HyperText Markup Language (HTML). By simply adding some text to the page and then associating a link with that text, we can allow our users to interact with multiple pages within a website as opposed to being confined to a single page. Of course, like other web features, Dreamweaver has excellent support for creating and working with the following types of links: Text links Image links Imagemaps Named anchors Navigation bars
Before we jump directly into linking however, it's important to discuss the concept of paths and targets. Creating a hyperlink is merely the process of assigning a path to the hyperlink reference (href) of text, images, hotspots within imagemaps, or anchors. When you assign a path to one of these elements, you are making a link available from your linked element to the endpoint via the path. When it comes to paths, developers have three to work with: Document Relative: Possibly the easiest type of path to work with, document relative paths require little more than the path from the current file to the target file. For instance, if I were working with a file located in the folder Dorknozzle\Departments\Marketing\Press Releases\ and I needed to link to a file called marketing.htm within the Marketing folder, I would simply use ../../marketing.htm as my path. The ../ essentially forces the browser to back out of the current folder. The same holds true if I were working with a file within the same Press Releases folder and I needed to reference an image within the Images folder located within the Press Releases folder. In that case, my path would resemble Images/file.gif. Simple enough right? The downside to working with document relative paths is that you can only back out of two folders before this method becomes impractical. If you work with a lengthy folder structure, the site root relative path might be your answer. Site Root Relative: Site root relative paths are possibly one of the more confusing types of paths to work with and arguably the least flexible in terms of manageability within Dreamweaver. The upside to site root relative paths is that they have no limit to folder depth. For instance, the example in the Document Relative path description references the path Dorknozzle\Departments\Marketing\Press Releases. If I were working with a file within the Press Releases folder and needed to link to the file index.htm within the Dorknozzle folder root, I could use a site root relative path to simply reference the path /index.htm. The / instructs the browser to find the site root and then retrieve index.htm. NOTE By default, Dreamweaver works with document relative paths. If you want to work with site root relative paths, you'll have to configure it when you define a site. Paths are covered in more detail in the next chapter.
Absolute: You can use absolute paths when referencing files located in paths that don't change. For instance, the domain name http://www.modulemedia.com or http://www.dorknozzle.info will never change…they are said to be absolute. Because this is the case, I could assign these domain names as my absolute paths. Furthermore, I could also refer to a specifc folder within that domain. For instance, if I wanted to reference an image in the Images folder of the www.modulemedia.com site, I could reference its absolute path as http://www.modulemedia.com/Images/image.gif.
After you've assigned a path to an element in your web page to create a link, you may also want to declare a target. A target exists as a way of instructing the browser how to open the path. For instance, the following four targets can be assigned when working with hyperlinks: _self: Opens the path within the same browser window as the original page. This target is the default. _blank: Forces the browser to open the path in a new browser window instance. This keeps the original page in the background. _parent: When working with frames, choose this option to load the linked document in the parent frame or parent window of the frame that contains the link. If the frame containing the link is not nested, then the linked document loads in the full browser window. _top: When working with framesets, choose this option when you want to load a linked document in a full browser window, thereby removing all frames.
NOTE It's important to note that the Target drop-down menu is located in the Properties Inspector, always near the Link text box for text and images.
Linking Text Arguably the easiest form of hyperlinking, creating text links, can be performed in one of three ways. First, we can simply type the text onto the page, highlight it, and then enter a path into the Link text box within the Property Inspector. Second, we can place our cursor where we want the link to appear on the page and select Hyperlink from the Insert menu. This method generates the text and link at the same time. And third, we can highlight existing text on the page, right-click to access the context menu, and choose the Make Link option. Either of the three methods performs the same task. Although we will not walk through each method, it's important to note that each functions similar in nature. After you've got one method down, the other two are just as simple. For now, we'll focus on creating text links by typing text onto the page and generating a link within the Properties Inspector. To do this, follow these steps: 1. | Place your cursor below the main Dorknozzle image but above the date and time stamp. Enter the text Visit our Parent Company.
| 2. | Highlight the text you just entered.
| 3. | Type the absolute path http://www.modulemedia.com in the Link text box in the Properties Inspector and press Enter. The link is now created for the highlighted text.
| 3. | With the link now created, preview your page in the browser by selecting Preview In Browser from the Document bar or choose F12.
| 4. | Clicking the link replaces the Dorknozzle site in the browser window with the Module Media site.
|
Of course, you can also change the target of the link to _blank thus forcing the Module Media website to open within its own browser window instead of replacing the Dorknozzle site. Another method for inserting hyperlinks is to choose the Hyperlink option from the Insert menu. Choosing this option launches the Hyperlink dialog similar to Figure 3.42. Figure 3.42. The Hyperlink dialog allows you to create a hyperlink on the page. 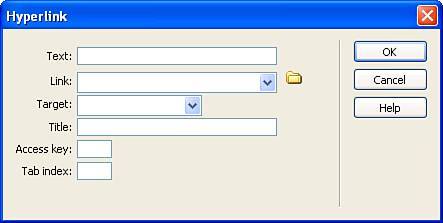
The Hyperlink dialog supports the following properties: Text: Enter the text that should be linked here. Link: Enter the path of the link here. Target: Choose a target (_blank, _parent, _self, or _top) from this menu. Title: While setting the Alt attribute displays a yellow tooltip in Internet Explorer when the user's mouse rolls over the hyperlink, the Title attribute displays the yellow tooltip in all browsers. Access key: Use this attribute to set a shortcut key for the hyperlink. For instance, entering the letter M here allows me to press Alt+M to highlight and ultimately trigger the hyperlink within the browser. Tab index: Set this text box to a numeric value when the current hyperlink appears in a long list of hyperlinks. Doing this will set the numeric order when a user tabs through links.
As you can see, this technique provides a more complete method for creating a text-based hyperlink. Email Links Aside from linking directly to external websites or to files located in the same folder, you can also use the Link text box in the Properties Inspector to provide a link for users to send email. For instance, the footer of our page has a sentence that reads Questions or Comments?. We could turn this sentence into a link that, when clicked, opens the user's favorite email program complete with an email address, subject, and so on. To do this, follow these instructions: 1. | Highlight the text as if you were creating a hyperlink.
| 2. | Enter the text mailto: followed by the email address that you want to appear in the To field of the email program in the Link text box in the Properties Inspector. For instance, I'll type mailto:zak@modulemedia.com.
| 3. | If you want a subject to appear when the email program is launched, enter the email address, followed by a ?Subject=, and then the subject text you want to appear. For instance, I'll type mailto:zak@modulemedia.com?Subject=Question about the site.
TIP Although we've used ?Subject= as the example here, you can also prefill the CC or BCC field in the new email message. To do this, simply append the mailto: link with the appropriate field name. For instance, if we wanted to add CC information, the formatted link would resemble mailto:zak@modulemedia.com?Subject=Question%20about%20the %20site&CC=ideas@modulemedia.com. | 4. | To test the results in the browser, select Preview In Browser from the Document Bar or press F12. When the browser appears, select the text to launch the email program complete with the To and Subject fields pre-populated, similar to Figure 3.43.
Figure 3.43. Use the mailto: option in the Link text box to create an email link on your web page. 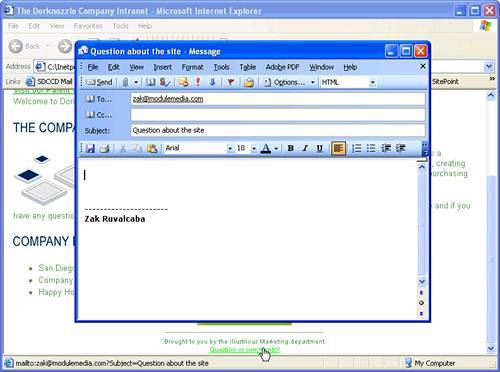
|
To accomplish the same task, you could also use the Insert, Email Link command. The Email Link dialog allows you to enter the text to appear on the page and the email address to be associated with the text. Linking Images Aside from linking text, you can also create links from images. Selecting an image reveals the image-based Properties Inspector which, like the text-based Properties Inspector features a Link text box and a Target menu. To demonstrate how to create a link from an image, follow these instructions: 1. | Select the rollover image that you inserted earlier, with the link that allows the user to view the public website. The Properties Inspector changes to an image-based Properties Inspector.
| 2. | Type http://www.dorknozzle.info in the Link text box and press Enter. You may also want to set a target.
| 3. | Select Preview In Browser from the Document bar to test the results in a browser window.
|
Imagemaps The third method of linking is to define an imagemap. An imagemap can be defined as a series of clickable hotspots within an image that, when clicked, navigate the user to the specified page. For our imagemap, we'll use a different header image called header_withnav.gif. Because this is the case, we'll need to replace the current header.gif image with our new image. To replace the image, we'll exploit the point-to-file method for replacing an existing image. With the Site Files panel open on the right side of the screen and the header image selected, drag the point-to-file icon located just to the right of the Src text box in the Properties Inspector and drop it onto the header_withnav.gif image in the File panel as shown in Figure 3.44. Figure 3.44. Use the point-to-file icon to select from the File panel a replacement image to use. 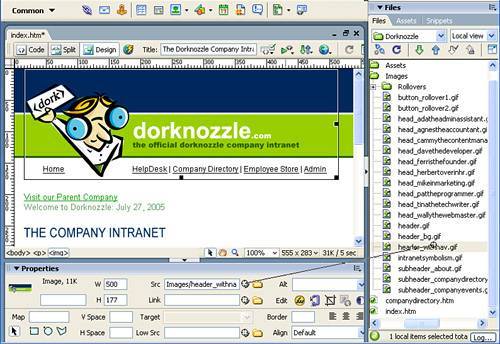
As you can see, the new image contains links created in the image editor to simulate text links. We'll want to define areas in the image so that the linking experience is as seamless as possible. You can define an imagemap in the new image by following these steps: 1. | Select the image so that the Properties Inspector becomes an image-based Properties Inspector.
| 2. | The bottom-left corner of the Properties Inspector defines options for working with imagemaps and hotspots including the Map Name text box, the Pointer Hotspot tool, the Rectangular Hotspot tool, the Oval Hotspot tool, and the Polygon Hotspot tool. Select the Rectangular Hotspot tool.
| 3. | The pointer now becomes a cross hair which allows you to draw a square hotspot around an image. Draw a square hotspot around the Home link within the new header image similar to Figure 3.45.
Figure 3.45. Draw a rectangular hotspot around the Home link in the header image. 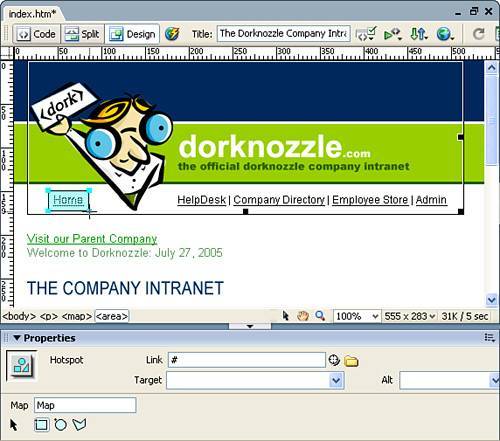
| 4. | As you've probably noticed, the Properties Inspector now becomes a hotspot-based Properties Inspector, which allows you to define the map name, choose a link, a target, and add some Alternate text. For our example, use the point-to-file icon to point to the index.htm file in the Files panel.
|
If you feel you need practice creating hotspots, try and create new hotspot to fictitious links for the other links in the header image. When you've finished, preview the result in the browser by selecting the Preview In Browser option from the Document bar or by pressing F12. When the page opens in the browser, try rolling over the Home link. Only the area around the Home link should be clickable. Named Anchors The final type of linking element you can add to your web pages are anchors. Adding named anchors on a page allows you to create hyperlinks that link to specific areas within a page. Although you can also use named anchors to link a user to a specific spot on another page, named anchors are generally reserved for pages that contain an excessive amount of content. In this situation, a small subnavigation menu can be created that links the user to specific spots (the anchors) on the page. Subsequently, you can add a "Back To Top" link at the point on the page where the user was linked to; when the "Back to Top" link is clicked, the user returns back to the top of the page. To work with named anchors, follow these steps: 1. | Open the file companydirectory.htm.
| 2. | The company directory page contains ten management bios for employees at our fictitious company. Near the top of the page is a menu bar that contains a horizontal list of all the employees listed on the page. Named anchors are the perfect choice in this case for linking each name in the menu bar to its respective employee within the list.
To create the named anchor, place your cursor next to the first name in the list (Ada) and select Named Anchor from the Insert menu. The Named Anchor dialog appears, similar to Figure 3.46.
Figure 3.46. The Named Anchor dialog allows you to create a named anchor within the page. 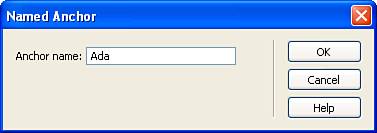
| 3. | In the dialog, enter the name of the first employee, Ada, and click OK.
| 4. | The yellow named anchor icon appears next to Ada's name. Because this named anchor icon is considered an invisible element, you might not be able to see it. To enable it, make sure that the Invisible Elements option is checked in the Visual Aids submenu in the Document bar.
| 5. | Create a hyperlink to the named anchor for Ada's name in the horizontal menu. Begin by highlighting Ada's name in the menu bar.
| 6. | Place your cursor in the Link text box in the Properties Inspector and type #Ada. The # symbol represents an anchor name while Ada represents the name itself. When finished, the design should resemble Figure 3.47.
Figure 3.47. Create a hyperlink from the horizontal menu to the new named anchor. 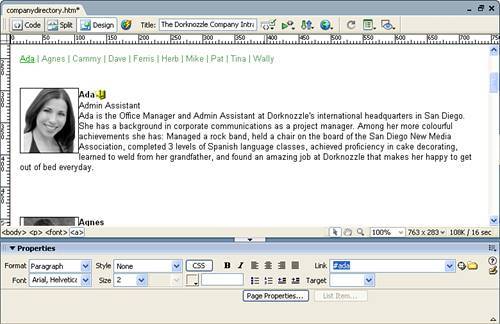
|
Preview your work in the browser by selecting the Preview In Browser option from the Document bar or by pressing F12. When the page opens in the browser, select Ada's name from the horizontal menu. The browser should advance the page down to Ada's name. Our next step is to add the "Back to Top" functionality. You can add this feature by following these steps: 1. | On the company directory page, add the text (Back to Top) next to Ada's name above her bio.
| 2. | Highlight the (Back To Top) text and enter the # symbol in the Link text box in the Properties Inspector. The result should resemble Figure 3.48.
Figure 3.48. Add a Back To Top link to your page. 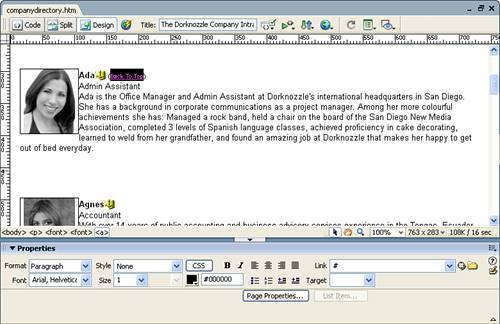
TIP Adding the # symbol to the Link text box is by far the simplest way of creating a Back to Top link but is not considered a best practice. A more efficient way of achieving this result is to create another named anchor at the top of the page (possibly called top) and point the Back to Top link to that anchor. | 3. | Preview your page in the browser by selecting the Preview In Browser option from the Document bar. This time, when the page links down to Ada's name, try choosing the Back To Top link. The page should move back to the top of the page. For practice, repeat the process for the rest of the links in the horizontal menu bar.
|
It's important to note that you can also use the point-to-file icon next to the Link text box to point to a named anchor. Creating a Navigation Bar You've already seen how to create a rollover image using the Rollover Image dialog located in the Image Objects subcategory of the Insert menu. Aside from simply creating an image that, when rolled over, changes to a new version of the image, the Image Object subcategory also lists the Navigation Bar option. This feature, like the Rollover Image option, allows you to create a series of rollover images that mocks the look and functionality of a typical website navigation bar. To use the Navigation Bar option from the Image Objects subcategory, assume for a moment that the header image of our website didn't have the imagemap but instead we were relying on the functionality in the Navigation Bar option to build our navigation menu. To build the navigation bar, follow these steps: 1. | Create a new blank HTML page by choosing the New option from the File menu. Choose the HTML option from the Basic Page category and click Create.
| 2. | Choose Insert, Image Objects, Navigation Bar. The Insert Navigation Bar dialog appears. The Insert Navigation dialog exposes the following functionality:
- Nav bar elements: Lists the navigation bar elements. Select the + icon to create a new navigation bar element, the icon to remove one, and the up and down icons to position navigation elements within the list.
- Element name: Uniquely name the navigation bar element. This option is required.
- Up image: Enter or browse for the image to use for the up state.
- Over image: Enter or browse for the image to use for the rollover state.
- Down image: Enter or browse for the image to use for the down state. This image appears when the user actually clicks the navigation bar element.
- Over while down image: Enter or browse for the image to use when the user rolls over the image when it is in its down state.
- Alternate text: Enter the Alternate (Alt) text here.
- When clicked, Go to URL: Enter the path that the image link will go to once clicked.
- In menu: Choose the target to be associated with the link. Normal targets do not appear here. However, frame names do appear here as targets when applicable.
- Options: Choose the Preload Images option to force the browser to preload all images before the page loads. Optionally, you can force the browser to display a specific image's down state when the page loads. This great usabality feature alerts the user as to which page they're currently on.
- Insert: Choose an option from this menu to display the navigation bar horizontally or vertically.
- Use tables: Enable this check box to position the navigation bar using tables. Using tables provides more flexible positioning and spacing options. Because we haven't covered tables yet, disable this option.
| 3. | Enter a name for the first rollover image in the Element Name text box. For the first image, you may want to enter the text Home.
| 4. | Located inside the Navigation Menu folder in the Images folder, you'll find a series of images labeled with the name of the image followed by up, over, and down. Browse to those files using the appropriate text box's Browse button. For our example, you should use home_up.gif, home_over.gif, and home_down.gif. Leave the Over While Down Image text box blank.
| 5. | Enter the alternate text Home in the Alternate text box.
| 6. | Enter or browse to index.htm in the When Clicked, Go to URL text box.
| 7. | Disable the Use Tables check box.
|
When you've finished, the dialog should resemble Figure 3.49. Figure 3.49. Enter the appropriate values to create a fully functioning navigation bar. 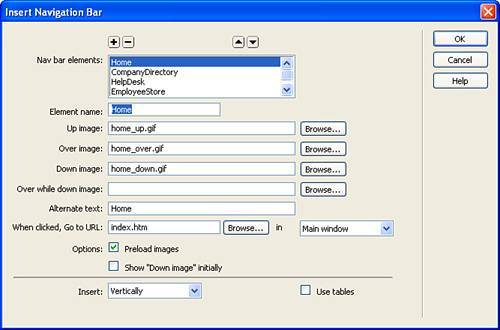
Unlike the Rollover Image dialog (which allows you to create only one rollover image), the Navigation Bar dialog allows you to create multiple rollover images by simply clicking the + icon. When you finish entering the properties for the Home image, click the + icon to set the Home navigation bar element and to clear the values of the text boxes so that you can enter new values for a second navigation bar element. Repeat this process until you've added all the navigation elements. When you finish, preview the result in the browser by choosing the Preview In Browser option from the Document bar or by pressing F12. In the browser, the navigation bar should resemble Figure 3.50. Figure 3.50. The navigation bar within the browser. 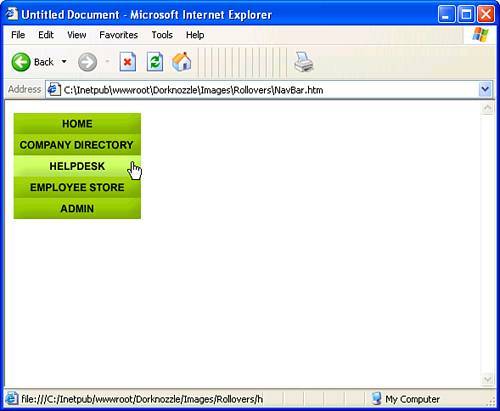
|