Working with a Web Page in Code View
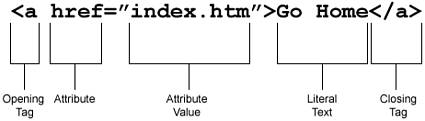
| So far you've learned how to build web pages in Design view. The Design view, supported by the design window, Properties Inspector, Insert bar, and supporting panels make Dreamweaver an attractive editor for visual developers hoping to create quick web pages without having to know markup or the sometimes confusing coding languages such as CSS and JavaScript. Although working in Design view may certainly be a positive for most developers, it's important to highlight some of the supported coding features that truly make Dreamweaver one of a kind. The last part of this chapter hopes to unleash the unique coding aspects that some people come to expect from the industry-leading web-page-development environment. Code HintsWe've looked at some of the visual preferences (such as line numbers, word wrap, and syntax coloring) in Code view, we've yet to outline and detail some of the powerful features that can aid you in development regardless of view. Arguably one of the most useful features in Code view is that of code hints. Those who made a living developing with HomeSite in the late 1990s certainly remember this feature because it was integral part of the HomeSite development environment and a huge reason HomeSite's popularity was unmatched. Thanks to the Macromedia/Allaire merger, Dreamweaver gained from the popularity that code hints had in HomeSite. Using code hints in the Code view environment is easy; understanding how it works is to understand the underlying structure behind HTML/XHTML. HTML/XHTML is an authoring language, not a programming language. The developer is entirely responsible for creating the structure that she wants her users to see using a markup language like HTML/XHTML. Organized using a well-formed structure of tags in conjunction with attributes, the browser parses the tags and presents to the user the structure that the developer intended. For future reference, Figure 3.51 outlines the structure of a typical HTML/XHTML tag. Figure 3.51. HTML tags contain attributes, attribute values, and generally wrap literal text or in some cases, other HTML elements such as images.
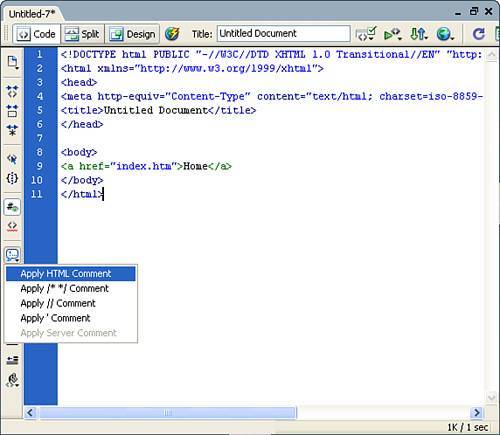
The more intricate the structure and inclusion of tags and attributes, the more detailed the design can look within the browser. As an HTML/XHTML developer, you'll quickly realize that there are hundreds of HTML/XHTML tags, with each tag having dozens of attribute combinations. As a developer, it's extremely difficult to remember them all. Fortunately, Dreamweaver's code hints automate what we may want to add. Accessing code hints is as simple as switching to Code view in a new HTML page, placing your cursor in the <body> tag, and typing. For instance, if I type the < symbol (this symbol represents the beginning of an HTML tag), the code hints menu appears complete with every supported HTML tag (see Figure 3.52). Figure 3.52. The code hints menu appears complete with all possible HTML tags.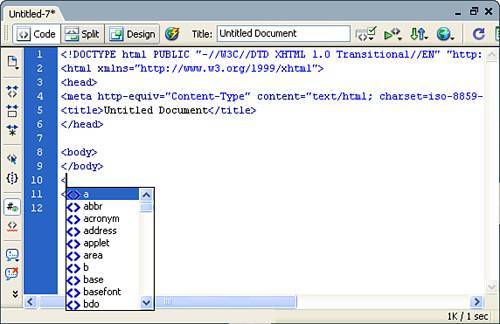 I can use the keyboard up and down arrow keys to cycle through the tags in the code hints menu. When I've found the tag I want to use, I press Enter to add it to the code. Pressing the spacebar opens the code hints menu again, but this time only the attributes for the selected tag appear (see Figure 3.53). (You could also just continue typing, and Dreamweaver auto searches and updates the code hints menu with the most appropriate tag based the letters you have entered.) When your tag is highlighted, press Enter. Figure 3.53. All attributes for a selected tag appear in the code hints menu.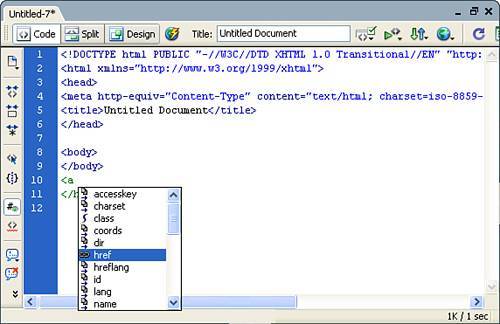 Again, pressing Enter adds the selected attribute. Depending on the attribute you add, the code hints becomes more detailed. In my case, I choose the href attribute (creates the reference for the hyperlink) of the <a> (tag used for creating links) tag. The Browse code hint then appeared, allowing me to choose a file. After I add my file, I can use the right-arrow key to move to the next attribute and press the spacebar to repeat the process. When I finish formatting the tag, I need only add the > symbol to close out the opening tag. Finally, I'll add the < symbol to begin the closing tag followed by the / symbol, in which case the closing tag is added automatically for me by Dreamweaver. As I mentioned earlier, the more intricate the structure of your HTML/XHTML, the better your designs will look…the possibilities are limited only by your needs. The Code View ToolbarFor developers used to working with code in HomeSite, the Code View toolbar docked to the left side of the coding environment and shown in Figure 3.54 should look relatively familiar. Figure 3.54. The Code View toolbar provides quick access to commonly used commands for the Code view user.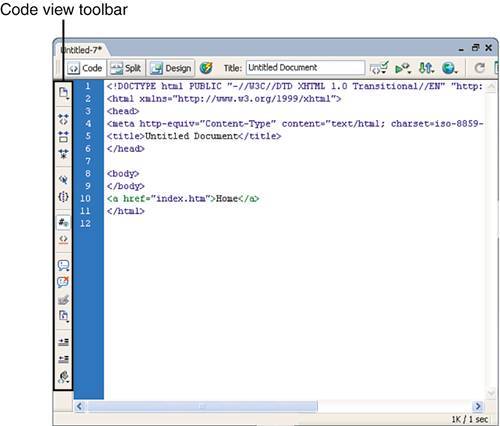 The Code View toolbar provides quick access to commonly used commands for the Code view user, specifically:
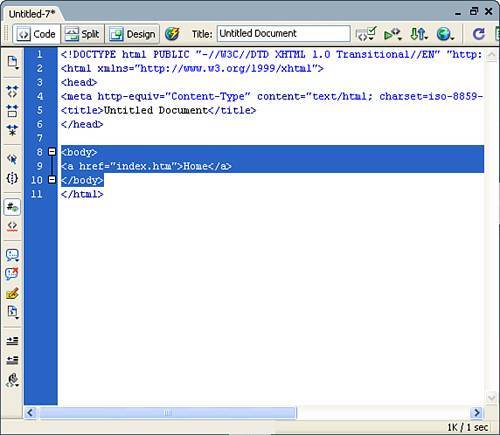
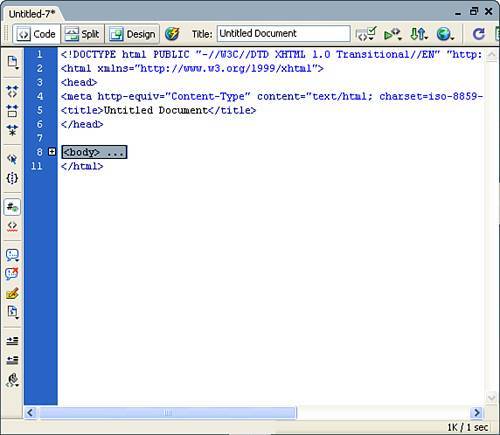
Of course, you can also show and hide the Code View toolbar by right-clicking the toolbar and checking/unchecking the Coding option from the context menu. Code CollapseCode collapsing provides the developer with the ability to highlight a segment of code and collapse it so that it's temporarily hidden from view. The obvious benefit to this is increased screen real-estate. To use the code collapse feature, follow these steps:
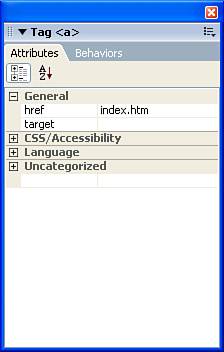
The Tag InspectorAfter you've created the tag structure, you can use the Tag Inspector to format all attributes of a tag through a visual panel. Part of the Tag panel group and available by choosing Tag Inspector from the Window menu, the Tag Inspector visually categorizes and lists all attributes supported by a tag. As you can see in Figure 3.58, the Tag Inspector displays all attributes and attribute values for the selected tag. Figure 3.58. The Tag Inspector visually displays attributes and attribute values for a selected tag.
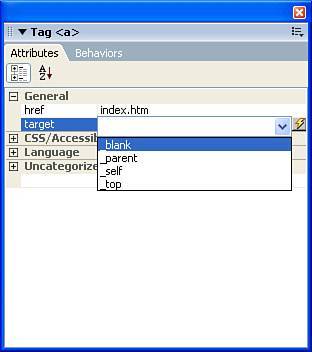
Depending on the attribute value you select, the Tag Inspector either allows you to manually type a value or allows you to select from a list of values through a menu similar to Figure 3.59. Figure 3.59. Enter attribute values or select from a list of attribute values in some cases.
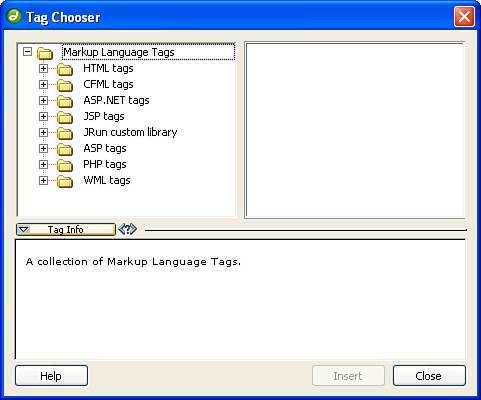
Although the Tag Inspector works in both Code and Design views, its inclusion and subsequent benefits are immediately obvious. Using the Tag ChooserThe next major addition to the development interface is the Tag Chooser. The Tag Chooser, available by selecting the Tag option from the Insert menu, is a collection of HTML, CFML, ASP.NET, JSP, JRun, ASP, PHP, WML, and XSLT tags. To use this intuitive window, place your cursor in the <body> tag and choose Tag from the Insert menu. The Tag Chooser dialog appears similar to Figure 3.60. Figure 3.60. The Tag Chooser contains a complete collection of HTML, CFML, ASP.NET, JSP, JRun, ASP, PHP, and WML tags.
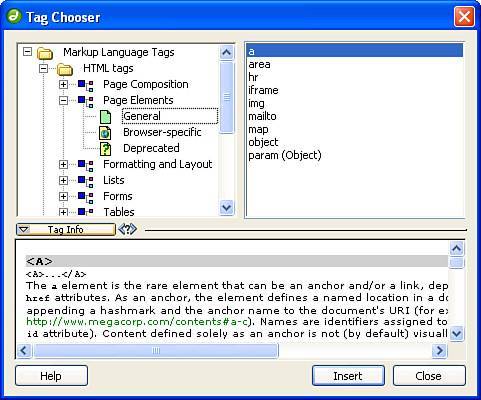
Choose the tag collection you'd like to explore; the tags are further organized within structural categories. For instance, the <a> tag is organized in the General option of the Page Elements category. Choosing the <a> tag from the elements pane also reveals the HTML reference for the <a> tag within the More Info pane similar to Figure 3.61. Figure 3.61. HTML tags are organized in categories. Selecting a tag opens the reference for the tag in the More Info pane.
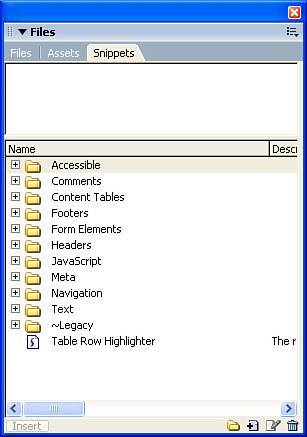
To insert a selected tag, simply choose the tag and click Insert to launch the Tag Editor dialog (see Figure 3.62). Figure 3.62. The Tag Editor dialog allows you to format properties for a specific tag.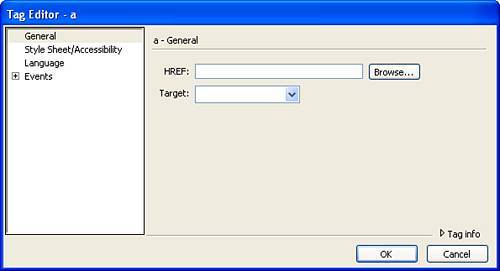 After you've formatted the attributes of the tag, click OK to insert the tag into the coding environment. You can either continue adding tags using the Tag Chooser or click Close to return to the coding environment. Working with SnippetsThe final development aid you can use in the Code view is snippets. Snippets are a clever way to save small blocks of prewritten code so that they are always available to you (and other developers) for use. Available from the Code panel group, the Snippets panel is structured as a series of folders into which snippets are organized. Each folder covers a particular technology or area of functionality. As you can see from Figure 3.63, Dreamweaver includes numerous code snippets you can use. Figure 3.63. Code snippets are organized into folders specific to the respective technology. Dreamweaver includes prebuilt snippets you can use.
Notice that the Snippets panel is organized into two halves. The top half includes a preview of the code snippet selected from the categorized list of snippets in the bottom half. HTML snippets are usually shown in Design view (showing what the HTML looks like in the browser), whereas JavaScript and other code snippets are shown in Code view (so that you can see the actual code). Inserting a snippet is merely a matter of selecting the appropriate snippet and either dragging it into the code environment or clicking the Insert button located in the bottom left of the Snippets panel. Creating your own snippet is just as easy but slightly more involved. To create your own snippet, follow these steps:
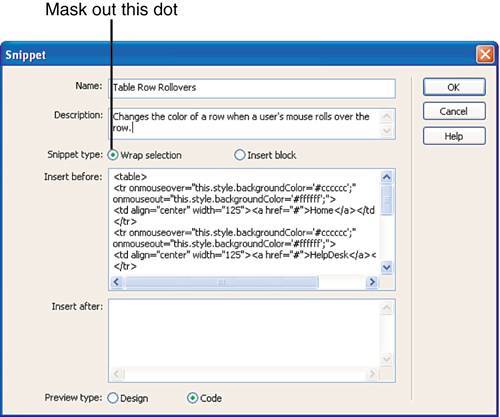
To use the snippet, simply drag the snippet into the code environment and choose Preview In Browser (or press F12) to test the results. Editing, moving, and deleting snippets are also a snap. To edit a snippet, right-click the snippet and choose Edit from the context menu. The Snippet dialog appears, and you can edit the code or change the description. To move snippets into other folders, drag them to the folder you want. To delete a snippet or its respective folder, right-click the snippet (or folder) and press the Delete key. |
EAN: 2147483647
Pages: 237