Introduction to ASP.NET
| In 2001, Microsoft created a buzz in not only the web development world but in the Windows development world when it introduced the .NET initiative (covered with more detail in the next section). The initiative's aim was simple: develop a line of products, platforms, and services that are interoperable for the developer and easy to use and integrate to the ordinary user. Flanked by platforms such as the .NET Framework, products such as Visual Studio .NET, MSN, Office, and more, and web services built directly into MSN such as Passport, .NET has risen as an initiative worthy of its hype. Make no mistake about itASP.NET isn't just a set of upgrades to traditional ASP. Built into the .NET Framework (covered next), ASP.NET represents Microsoft's next generation server-side technology and represents a complete reinvention for its predecessor. ASP.NET supports compiled code written in C++, C#, Visual Basic .NET, and Jscript .NET. Even better, ASP.NET allows separation of code from HTML formatting (called code behind). Because the language can be compiled, it can run faster than interpreted counterparts such as ASP and PHP. .NET and the .NET FrameworkFor the past several years, Microsoft has run a series of commercials that show executives interacting with software that is perceived to make the user feel as if the software is revolutionizing the way they do business. At the end of the commercial, the tag line says: "That's business with .NET." Great! What's .NET? To many, these commercials are vague and lend themselves to many questions: What is .NET? What is business with .NET? When .NET was introduced to the public, there was such an overwhelming bombardment of marketing information that it was difficult to figure out what .NET was and what kind of advantage it could provide for an organization. Fortunately, the dust has settled and a clear definition of what .NET truly is has emerged. .NET is Microsoft's new strategy for delivering software as a service. By reinventing the Application Service Provider (ASP) business model, Microsoft hopes to achieve independence from the long-standing "box ware" paradigm. Here are the key features that make up .NET:
As you can see, .NET is merely a strategy and not a tool or service. It's by no coincidence that Microsoft pulled the ending tag line from those commercials and replaced it with: "Solutions for the agile business." The .NET Framework, which is a standalone, installable Windows application of sorts, is the environment for which .NET applications are built. The .NET Framework is specifically designed for Windows and web applications but supports development across a larger spectrum. The three main parts of the .NET Framework are listed here:
Although the .NET Framework is just a small piece of the pie, it lays the foundation for .NET applications and web services. Remember, that the .NET Framework, although crucial in the .NET strategy, is only a small piece of the .NET platform, and the .NET platform is just one-third of the .NET initiative. Installing the .NET Framework and ASP.NETUnlike ASP, the .NET Framework, which includes ASP.NET, doesn't come pre-installed on most operating systems. In fact, Windows Server 2003 is the only operating system that comes with the latest release of the .NET Framework pre-installed. However, this doesn't mean that installing the .NET Framework will be a pain. On the contrary, in most cases, installing the .NET Framework is as simple as visiting the Microsoft Windows Update website. If you don't have Windows Server 2003 (which most of us probably don't), you'll need to install the .NET Framework and ASP.NET manually. The best method of acquiring the .NET Framework is to download and install it directly from the web, or more specifically, the Microsoft Windows Update website. The reason for this is simple: Windows Update will not only alert you of the fact that you don't have the .NET Framework installed (assuming you don't), it will also allow you to download and install it. It's like a detection and installation utility, all in one. To use Windows Update to install the .NET Framework and ASP.NET, follow these steps:
That's it! You're now ready to begin working with ASP.NET. TIP If you ever want to play around with the various tools included with the .NET Framework SDK, you can download that version from the asp.net website at http://www.asp.net/download-1.1.aspx. The .NET Framework SDK contains debuggers, compilers, MSDE, samples, and more. Be aware however, that file is 108 MB, so be prepared to wait while it downloads. Creating a Simple ASP.NET PageNow that you've had a formal introduction to the .NET Framework and ASP.NET and you've had a chance to install ASP.NET, let's walk through the process of creating a simple ASP.NET page. Not only will this process help familiarize you with the technology, you'll also get a basic understanding of how IIS and the .NET Framework handle the processing of a dynamic ASP.NET page. To create a simple ASP.NET page, follow these steps:
TIP If you plan on trying out numerous server-side technologies, it's beneficial to create the folder with the Dorknozzle name followed by the three-or four-letter server-side technology you plan to use. This convention prevents you from continuously having to redefine the site for every server-side technology. To test your work, open the browser and type the URL http://localhost/DorknozzleASPX/sample.aspx. As you can see from Figure 22.11, the text "The Date and Time is:" along with today's actual date and time appear on the page. Figure 22.11. Basic text and today's date and time appear on the page.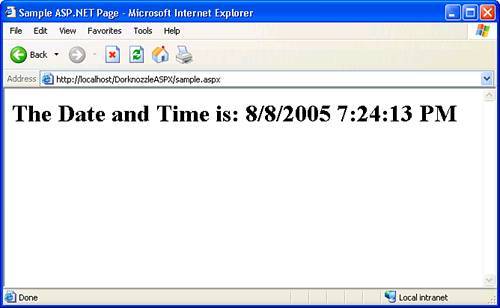 As you did with the ASP example, you've just created your first dynamic ASP.NET web page. I know, I know, it's getting less dramatic as we progress! Again, look at the code and see whether you can pick apart the dynamic portions of the page. In this example, the difference is much more dramatic than was the case with ASP. This is because ASP.NET is control based and event driven. ASP.NET makes use of dozens of controls beginning with the asp prefix, followed by a semicolon, and followed by the tag name. In our example, the Label control is used as a way to display today's date and time: <asp:label runat="server" /> The Label control, as is the case with every other ASP.NET control, has two distinct attributes: the ID and the Runat server attributes. The ID is a way to uniquely identify the control on the page; the runat="server" attribute and value tells the browser and ultimately the web server that the .NET Framework should process this portion of the page. Near the top of the page, I've outlined a code declaration block containing one event handler: Page_Load: <script runat="server"> Sub Page_Load() End Sub </script> It's called an event handler because it handles the page's load event and responds with code accordingly. In our case, we identify the Label control by name and set its built-in Text property to today's date using the built-in Now() function: theTime.Text = Now() The result, as you've seen, is text that is parsed by the browser and today's date which is fed to the browser by the .NET Framework. Unlike ASP, where the process was relatively straightforward, the process is slightly more complex in ASP.NET. In ASP.NET, the page is still fed through IIS. IIS, recognizing that a code with runat="server" attributes exists, intercepts the request and calls for help from the .NET Framework (running as a process called aspnet_wp.exe in the background). To see this process, simply press Ctrl+Alt+Delete, click the Task Manager option, and choose the Processes tab from the Windows Task Manager dialog. As you'll see, the aspnet_wp.exe worker process runs silently in the background. The .NET Framework processes the request and takes the code to mean, "Print out the date and time within the page." The .NET Framework converts the Label control to a <span> tag (legitimate HTML) and responds back to IIS with plain old text and HTML tags. IIS then feeds that response back to the client browser, where we see the result in a clean and legible format. If you don't believe me that the .NET Framework always converts code to HTML, try viewing the source of the page in the browser by choosing View, Source (in IE). As you can see from Figure 22.12, the code declaration block (<script> tag) is removed from the page, the Label control is converted to a <span> tag, and the date and time is rendered as literal text. Figure 22.12. The code declaration block (<script> tag) is removed from the page, the Label control is converted to a <span> tag, and the date and time is rendered as literal text.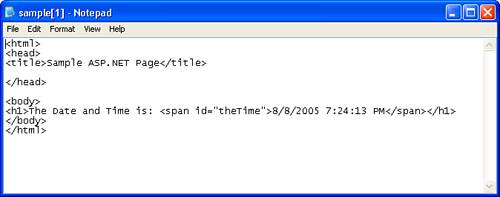 That's ASP.NET in a basic nutshell. In this example, we manually coded the ASP.NET code. Again, the beauty in using Dreamweaver is that you don't have to do your own coding. Dreamweaver writes all the necessary code for you. More on this later; for now, let's focus on getting our project configured so that we can use ASP.NET to create dynamic Dorknozzle pages. Configuring Dorknozzle to Run under ASP.NETUp to this point, we've been working primarily from C:\Dorknozzle\<chapterfolder>. From now on, we'll work from C:\Inetpub\wwwroot\DorknozzleASPX (assuming that you're using ASP.NET). Because this is the case, we need to reconfigure the site definition to point to the new folder we've created. Furthermore, we need to configure the Testing Server category in the Site Definition window to provide Dreamweaver with information specific to the technology you plan on using for the defined site. To configure Dorknozzle to run under ASP.NET, follow these steps:
You're now ready to begin building dynamic Dorknozzle pages using Dreamweaver and ASP.NET! Using ASP.NET in DreamweaverDepending on the server technology you decide to use, features exposed in Dreamweaver's interface will change. For the most part however, you can bank on the fact that the following features are always available when working with any server-side technology, including ASP.NET:
Earlier, I mentioned that most of the dynamic functionality built into Dreamweaver is the same regardless of the server-side technology you decide to use. This becomes obvious with the Application Objects submenu in the Insert menu and the Application category in the Insert bar. The objects listed in these menus expose generic functionality that remains consistent regardless of server-side technology. What changes is the option below the Application Objects option in the Insert menu. This option (which varies from ASP Object, ASP.NET Objects, ColdFusion Objects, and PHP Objects, depending on which server-side technology you decide to use), displays specific content accordingly. |
EAN: 2147483647
Pages: 237