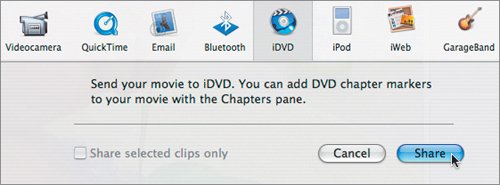
| In this lesson, you'll follow Jennifer as she builds a DVD for her studio, including much of the material you and she have been building throughout this book. Having just added chapters to your movie in the previous exercise, you could start from inside iMovie and send the movie to iDVD by choosing Share > iDVD. You can also launch iDVD directly and pull in content, which is what you'll do in the next exercise. Either way, iDVD lets you drop one or more movies onto a DVD, as well as more than one kind of project (such as a slideshow). iDVD gives you direct access to iTunes, iPhoto, and iMovie through its connection to the Music, Photos, and Movies folders in your Mac's Home folder. By default, music and photos reside in these folders when you use them in iLife, but movie projects often get saved all over a computer. Your iMovie projects should reside in the Movies folder. iDVD is designed to look into an iMovie project file and extract what it needs in order to make the DVD, both the edited video and the chapter information you create. This is a remarkable feature and makes your job of DVD creation much simpler.  If you create QuickTime movies of your completed iMovie projects (using the Share exporting option), save these to the Movies folder as well, particularly if you want to access them from iDVD. The movies you'll be using in this lesson came on the book's DVD and need to be positioned in your Home folder before we can work with them in iDVD. | | 1. | Move the following finished project files from their position in the Lessons folder into the Movies folder in your Home folder:
 Note If you want to access QuickTime movies from locations on your Mac besides the Movies folder, you can expand your options through the iDVD Preferences (under the Movies tab), although this won't work for entire iMovie projects. It's generally best to keep everything in the Movies folder. When you load a DVD into a DVD player, usually the video doesn't begin playing right away. Instead, what you most often see is a menu that introduces you to the content on the disc. It might say what the disc is about, display what different videos it contains, and maybe give you options for accessing specific chapters within a video. The menu provides information and access, but it can also have personality.
Half the fun of iDVD is customizing these menus. While there are some practical considerations about what theme your DVD has, in general the choice is entirely personal, and any will do.
| | | 2. | Open iDVD.
There are a few ways to do this. One is through the Share option in iMovie, which includes an iDVD option. We won't use this method right now, but sometimes it's a great way to initiate the process, particularly when you want to burn a DVD of the movie you just completed in iMovie, but nothing else.
 In many cases, your DVDs are compilations of different videos and photos. Consequently, let's not start from a particular iMovie project but rather from iDVD itself, pulling in content you want to have on the disc. To do this, you'll need to open iDVD from the Dock (or from the Applications folder). In many cases, your DVDs are compilations of different videos and photos. Consequently, let's not start from a particular iMovie project but rather from iDVD itself, pulling in content you want to have on the disc. To do this, you'll need to open iDVD from the Dock (or from the Applications folder).
 This opens the iDVD 6 launch window. This opens the iDVD 6 launch window.
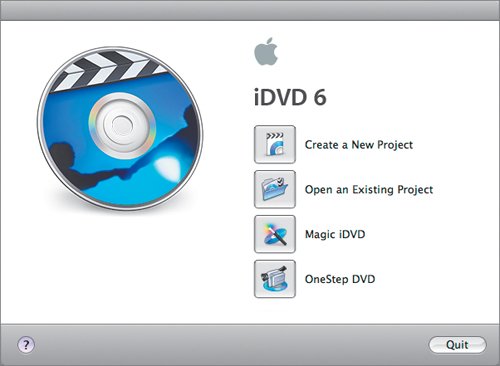 | 3. | Select Create a New Project.
| | | 4. | Name the project (the name will end up being the name of the DVD you're going to make), and make sure it will be saved where you want it.
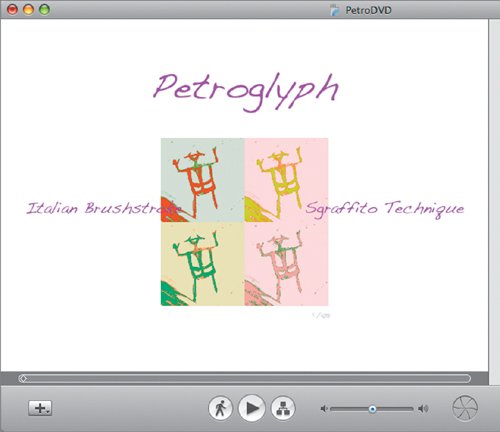
Jennifer is calling her disc PetroDVD.
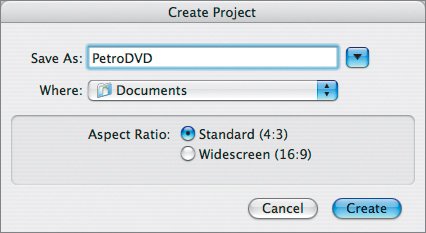 Your Mac defaults to placing projects in the Documents folder, which is fine, but you might change this to the desktop (using the pull-down menu) if that's the way you like to work. Jennifer is going to keep hers in the Documents folder. Choose Standard for your Aspect Ratio.
Note Aspect Ratio has to do with the width and height of your video picture and depends primarily on the camera the video was shot with. Regular consumer video cameras these days are still primarily Standard 4:3. | | | 5. | Click Create.
This launches iDVD. When it's open, you'll see one of the DVD templates onscreen in the iDVD workspace. The odds are good this theme isn't the one you're looking for. You have many to choose from.
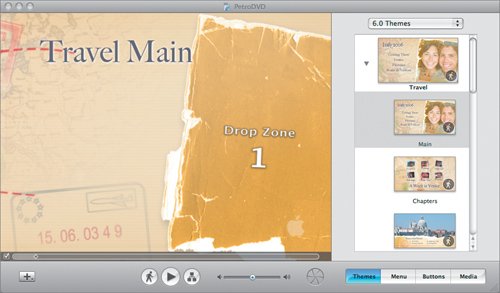 At the bottom right of the window is a series of buttons that will help you build and customize your DVD. It has the look and feel of iMovie, though the buttons are a bit different. At the bottom right of the window is a series of buttons that will help you build and customize your DVD. It has the look and feel of iMovie, though the buttons are a bit different.
 iDVD opens with Themes selected. There are lots of themes to choose from, including themes from previous versions of iDVD. The drop-down menu at the top of the Themes pane lets you explore them.
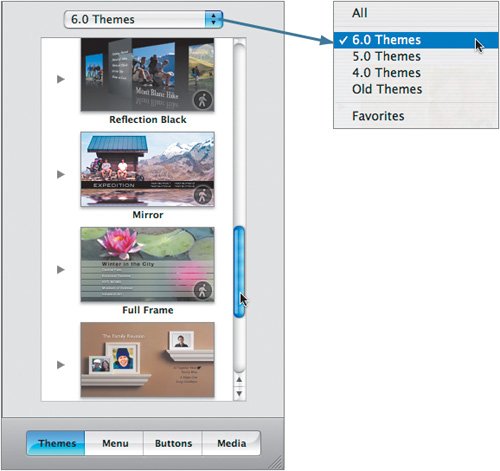 Select a theme in the pane and see it appear, and in many cases perform, in the main window on the right. All the 6.0 themes and some of the 5.0 themes have an arrow to their left. Click the arrow and see subpages with the same design theme. Select a theme in the pane and see it appear, and in many cases perform, in the main window on the right. All the 6.0 themes and some of the 5.0 themes have an arrow to their left. Click the arrow and see subpages with the same design theme.
Note The 6.0 themes are designed to be widescreen. If your project is standard, and you select one of those themes, iDVD asks if you would like to change your project to widescreen. No, thank you. Click Keep. 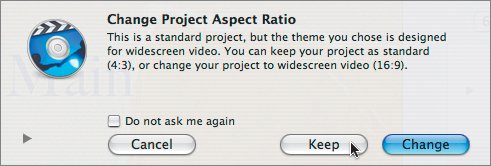 | 6. | Scroll through the options available, looking for one that feels appropriate for Jennifer's ceramics studio.
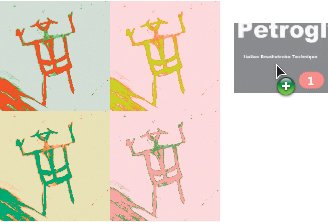
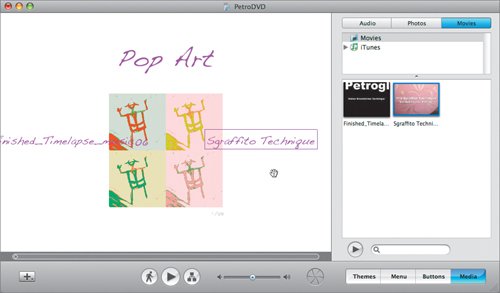
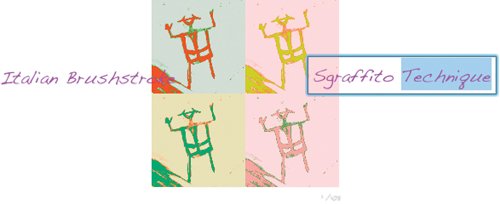
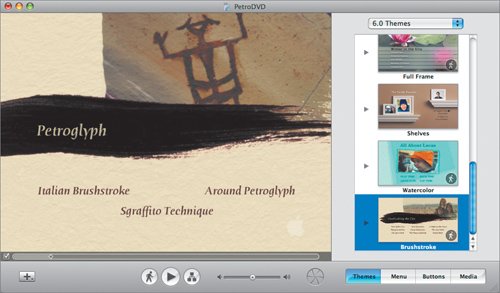
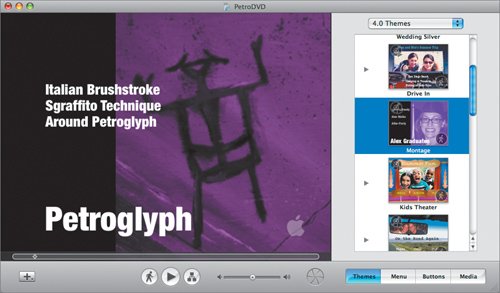
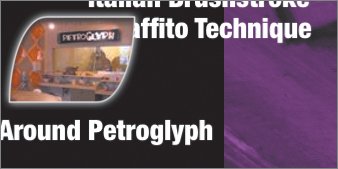
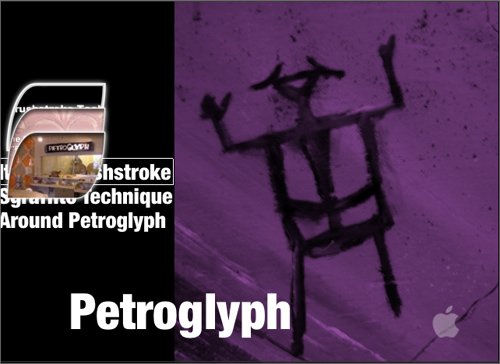
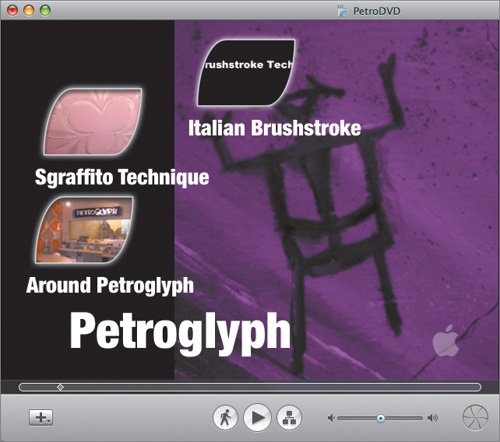
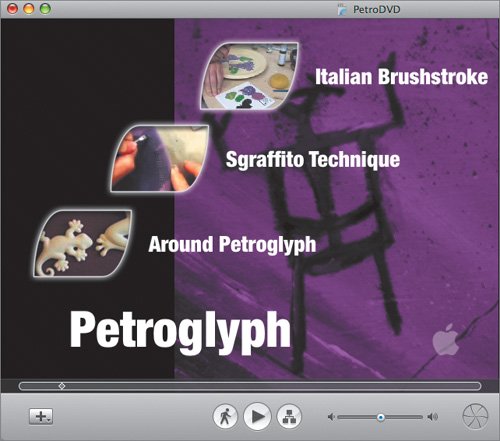
In the 4.0 Themes, there is one Jennifer likes for Petroglyph: Pop Art.
Tip A template for a travel theme or a wedding theme doesn't necessarily have to be used for a travel or wedding project. Any theme might provide a good look for a disc about your child's first years, for instance. Don't be fooled by theme names. When you look at a theme template, you'll see it's just some stock elements and colors. Wedding Bronze One, for instance, shows a curtain rippling and provides space for you to add a photothere's nothing inherently "wedding" about it. If you don't like following the crowd, one nice way to customize your disc is to augment prebuilt themes and use them in original ways, all of which you'll learn in this lesson. | | | 7. | Select the Pop Art theme.
Although each theme is slightly different, all work in the same way, so even if you experiment with only one theme, you can learn the basics of building discs and designing menus.
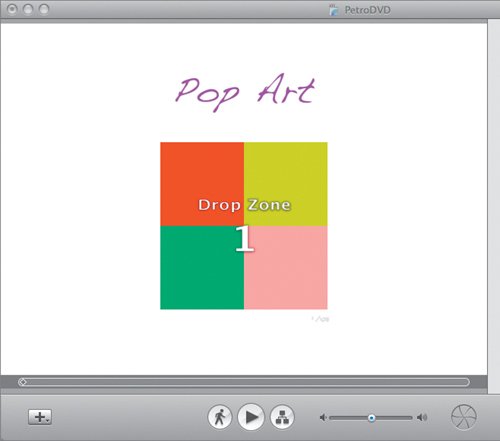 Like most theme templates, this one has a title on topwhich you can change simply by clicking it and typing a different title. (The typeface and size are set, though you'll shortly learn how to modify them.) There's also a space labeled as a drop zone. Drop zones are placeholders that may contain photos or movies.
Not every template provides a space that accommodates both photos and moviessome hold only one or the other.
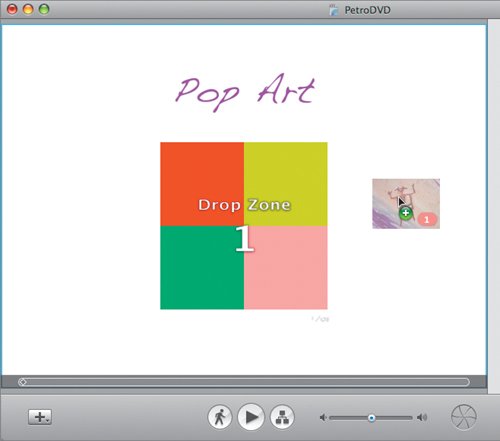
The drop zone concept begs the question: Drop photos from where? From iPhoto, from the desktop, from somewhere else? Of course, the answer is from everywhere. But while you can drag straight out of the Finder, your window onto your Mac's media universe is one button away.
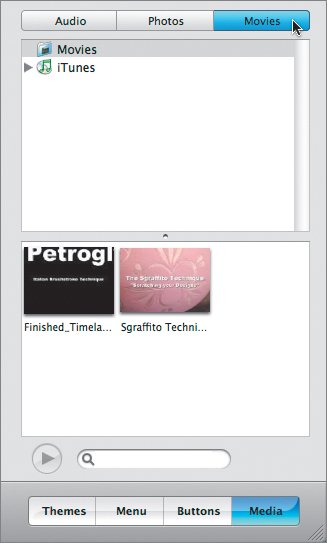
| | | 8. | Click the Media button to display the Media pane; then click the Photos button. Is this looking at all familiar yet?
From the Media pane, you have access to your iTunes and GarageBand songs, your photos from iPhoto, and your movies in the Movies folder.
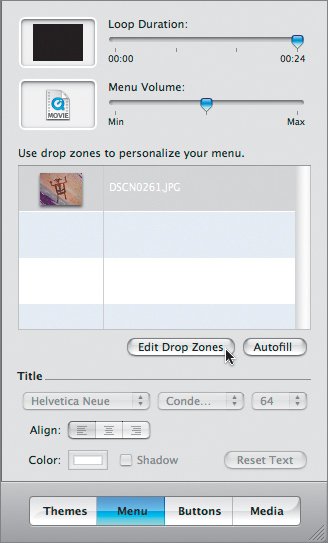
 | 9. | Drag the photo of the petroglyph (DSCN0261) to the center of the template so that your menu looks like Jennifer's.
This photo is from Jennifer's L3.Biz roll 1, which you loaded in Lesson 3.
   | | | 10. | Click the Movies button at the top of the Media pane.
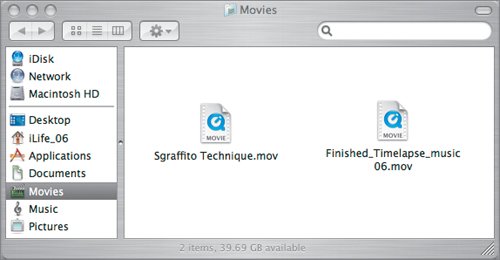
The two QuickTime movies (with the .mov extension) are available hereearlier in this lesson, you dragged them into the Movies folder from the DVD's Lessons folder. (Depending on what you've been doing on your Mac, there could be other movies here as well.)
 Note You might ask what the iTunes Library is doing under Movies. Remember back in Chapter 11, when you made a GarageBand soundtrack for the time-lapse movie? You exported the songand the videointo iTunes. With iTunes' new ability to manage video, you can access those movies from the Movie pane. 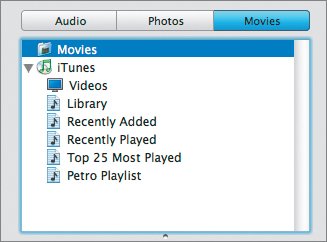 These two short videos in the Movies folder are key elements of the DVD Jennifer wants to create.
Note The image quality of these videos is not comparable to that of finished projects in iMovie. iMovie is always working at the full quality of the video from your camcorderprobably DV video qualityand it's very good. The newest release of iMovie can also work in high-definition (HD) quality. This is comparable to professional material, and while it is less likely you'll be using HD, iMovie will always keep your material at the highest possible resolution. Note These particular QuickTime videos were necessarily compressed to be small enough to fit on the enclosed DVD with all the rest of the content for this book, and consequently lost a fair amount of resolution. Keep in mind that your own projects and DVDs will have better-looking video than these examples. | | | 11. | Drag Finished_Timelapse_music06.mov to the template. Drop it on the template anywhere but on that graphic in the middle of the screenif you put it there, it will replace the photo already placed with the movie you're dragging.
These theme templates often contain some kind of graphical element that can present moving videobut don't mistake these for the places you drop your videos.
 When you drop the movie onto the template in any of the white spaces around the graphic in the middle, a link will be created to the movie from here.
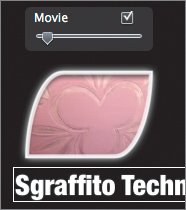
| | | 12. | Drag Sgraffito Technique.mov to the DVD template as well.
 This particular template forces titles to alternating sides of the graphic in the middle. You'll find that different templates have their own idiosyncrasies as far as how they handle title placement, line breaks, and other minor issues. This particular template forces titles to alternating sides of the graphic in the middle. You'll find that different templates have their own idiosyncrasies as far as how they handle title placement, line breaks, and other minor issues.
Now that both movies are set up for the DVD, it's time for a little cosmetic work. Let's fix the titles.
| 13. | Click Finished_Timelapse_music06.mov and change the name to something more descriptive and user friendly, such as Italian Brushstroke.
 One of the minor irritations of this template is that the titles overlap the graphic image a little. This makes the word Brushstroke hard to read. Jennifer could force a line break between the words in that title, but she opts to finish the DVD structure first and then review legibility issues. One of the minor irritations of this template is that the titles overlap the graphic image a little. This makes the word Brushstroke hard to read. Jennifer could force a line break between the words in that title, but she opts to finish the DVD structure first and then review legibility issues.
Note You will learn how to customize these titles later in this lesson. | | | 14. | Finally, before moving on, change the DVD title from its default Pop Art to something appropriate.
The video will be shown in the studio, so its title should be something like the name of the business or perhaps something more specific, like Spring 2006 Videos. Petroglyph is a simple title, so let's use that.
 If the DVD were to contain only this pair of movies, you'd be done at this point. But Jennifer can do much more to make this disc useful and interesting. If the DVD were to contain only this pair of movies, you'd be done at this point. But Jennifer can do much more to make this disc useful and interesting.
|
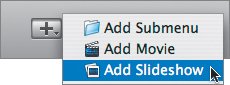
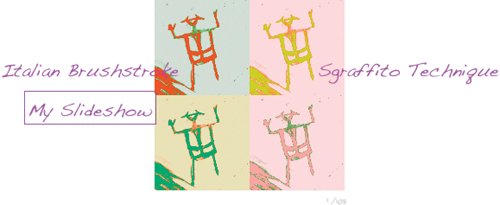
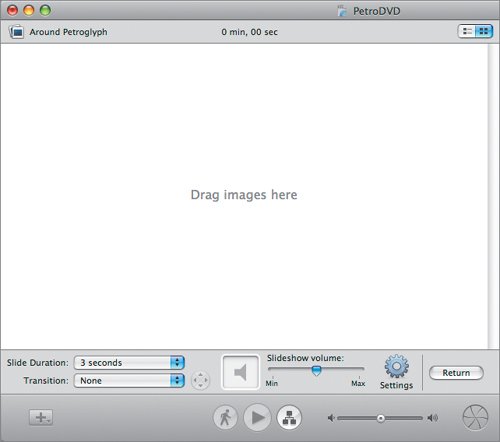
Adding Photos and Slideshows from iPhoto While you're in iDVD, you can access your photos and entire albums in iPhoto. But before you go digging through them, you need to make a place in iDVD where your photos will go. | | 1. | Click the plus (+) button at the bottom of the window and select Add Slideshow from the drop-down menu.
 This adds to your menu a link to a special type of slideshowwhich is different from what you'd get if you simply copied photos to the DVD like they were data files. (It's also different from using iPhoto to convert a slideshow into a QuickTime movie of a slideshowsomething you didn't do in this book but may have discovered at some point.) The slideshow you place on this DVD will produce just as interactive an experience as you get with the Slideshow tool in iPhoto.
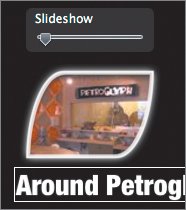
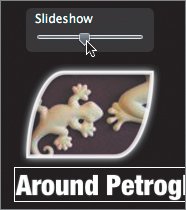
iDVD will add a link with the title My Slideshow (which, of course, you change when you're ready). Jennifer changes hers to Around Petroglyph.
  | | | 2. | Double-click the title of the new slideshow.
This changes the main iDVD window into the slideshow editor. Displayed at the top is the title, along with how long (in minutes and seconds) the slideshow will run, given the number of slides and each slide's duration.
Time to add some slides.
 | | | 3. | Click the Media button; then click Photos. From the menu of folders and albums you've created while working on the projects in this book, select Biz Owner > Cool Pieces.
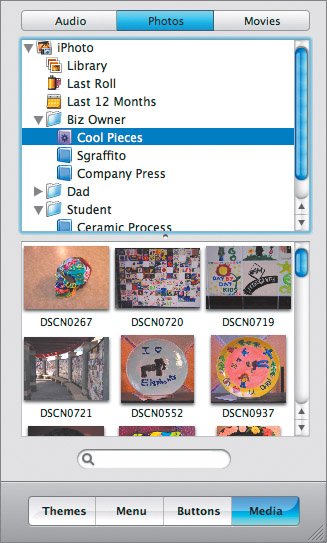 You may recall this album from Lesson 4. Jennifer was going to make two different booksthe first was an idea book, the second a linen-bound hardcover book. But because most customers won't see the book, a slideshow of this material seems like suitable content for the DVDshe can show that in the studio.
You could drag one shot at a time to the large workspace on the right, but it's easier to grab an entire album and drag it there.
 As soon as you drop the album, thumbnails appear in the workspace.
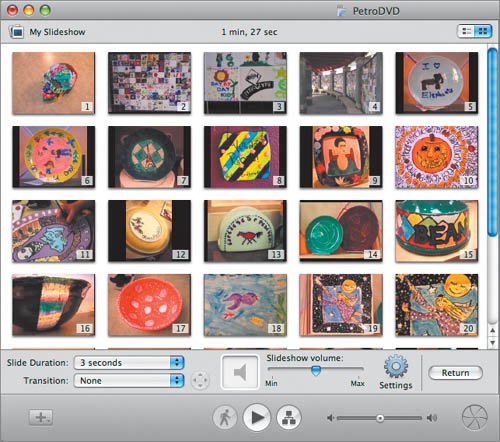 The controls at the bottom of the window let you specify how long each slide appears onscreen and what kind of transition you want between slides. The Settings button gives you additional control options. The controls at the bottom of the window let you specify how long each slide appears onscreen and what kind of transition you want between slides. The Settings button gives you additional control options.
 Tip The "Add image files to DVD-ROM" option lets you include a folder of the slideshow images at their best quality possible. Christopher chooses this option when he wants to distribute photos to the grandparents. They can watch the slideshow first and then, if they want, make prints from iPhoto, using the original files on the DVD. Jennifer has no need for this feature for her DVD, but it's a great option. Because this slideshow will run unassisted and in a public space, Jennifer decides to let the show loop indefinitely and to present each slide for 5 seconds, a little longer than she might ordinarily. She also likes to use dissolves as a transition between shots.
 From this set of tools, you can also add audio to your slideshow. From this set of tools, you can also add audio to your slideshow.
| 4. | From the Audio tab in the Media pane, access your iTunes Library.
| | | 5. | Drag a song or playlist to the Audio button (also called the audio well) beneath the workspace.
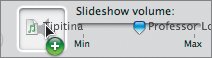 When you drop the music, the audio well changes to reflect the file types (such as MPEG4 or AAC) it holds and to indicate that music will be played with this slideshow.
 If you decide you don't like the audio you've placed in the audio well, drag it from the well to the desktop and watch it vaporize.
|
Changing and Modifying Themes You've now established some content for this disc (two movies and one slideshow) and chosen a background image for the template. But before you leave this part of iDVD, it's a good idea to investigate the other themes and how to customize them. Because every theme manages its template components a little differently, sometimes it's interesting to see the benefits (or problems) of each. You've been working in the Pop Art theme. Without changing any other features of your DVD, select some different themes. 1. | Click the Return button at the bottom of the slideshow editor.
This returns you to the previous workspace. It's not required, but it can help keep you oriented as you navigate iDVD.
| 2. | Click the Themes button at the bottom of the screen.
This should put you in familiar territory.
| | | 3. | Go back to the 6.0 Themes. Change the theme to Brushstroke, and take a look at how the template changes but the menu items remain.
There are more drop zones in this theme, so it could accommodate other photos or movies in the menu.
 | | | 4. | Change the theme to Portfolio from the 5.0 Themes.
This template also has drop zones for many photographs or movies. But in each case, you can still see the links that connect to the time-lapse and sgraffito movies, as well as the Around Petroglyph slideshow. These links transfer regardless of theme.
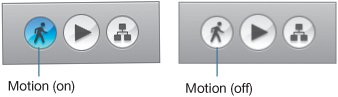
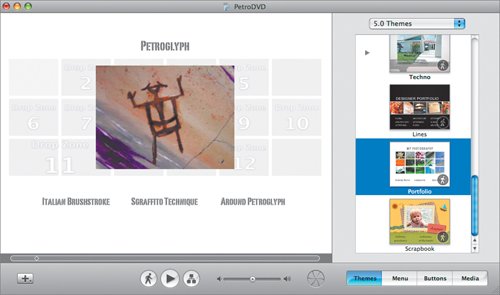 Notice that many of these themes have moving video in them already, some incorporate music, and others include ambient sounds. Templates that feature such built-in activity are designated by a Motion icon on the theme. Notice that many of these themes have moving video in them already, some incorporate music, and others include ambient sounds. Templates that feature such built-in activity are designated by a Motion icon on the theme.
 If the sound (or action) bugs you, you can turn it off by clicking the Motion button at the bottom of the workspace.
 Now the screen is probably calm enough to allow you to explore and experiment.
Note With each revision of iDVD, the themes have become more dynamic and complex, with more drop zones and more kinds of moving elements. These take advantage not only of the greater CPU power of modern Macs, but also of the increasing sophistication of you, the customer. But Macs with less RAM or slightly slower CPUs can be taxed by the newest templates. It is always possible to use 4.0 Themes or other Old Themes that might be more comfortable on your particular hardware configuration. | | | 5. | Switch to 4.0 Themes and change the theme to Montage.
 Up until this point in iDVD, you've alternated between Themes and Media. Now let's look at the other two buttons: Menu and Buttons. Up until this point in iDVD, you've alternated between Themes and Media. Now let's look at the other two buttons: Menu and Buttons.
These panes hold specific tools for customizing the theme templates, allowing you to modify some of the preset attributes. When you're done, your theme will likely have little resemblance to the original Montage it began as.
First of all, get rid of the music.
| | | 6. | Click Menu.
 This pane gives you access to your menu and drop zones, including a button to open the drop zone editor. With all the moving elements in some of the newer themes, the drop zone editor can make managing menu resources easier.
Note The icon in the audio well on this one says Movie. What's it doing in the well? If you want to add the audio track of a movie, you can't just drag it over your theme window. It will drop in both audio and video. But if you drop the movie into the audio well, you'll add only the audio to the menu background. | 7. | Drag the file in the audio well to your desktop.
  It will disappear from its position in this template, and the well will be empty.
 You could add your own tune here, but leave it blank for now.
Let's move on to customizing the menu buttons.
| 8. | Select a button on your menu.
 | | | 9. | Click the Buttons button.
You're going to change some button attributes.
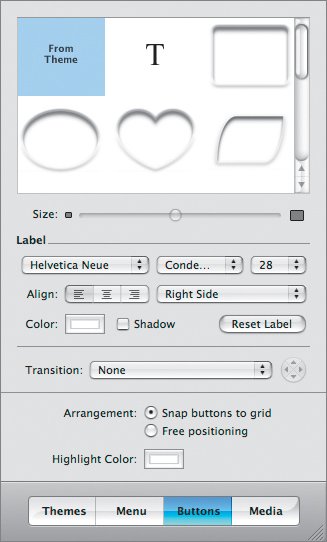 Right now, the button style for this button comes from the template; it's just the text with the title of the button. That's why the Style field From Theme is highlighted in blue.
| | | 10. | Select the oblong shape.
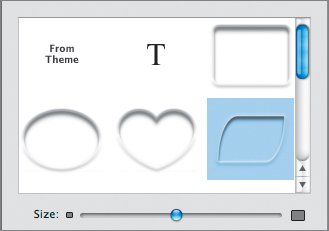 The button becomes a window with a glimpse of the video within.
 Select the rest of your buttons and choose the oblong shape.
Tip You have complete control over the look of each individual button now. You could make each button look different, but for consistency and a more pleasing look, it's a good idea to stick with one button style on a menu. Consider staying with your style on other menus too if you have them. Unfortunately, these buttons are stacked too closely to see fully. It's because they are locked to a grid in the template.
 | | | 11. | Click the "Free positioning" option in the Buttons pane.
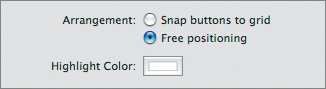 This lets you drag the buttons around onscreen to the locations you choose.
 Most videos start with a fade-up from black, so in many cases these buttons will look black. Let's adjust those now. Most videos start with a fade-up from black, so in many cases these buttons will look black. Let's adjust those now.
| 12. | Click the Around Petroglyph button.
A slider appears over the clip, allowing you to choose the image from the slideshow that shows up in the button.
| | | 13. | Move the slider around and find a different image.
  For buttons linked to video, you can choose whether you want the button to play the video or just show a single nonmoving frame.
| 14. | To play the video, select the checkbox above the Movie slider.
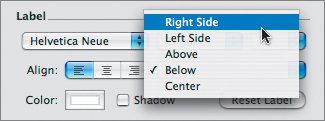
 Tip Moving video inside a button is a pretty neat feature, but if you have lots of little movies going on at the same time on your menu, it's actually distracting and somewhat irritating. It may be an impressive demo, but consider using moving video in buttons sparingly. | | | 15. | Realign the text titles for each button in the Buttons pane, with the text on the right side of the button.
 Now that you've got the buttons looking the way you want, you can position them exactly as you'd like.
| 16. | Reposition the buttons creatively.
 Note Other text attributes you can change include the size, the color, and, obviously, the font. When you work with text onscreen, it becomes increasingly important to recognize the "safe" area of the screen. A computer monitor displays the entire frame of video from a videotape or DVD. But when you put that same material on a regular TV set, the edges are chopped off. Exactly how much depends on the set, but a video frame has a well-defined safe zone. Before you burn a DVD, you should always check to see that your most important material, particularly text, is within the safe area.
| | | 17. | Choose View > Show TV Safe Area to turn on that option.
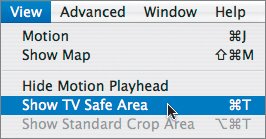 Some of the screen will be dimmed; a red border separates the safe region from the risky.
 | 18. | Adjust your DVD menu so that all the text is inside the safe area.
If you want to save your customized template to use again, choose File > Save Theme as Favorite.
| | | 19. | Click Themes. Find the Pop Art template again and click it.
The screen will return to its familiar facade.
These are some of the many ways you can customize menu templates. Any template can be saved or discarded at will.
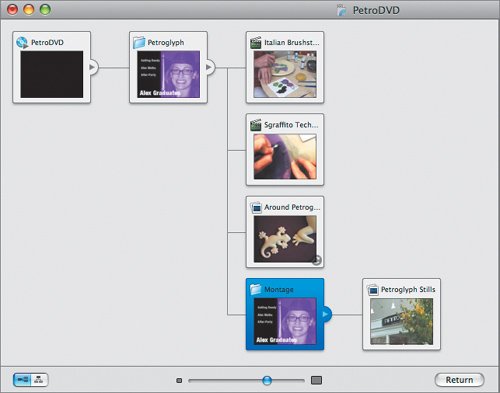
What you've seen is that regardless of what theme you select, the button names and videos remain unaltered. The themes are just cosmetic overlays of the same content and structure. The structure of the DVDthat is, the way it is organized hierarchically and the way the audience navigates its menus to find the videos and slideshowsremains the same across all of these themes.
To view the DVD's structure, which you may want to see if you're confused about how the user access and experience are built, for instance, click the Map button.
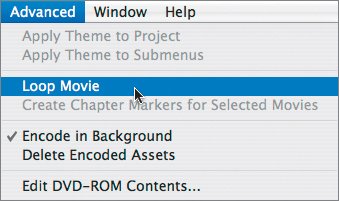
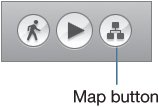 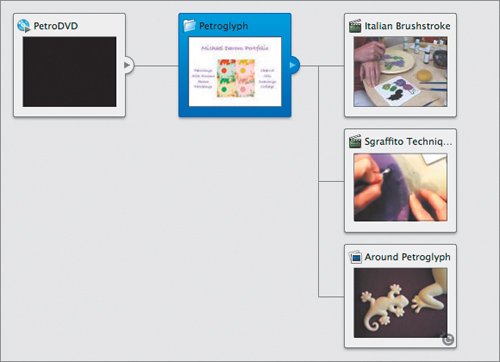 Now it should be clearer how your DVD is structured. The Map view is a good way to navigate your DVD while you're building it. It also gives you access to a unique option: You can set up an opening video (or slideshow) that will play as soon as the DVD is inserted into a playerbefore the opening menu appears. The first squarecalled an autoplay wellis built into the structure of the disc, and is presented to the left and connected to the main menuin this case, the Petroglyph Pop Art menu. The autoplay well is labeled PetroDVD. You can drag video or slideshows onto it to use as the opening sequence. If you want it to cycle endlessly until someone selects Play (as in a kiosk situation), choose Advanced > Loop Movie. Now it should be clearer how your DVD is structured. The Map view is a good way to navigate your DVD while you're building it. It also gives you access to a unique option: You can set up an opening video (or slideshow) that will play as soon as the DVD is inserted into a playerbefore the opening menu appears. The first squarecalled an autoplay wellis built into the structure of the disc, and is presented to the left and connected to the main menuin this case, the Petroglyph Pop Art menu. The autoplay well is labeled PetroDVD. You can drag video or slideshows onto it to use as the opening sequence. If you want it to cycle endlessly until someone selects Play (as in a kiosk situation), choose Advanced > Loop Movie.
 Jennifer will leave the autoplay feature alone for now, but it's an interesting option that she may use as she increases her library of videos from her studio.
|
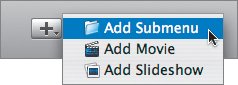
Adding Submenus to Menus While Jennifer's DVD is probably too simple to warrant complex organization, you have the option of adding more levels of menus to your DVD. For instance, if you have more videos or slideshows than will fit on the first menu page (for many themes, the limit is six items), you'll need to create another menua submenu. 1. | Under Themes, return to the Montage theme.
Notice that some customizations you made earlier to the theme are lost as you circulate among different themes. Other attributes remain fixed.
| | | 2. | Click the plus button at the bottom of the screen and select Add Submenu from the drop-down menu.
 This adds a link to a submenu attached to your top menu.
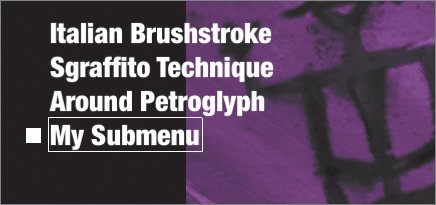 The default name for the link is My Submenu, but you can change this to whatever describes the new area.
Tip If you show the buttons as images, the folder button onscreen will show a folder icon. You won't see a video or slide images when you click the folder and slide the slider. Still, the button is a well, and you can drag an image from the photos in the Media Browser to this well to give it an image. 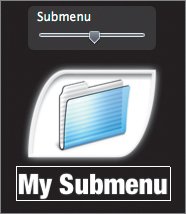  | | | 3. | Double-click the folder.
This reveals a new place (a new menu) to add your videos and slides. There will always be an arrow on this page, pointing left, which allows you to return to the previous menu. (On some templates, it's harder to see than on others.)
| 4. | If you want to, experiment by adding videos and slides, following the same steps you did earlier in this lesson for customizing your first menu.
A submenu can have any theme, and doesn't need to match the theme of the top one. As you expand your DVD's structure, the Map view of the disc's contents becomes increasingly important. In the Map view, you can see which menus are submenus, what is linked to what, and any menu's theme.
 |
|