Windows Controls
 | |||||||||||
| Chapter 7 - Windows Applications | |
| bySimon Robinsonet al. | |
| Wrox Press 2002 | |
Windows Forms applications are largely composed of the many different available controls. These controls can be as simple as the Button and TextBox controls we have used so far, or they can be elaborate and complex like Charting and TreeView controls. The .NET Framework ships with many controls ready to incorporate into Windows Forms applications today, and there are already hundreds of third-party controls ready to be used in custom .NET application development. With so many, it is impossible to cover how to use each in the space of this chapter. Therefore, we will examine how all controls operate and interact at a higher level.
Controls in Windows Forms include those a developer would expect to find in a class library designed for graphical user interfaces including:
-
Labels
-
Buttons
-
Checkboxes
-
Menus
-
Radio buttons
-
Combo boxes
-
Listboxes
-
Textboxes
-
Tabcontrols
-
Toolbars
-
Tree views
As we have seen, Visual Studio .NET can add these controls to a Form for you. We have already done this several times in the examples in this chapter. The steps that occur when a control is added to a Form are the following:
-
A variable of the type of control required is declared as a private object in the Form class
-
In the InitializeComponent() method the control object is created and assigned to the private variable
-
The properties of the control, such as the Location , Size , and the Color are all set within InitializeComponent() as well
-
The control is added to the collection of controls on the form
-
Finally, event handlers are implemented as the developer adds them through the IDE
Note that this is exactly the same process we went through when we manually added a button to our first Windows Forms application without Visual Studio .NET. The IDE simply makes this process easier - it does not perform any magic.
Most controls inherit from System.Windows.Forms.Control . This base class contains the basic methods and properties used by any control that provides a user interface to the user. This control manages the basic functionality required to capture keyboard and mouse input, as well defining its size and location on its parent.
Dynamic Controls
Since all displayable controls inherit from the Control class, we can take advantage of polymorphism when working with collections of controls. All controls contain a Controls property that acts as a collection of the contained controls. This allows you to write code that loops through the Controls collection and manipulates or queries each individual control using the base Control class's properties and methods.
This Controls property is also dynamic, and can be used to customize the appearance of a user-interface at run time by adding and removing controls to or from a Form or Control . Like all collections, the Controls collection exposes methods that allow for the addition and removal of objects, which cause visible controls to be added to and removed from the user-interface. This can be a very powerful technique for designing customizable user interfaces and elegant designs that display only the required information. In fact, if you examine the InitializeComponent() method created by Visual Studio .NET you will see this is exactly how the code itself adds controls to Forms initially, and it is also how we added our Button control to our first Windows Forms application at the beginning of the chapter. Let's create an application that takes advantage of this ability to customize the user interface at run time.
A common application requires different screens for each of the various objects that can be manipulated. One example is an inventory management system that must manage computers, software, and furniture. Each of these objects has unique properties; however each may also share some common characteristics. Depending on the interface design, it might be very useful to customize the user interface based on the type of object currently being manipulated in the system and display only those fields that are relevant to the current item being worked with. This dynamic customization of the user interface can be accomplished by manipulating the Controls property at runtime.
Open Visual Studio .NET and create a new C# Windows Application titled DynamicUI . This project can be found in the online code download in the DynamicUI directory.
Add three Button controls somewhere on the left of the Form . The exact placement is not important. Give the buttons the Text properties of Computer , Software , and Furniture . The Form should look approximately like the following screenshot:
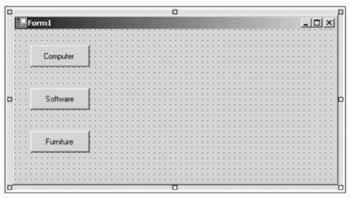
When a user selects the appropriate button the user interface will dynamically customize itself for the input of that type of object. An enterprise application would likely consume these settings from a back-end data source or configuration file; however, for brevity we will simply embed the logic of the display directly within the application. This is not a best practice, and if this example were expanded the first step should be to create an external method of representing the user interface.
There are a number of properties we will be setting for every control we add to the Form . These include the Size and Location properties, as all visible controls must be located somewhere. We will often also set the Text and Name properties as well. When adding a large number of controls to a Form this process can quickly lead to redundant and repetitive code, so to avoid this we will create a utility method to set these properties at once. We can then call this method for every control we add to the Form . Add the following private method to the Form1 class.
private void AddControl(Control aControl, Point Location, Size Size, String strText, int TabIndex, string strName) { aControl.Location = Location; aControl.Size = Size; aControl.Text = strText; aControl.TabIndex = TabIndex; aControl.Name = strName; this.Controls.Add(aControl); }
This method accepts a Control object and sets various common properties on it. Note that when we invoke this method we will pass in a derived class, like a Label or TextBox . This is possible through polymorphism, because the base Control class defines the properties accessed by this method.
We are now ready to add event handlers for our Buttons . Add a Click event handler for each of the three buttons and add the following code. The names of the event handlers may be different depending on the names used for the Buttons themselves :
private void btnComp_Click(object sender, System.EventArgs e) { Controls.Clear(); InitializeComponent(); AddControl(new Label(),new Point(125,24),new Size(45,20),"ID:",0,""); AddControl(new TextBox(),new Point(174,21),new Size(125, 20), "",0,"txtID"); AddControl(new Label(),new Point(125,54),new Size(45,20),"OS:",0,""); AddControl(new TextBox(),new Point(174,50),new Size(125,20), "",1,"txtOS"); AddControl(new Label(),new Point(125,84),new Size(45,20), "Speed:",0,""); AddControl(new TextBox(),new Point(174,78),new Size(125,20), "",2,"txtSpeed"); } private void btnSoft_Click(object sender, System.EventArgs e) { Controls.Clear(); InitializeComponent(); AddControl(new Label(),new Point(125,24),new Size(45,20), "ID:",0,""); AddControl(new TextBox(),new Point(174,21),new Size(125, 20), "",0,"txtID"); AddControl(new Label(),new Point(125,54),new Size(45,20), "Vendor:",0,""); AddControl(new TextBox(),new Point(174,50),new Size(125, 20), "",1,"txtVendor"); AddControl(new Label(),new Point(125,84),new Size(45,20), "Name:",0,""); AddControl(new TextBox(),new Point(174,78),new Size(125, 20), "",2,"txtName"); } private void btnFurn_Click(object sender, System.EventArgs e) { Controls.Clear(); InitializeComponent(); AddControl(new Label(),new Point(125,24),new Size(45,20),"ID:",0,""); AddControl(new TextBox(),new Point(174,21),new Size(125, 20), "",0,"txtID"); AddControl(new Label(),new Point(125,54),new Size(45,20), "Color:",0,""); AddControl(new TextBox(),new Point(174,50),new Size(125, 20), "",1,"txtColor"); AddControl(new Label(),new Point(125,84),new Size(45,20), "Type:",0,""); ComboBox aCombo = new ComboBox(); aCombo.Items.AddRange(new Object[] {"Desk","Chair","Whiteboard"}); AddControl(aCombo,new Point(174,78),new Size(125, 20),"",2,""); } Run the application and select the different options available through the buttons. You will see the user interface customize itself based on the type of input expected from the user. The different data points possible for each type of object are displayed dynamically.
The code is relatively straightforward. Each method first clears the Controls collection before calling InitializeComponen t () . Recall that Visual Studio .NET always generates this method; it is responsible for creating the user interface as designed at design time. Therefore it can be used as a quick and easy way to get back to the initial design state of the Form . In a more fully-featured application separate menu and input Forms would be used to customize the user interface, so clearing all of the controls on the input Form would be an acceptable option, since all of the controls would be generated dynamically every time anyway.
Once the code has cleared the Form and added the three b uttons back, it adds the dynamic controls to the Form using the custom AddControl() method extensively. Note that for the majority of calls we simply create a new TextBox or Label object when calling the AddControl() method, as there is no need to retain a reference to the control object itself unless we need to set additional properties. However, in the btnFurn_Click() event handler we create a ComboBox control and add some string values to it before adding it to the Form. Therefore the control must be created externally to the method call and the reference used to add the values to the list. We will also use this technique next when we add event handlers to the dynamic controls.
Dynamic Event Handlers
The rich event model exposed by Windows Forms can still be utilized when implementing a dynamic user interface generated at runtime. All of the many events are still available to be hooked into, although these obviously cannot be set at design time in the Properties window. However, recall that our first example attached an event handler to a Button control using only code, proving it is possible to hook into events of dynamically generated controls.
To demonstrate how to add some event-processing code to our simple data entry application, let's add some validation logic to some of the TextBoxes . Specifically we are going to allow only numerical characters to be entered into the ID fields on the Form , which all of the object types contain.
First we need to add the event handler method itself. This is a very simply KeyPress event handler. Add the following method to the Form1 class.
private void ID_Validate(object sender, System.Windows.Forms.KeyPressEventArgs e) { //Check to make sure input is Numeric or Backspace Key if (!Char.IsNumber(e.KeyChar) && e.KeyChar != (char)8) e.Handled = true; }
This event handler simply checks to see if the key that has been pressed is numeric or is the BackSpace key. If it is not then the event tells Windows that the application has processed the event, and Windows does not need to continue processing. This has the result of stopping the character from ever being entered on the TextBox control, thus filtering out any non-numeric data. Allowing users to use the BackSpace key is always a good idea, even if you are filtering out data or performing validation at the keystroke level - after all, any user can make a mistake.
Now we need to modify the three button Click event handlers to set this event handler. In order to do this the ID TextBox control must be created separately from the AddControl() method invocation, because the event handler must be attached to the KeyPress event. Therefore we will create a new TextBox object, set the event handler to the ID_Validate() method, and finally pass this object into the AddControl() method. The first Click event method is below with the changes highlighted.
private void btnComp_Click(object sender, System.EventArgs e) { TextBox aTextBox; Controls.Clear(); InitializeComponent(); AddControl(new Label(),new Point(125,24),new Size(45,20),"ID:",0,""); aTextBox = new TextBox(); aTextBox.KeyPress += new KeyPressEventHandler(ID_Validate); AddControl(aTextBox,new Point(174,21),new Size(125, 20),"",0,"txtID"); AddControl(new Label(),new Point(125,54),new Size(45,20),"OS:",0,""); AddControl(new TextBox(),new Point(174,50),new Size(125, 20),"",1,"txtOS"); AddControl(new Label(),new Point(125,84),new Size(45,20),"Speed:",0,""); AddControl(new TextBox(),new Point(174,78),new Size(125, 20),"",2,"txtSpeed"); } The changes are identical in the other two event handlers, so you should be able to modify these methods on your own to reproduce the numeric validation logic in the other two methods. Again, the complete code is available in the online code download.
Run the application again, and now you should be unable to enter non-numerical characters into the ID TextBox control. This demonstrates how to dynamically generate and modify controls on a Form , as well as attach and respond to events within these dynamic controls.
EAN: 2147483647
Pages: 244