| When you first use rigid bind, the resulting rigid skin often doesn't deform exactly the way you'd like (Figure 11.10). If you need to make changes to the positioning of the skeleton, you can detach the skin entirely, modify the joints, and then re-apply the rigid bind. If you don't detach the skin, any changes you make to the joints after binding will affect it, which isn't usually the desired effect (Figure 11.11). Figure 11.10. This elbow joint is incorrectly positioned, and it's also deforming the skin too sharply. 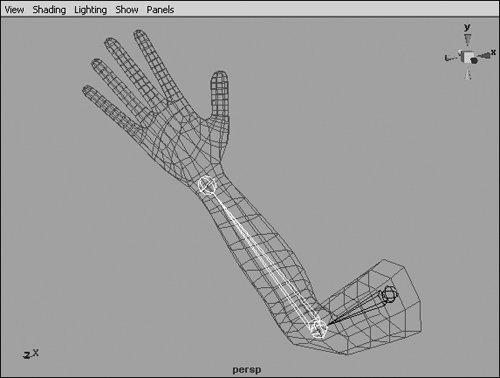
Figure 11.11. The elbow joint in the top arm is too far to the right. However, attempting to move this joint to the left will have undesirable results on the skin. You can avoid this by detaching the skin first. 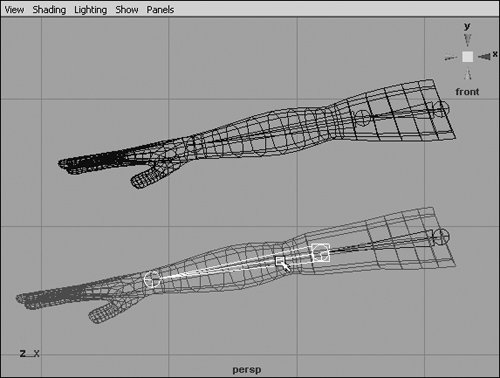
Alternately, you can detach the skeleton while still preserving the skin groups that determine which points are assigned to which bones. This allows you to reposition the skeleton and then reattach it, without affecting the way its points are bound to it. Once you have a skin that's closer to what you want, you can fine-tune it by adjusting which joints affect which points, and to what extent. The degree to which a joint affects a point is referred to as its weight, and can be any value up to 1.0. You can also create flexors to gain more precise control of the way the surface bends when specific joints are rotated. One important technique when modifying rigid skins is setting the skeleton to the bind pose. This means that if you've moved or rotated any of the joints, they'll be put back where they were when you bound the skin to the skeleton. It's a good idea to do this before adding a flexor or detaching a skin, or you may get undesirable results (Figure 11.12). Figure 11.12. Detaching a skin from a repositioned skeleton will result in the skin returning to its original position, while the skeleton remains in place. 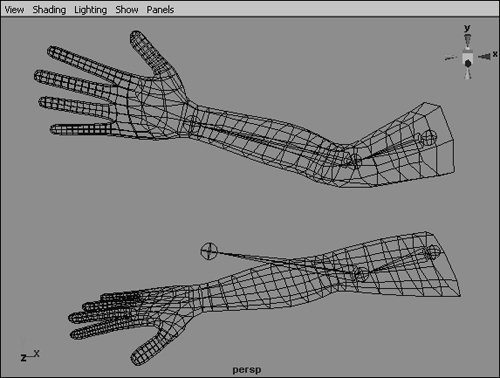
To set a skeleton to its bind pose: 1. | Using a skeleton with a rigid bound skin, move one or more of the joints. (You can create a skin by following the steps described in "To bind skin using rigid bind," earlier in this chapter.)
| 2. | Select one of the joints.
| 3. | From the Skin menu, select Go to Bind Pose.
All of the skeleton's joints are reset to the position and rotation they were in when its skin was bound.
|
To detach a skin: 1. | Select the skin geometry that you want to detach from its skeleton (Figure 11.13). (You can create a skin by following the steps described in "To bind skin using rigid bind," earlier in this chapter.)
Figure 11.13. By detaching this geometry, we can reposition the misplaced elbow joint. 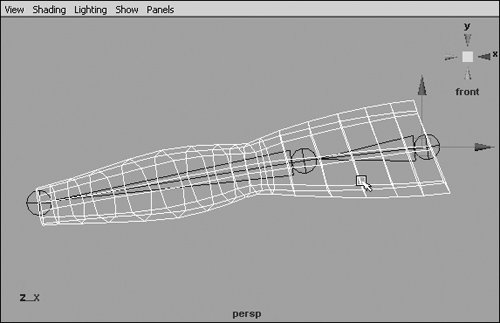
| 2. | From the Skin menu, choose Detach Skin (Figure 11.14)
Figure 11.14. Choose Detach Skin to remove the influence of the bones from the selected surface. 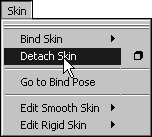
The geometry becomes detached from the skeleton. You can re-attach the geometry in the same that way you originally bound it.
| 3. | Select a joint, and move it.
The joint moves, but the surface remains in place (Figure 11.15).
Figure 11.15. You can now move the elbow joint without affecting the surface. 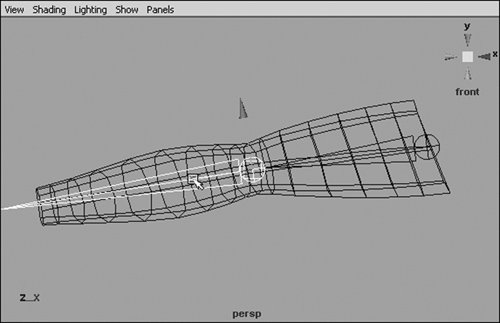
|
To detach a skeleton and preserve skin groups: 1. | Select the skeleton that you want to detach from its skin. (You can create a skin by following the steps described in "To bind skin using rigid bind," earlier in this chapter.)
| 2. | From the Skin > Edit Rigid Skin > Preserve Skin Groups submenu, select Detach Skeleton (Figure 11.16).
Figure 11.16. You can use this menu to temporarily detach a skeleton. Its point assignment and weighting will be maintained when you reattach it. 
The skeleton becomes detached from the skin, but the skin groups are preserved.
|
To reattach a skeleton to its skin: 1. | Follow the steps in "To detach a skeleton and preserve skin groups," above, and make any desired modifications to the skeleton or skin.
| 2. | Select the detached skeleton.
| 3. | From the Skin > Edit Rigid Skin > Preserve Skin Groups submenu, select Reattach Skeleton (Figure 11.17).
Figure 11.17. You can only reattach a skeleton if you previously used this menu to detach the skeleton. Skeletons detached using Detach Skin must be re-bound. 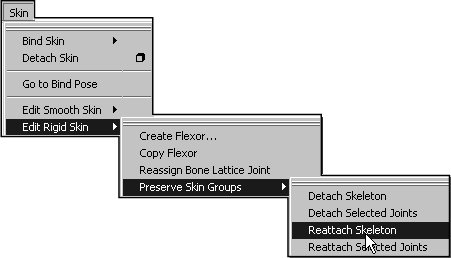
The skeleton is reattached to the skin, using the same skin groups that it had before.
|
To assign rigid-bound points to a different joint: 1. | Create a rigid skin by following the steps described in "To bind skin using rigid bind," earlier in this chapter.
| 2. | Choose Deform > Edit Membership Tool.
The cursor changes.
| 3. | Click one of the joints.
The points that are members of that joint are selected.
| 4. | Click  -select the points you'd like to assign to the joint. You can click and drag a marquee to select multiple points at once (Figure 11.18). -select the points you'd like to assign to the joint. You can click and drag a marquee to select multiple points at once (Figure 11.18).
Figure 11.18. Be sure to hold down as you click or click and drag to select points. 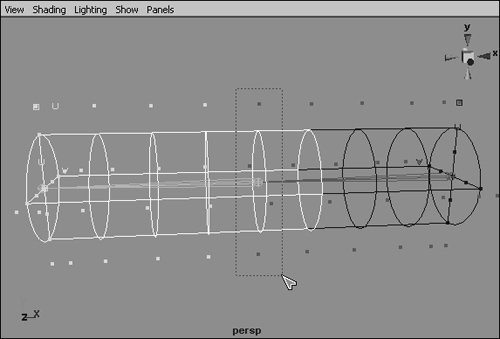
The points are added to the skin group of the selected joint (Figure 11.19).
Figure 11.19. The points you've added are highlighted like the other points in the selected joint's skin group. 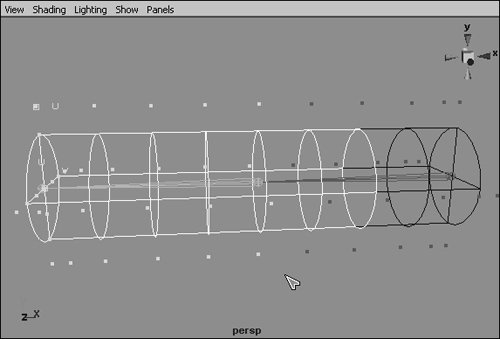
| 5. | Select and rotate the joint.
The points that you added now rotate with the joint (Figure 11.20).
Figure 11.20. Because the middle row of points has been added to the middle joint, it rotates with that joint. 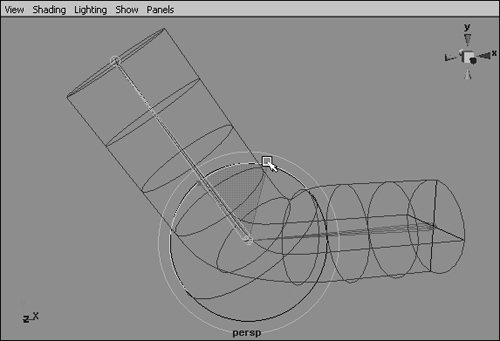
|
 Tips Tips
While using the Edit Membership tool, you can switch to adding points to a different bone by clicking on that bone. If you  -select points while using the Edit Membership tool, they're removed from the joint's skin group. However, if they aren't assigned to another joint, the points are left behind when the character moves. -select points while using the Edit Membership tool, they're removed from the joint's skin group. However, if they aren't assigned to another joint, the points are left behind when the character moves. The Edit Membership tool can be used for any deformer, such as a lattice or a blend shape.
To edit rigid skin weights: 1. | Create a rigid skin by following the steps described in "To bind skin using rigid bind," earlier in this chapter.
| 2. | In component mode, select the points whose weights you'd like to edit (Figure 11.21). You can switch to component mode by pressing  . .
Figure 11.21. It's difficult to determine which points are which in the Component Editor, so you should select a group of points that you want to change to be the same value. 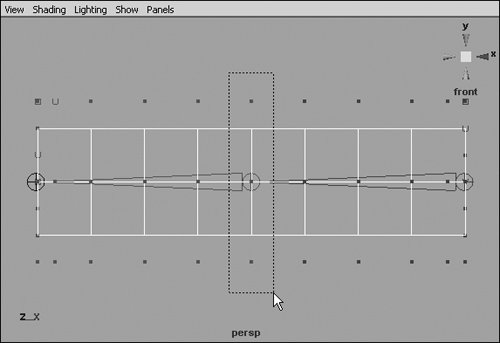
| 3. | Choose Window> General Editors > Component Editor.
| 4. | In the Component Editor, click the Rigid Skins tab.
| 5. | Click the top numeric field, and drag down to highlight all the weights (Figure 11.22).
Figure 11.22. The Component Editor displays the bone weights of the selected points. 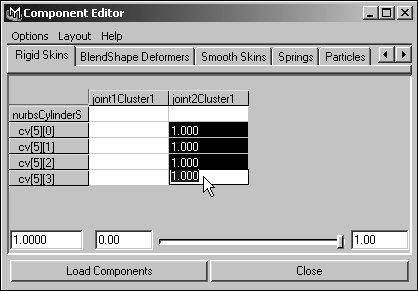
| 6. | Enter the new value for the weights.
All the weights for the selected points take on the new value. Rotate the joint to see what effect this has. For example, if you enter 0.5, the points now rotate half the distance of the joint (Figure 11.23).
Figure 11.23. By setting the points around the joint to a weight of 0.5, you can create a smoother bend. 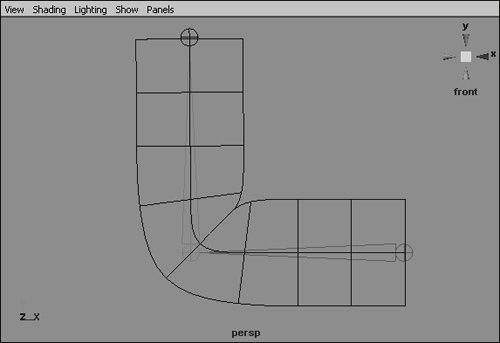
|
To create a flexor: 1. | Create a rigid skin by following the steps described in "To bind skin using rigid bind," earlier in this chapter.
| 2. | Select the middle joint (Figure 11.24).
Figure 11.24. The joint to which you plan on adding a flexor should be in its bind pose. If not, choose Go to Bind Pose from the Skin menu after selecting it. 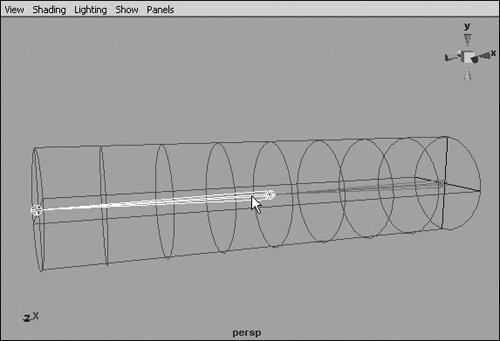
| 3. | Choose Skin > Edit Rigid Skin > Create Flexor.
The Create Flexor dialog box appears (Figure 11.25).
Figure 11.25. The default settings in the Create Flexor dialog box work well for most joints. 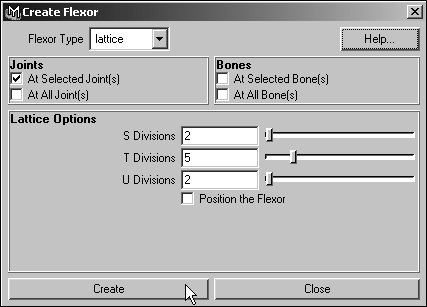
| 4. | Use this dialog box to change the flexor's type and adjust its settings; the defaults are fine for most circumstances.
Click Create to finalize the flexor. A lattice is created around the joint (Figure 11.26).(For more information on lattices, see Chapter 13, "Deformers.")
Figure 11.26. A lattice is a grid that deforms when its joint moves and influences the joint's skin group. 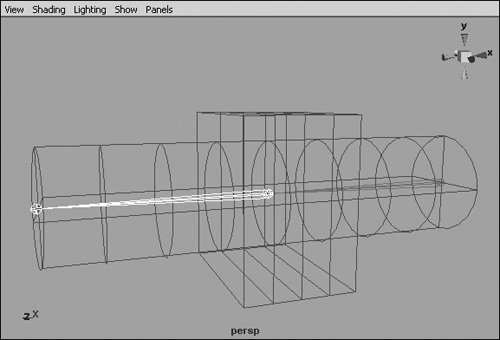
| 5. | Rotate the joint about 90 degrees.
When the joint is rotated, the flexor reshapes the surface to create a smooth bend (Figure 11.27).
Figure 11.27. A lattice creates a smooth, controllable deformation at a joint. 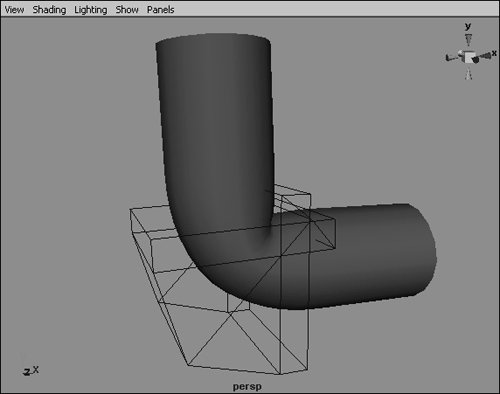
|
To change a flexor's attributes: 1. | Follow the steps in the previous task to create a flexor.
| 2. | Select the lattice that appears when the flexor is created.
| 3. | In the Channel Box under the Shapes heading, click Creasing.
| 4. | With the middle mouse button, click and drag back and forth in the view to change the value in the Creasing field, which in turn affects the inner part of the bend (Figure 11.28).
Figure 11.28. Adjusting a lattice's Creasing attribute makes the surface on the inside of the bend more or less creased. 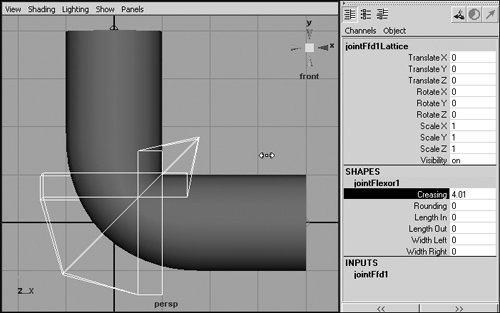
| 5. | In the Channel Box under the Shapes heading, click Rounding.
| 6. | With the middle mouse button, click and drag back and forth in the view to change the value for Rounding, which affects the outer part of the bend (Figure 11.29).
Figure 11.29. Adjusting a lattice's Rounding attribute makes the surface on the outside of the bend more or less rounded. 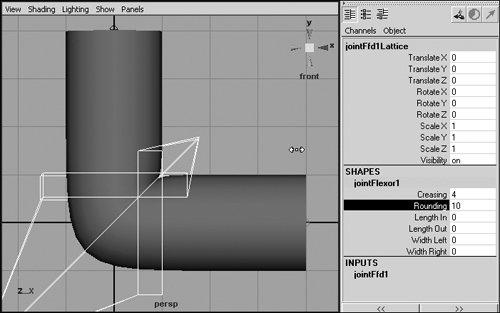
|
Tip
|