Using Rigid Bind


Using rigid bind is like parenting the component points of a surface to different joints rather than parenting the entire surface to a single joint. Unlike when you parent objects to joints, Maya automatically calculates which points should be assigned to which bones. Once bound, the surface is referred to as a rigid skin, and each set of points that has been assigned to a specific bone is called a skin group.

To bind skin using rigid bind:

1.

Select the box next to Cylinder in the Create > NURBS Primitives menu.

The NURBS Cylinder Options window is displayed.

2.

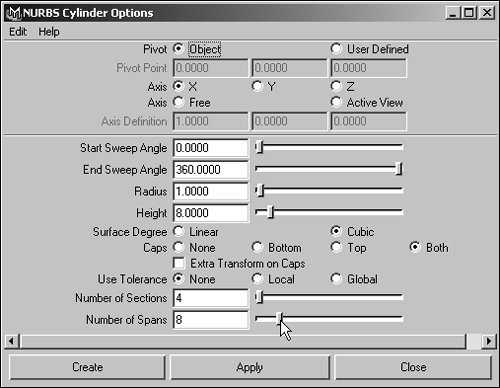
In the NURBS Cylinder Options window, change the Axis value to X and the Height and Number of Spans values to 8 (Figure 11.6).

Figure 11.6. A cylinder of eight spans has enough CVs to represent a simple arm.


Click the Create button to finalize the cylinder, which will represent a simple arm in this task.

3.

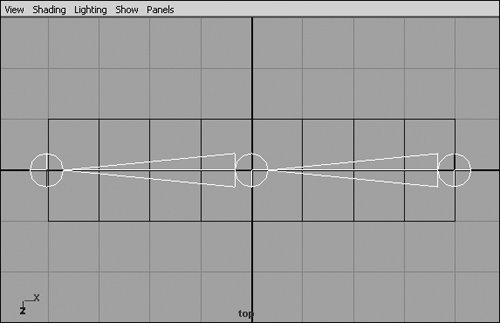
Choose Skeleton > Joint Tool, and create three joints to fit the arm (Figure 11.7).

Figure 11.7. The placement of the joints determines where the cylinder will bend.


4.

Select one of the joints, and then -select the surface.

5.

From the Skin > Bind Skin menu, select the box next to Rigid Bind.

The Rigid Bind Skin Options dialog box opens.

6.

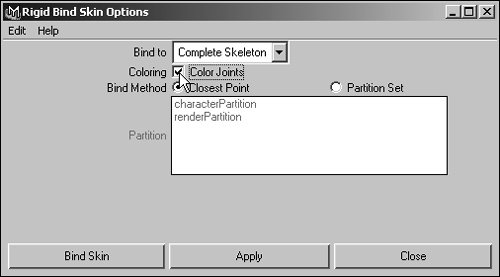
Select the Color Joints check box (Figure 11.8).

Figure 11.8. The Color Joints option can be useful for determining the joint to which specific points are assigned by the rigid bind.


With this option selected, points are color-coded to match the joints they're assigned to, once the skin is bound.

7.

Click the Bind Skin button.

8.

Select the middle joint, and rotate it.

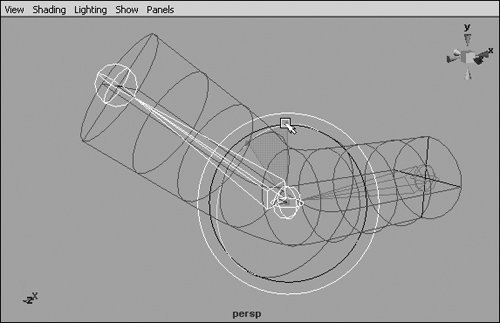
Half of the cylinder moves with the bone (Figure 11.9).

Figure 11.9. Half of the cylinder moves with the second bone when you rotate the middle joint.


Tips

  • Any kind of surface can be bound to a skeleton. You can follow the steps in this task to bind polygons or subdivs as well as NURBS.

  • You can bind a whole character with multiple surfaces at once. To do this, select the root joint of the skeleton and all of the surfaces involved, and then bind the skin.

  • By default, rigid bind uses the entire skeleton. If you'd like to use a specific portion of the skeleton, select the root joint of that portion and choose Selected Joints from the Bind To drop-down in the Rigid Bind Options dialog box.


Maya 7 for Windows and Macintosh(c) Visual Quickstart Guide
Maya 7 for Windows & Macintosh
ISBN: 0321348990
EAN: 2147483647
Year: 2006
Pages: 185

flylib.com © 2008-2017.
If you may any questions please contact us: flylib@qtcs.net